Chapter 6: User Interface | Additional Work Item Information |
Attachments
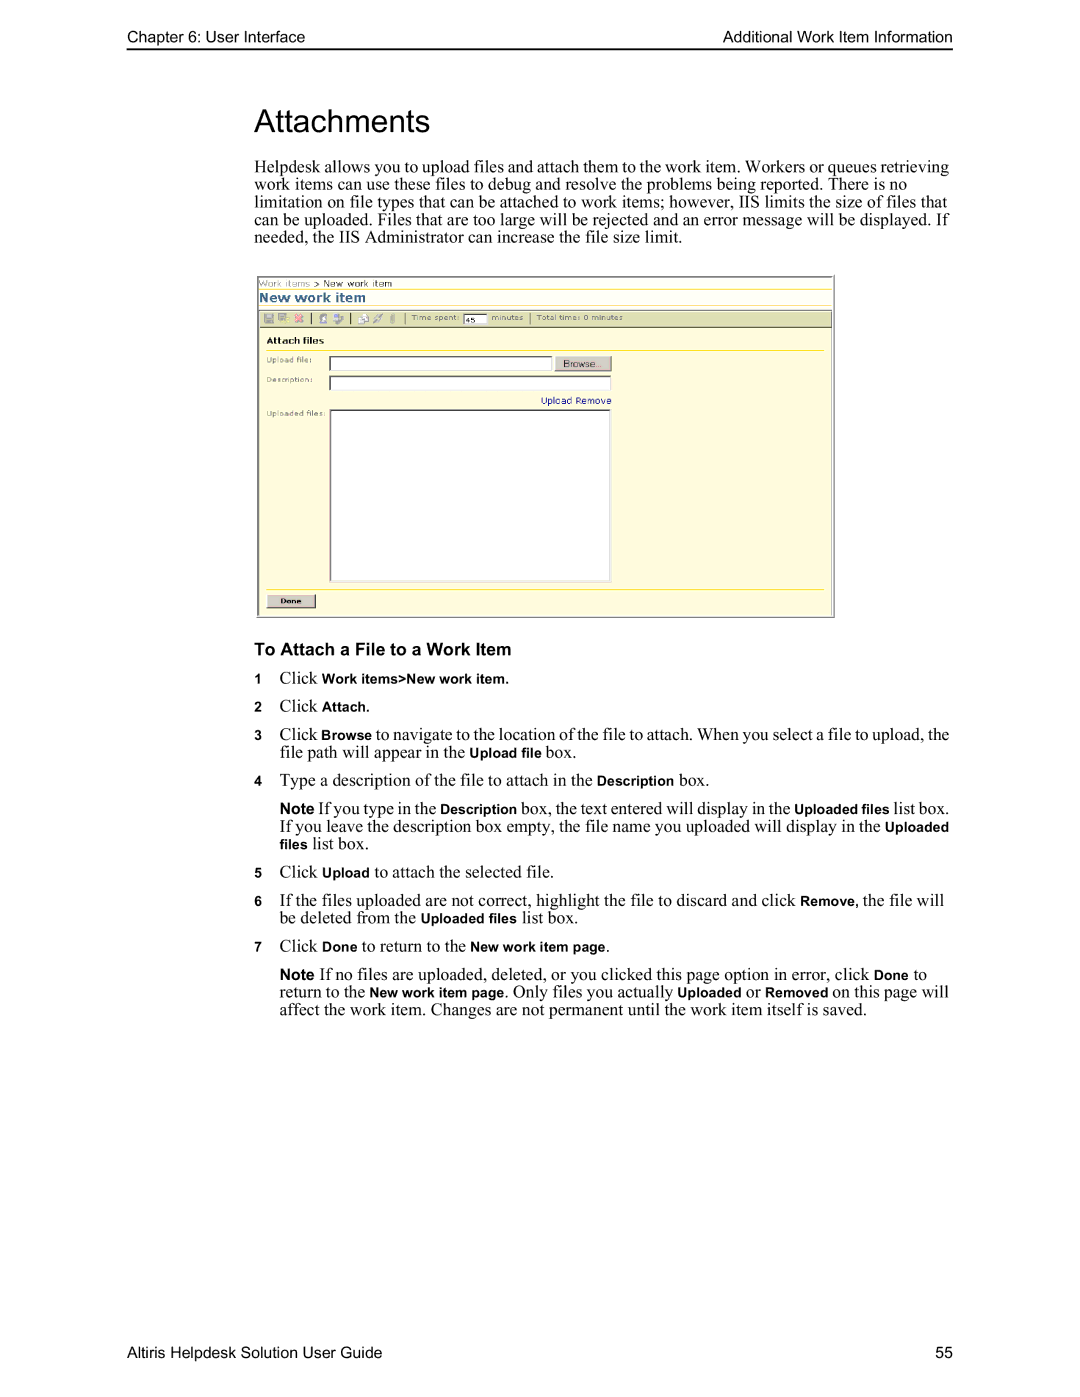
Helpdesk allows you to upload files and attach them to the work item. Workers or queues retrieving work items can use these files to debug and resolve the problems being reported. There is no limitation on file types that can be attached to work items; however, IIS limits the size of files that can be uploaded. Files that are too large will be rejected and an error message will be displayed. If needed, the IIS Administrator can increase the file size limit.
To Attach a File to a Work Item
1Click Work items>New work item.
2 Click Attach.
3Click Browse to navigate to the location of the file to attach. When you select a file to upload, the file path will appear in the Upload file box.
4Type a description of the file to attach in the Description box.
Note If you type in the Description box, the text entered will display in the Uploaded files list box. If you leave the description box empty, the file name you uploaded will display in the Uploaded files list box.
5Click Upload to attach the selected file.
6If the files uploaded are not correct, highlight the file to discard and click Remove, the file will be deleted from the Uploaded files list box.
7Click Done to return to the New work item page.
Note If no files are uploaded, deleted, or you clicked this page option in error, click Done to return to the New work item page. Only files you actually Uploaded or Removed on this page will affect the work item. Changes are not permanent until the work item itself is saved.
Altiris Helpdesk Solution User Guide | 55 |