Appendix D: Recording and Playing Audio
Appendix D: Recording and Playing Audio
The DVR is capable of recording one audio channel, which can be assigned to any available camera channel. Audio recording requires an
The DVR can play audio from
Connecting an
|
|
|
|
| Video IN (CH 1~8) | |
|
|
|
| |||
|
|
| Video |
| ||
|
| |||||
|
|
| (BNC cable) |
|
| |
|
|
| ||||
|
|
|
|
| ||
|
|
|
|
|
|
|
|
| Audio (RCA cable) |
| |||
Audio IN |
| AUDIO CAPABLE | CAMERA OR | |||
|
|
| MICROPHONE | |||
|
|
|
| (Not included) | ||
NOTE: It is recommended to test the audio and video on your cameras prior to installation.
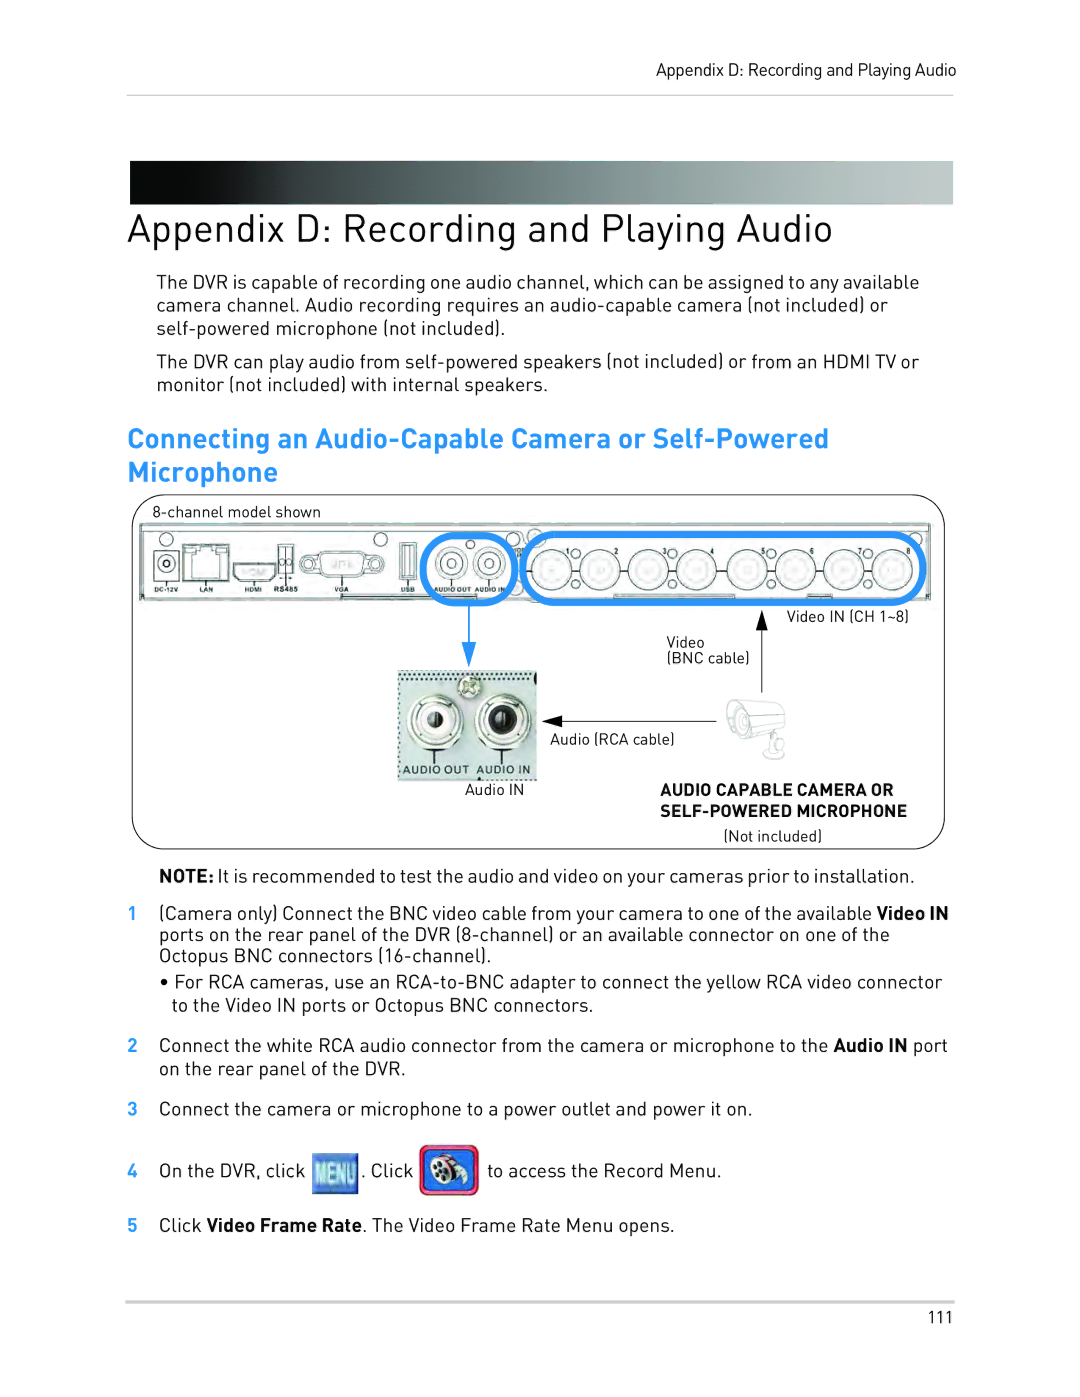
1(Camera only) Connect the BNC video cable from your camera to one of the available Video IN ports on the rear panel of the DVR
•For RCA cameras, use an
2Connect the white RCA audio connector from the camera or microphone to the Audio IN port on the rear panel of the DVR.
3Connect the camera or microphone to a power outlet and power it on.
4 On the DVR, click | . Click | to access the Record Menu. |
5Click Video Frame Rate. The Video Frame Rate Menu opens.
111
