LOREX Technology LH3481001C8B, LH340 EDGE3, LH330 EDGE2 Connecting BNC Cameras to your DVR

Models: LH330 EDGE2 LH3481001C8B LH340 EDGE3

1 144
Download 144 pages 9.37 Kb
Page 28
Image 28
Connecting BNC Cameras to your DVR

Getting Started

Connecting BNC Cameras to your DVR

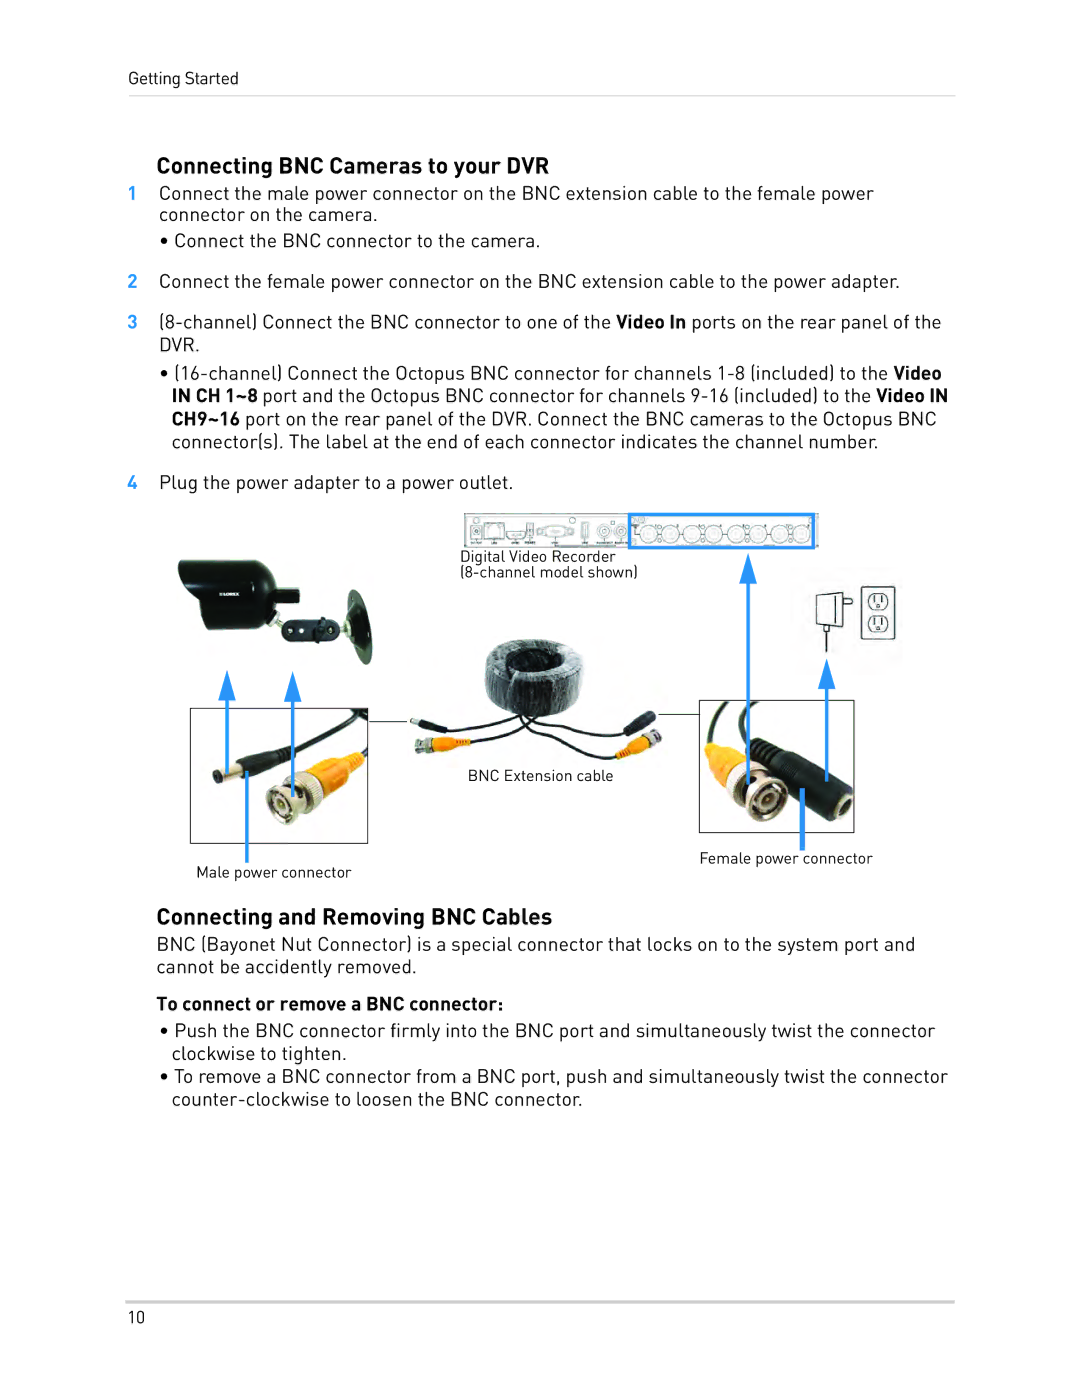
1Connect the male power connector on the BNC extension cable to the female power connector on the camera.

• Connect the BNC connector to the camera.

2Connect the female power connector on the BNC extension cable to the power adapter.

3(8-channel) Connect the BNC connector to one of the Video In ports on the rear panel of the DVR.

(16-channel) Connect the Octopus BNC connector for channels 1-8 (included) to the Video IN CH 1~8 port and the Octopus BNC connector for channels 9-16 (included) to the Video IN CH9~16 port on the rear panel of the DVR. Connect the BNC cameras to the Octopus BNC connector(s). The label at the end of each connector indicates the channel number.

4Plug the power adapter to a power outlet.

Digital Video Recorder (8-channel model shown)

BNC Extension cable

Female power connector

Male power connector

Connecting and Removing BNC Cables

BNC (Bayonet Nut Connector) is a special connector that locks on to the system port and cannot be accidently removed.

To connect or remove a BNC connector:

Push the BNC connector firmly into the BNC port and simultaneously twist the connector clockwise to tighten.

To remove a BNC connector from a BNC port, push and simultaneously twist the connector counter-clockwise to loosen the BNC connector.

10

Page 28
Image 28
LOREX Technology LH3481001C8B, LH340 EDGE3 Connecting BNC Cameras to your DVR, Connecting and Removing BNC Cables