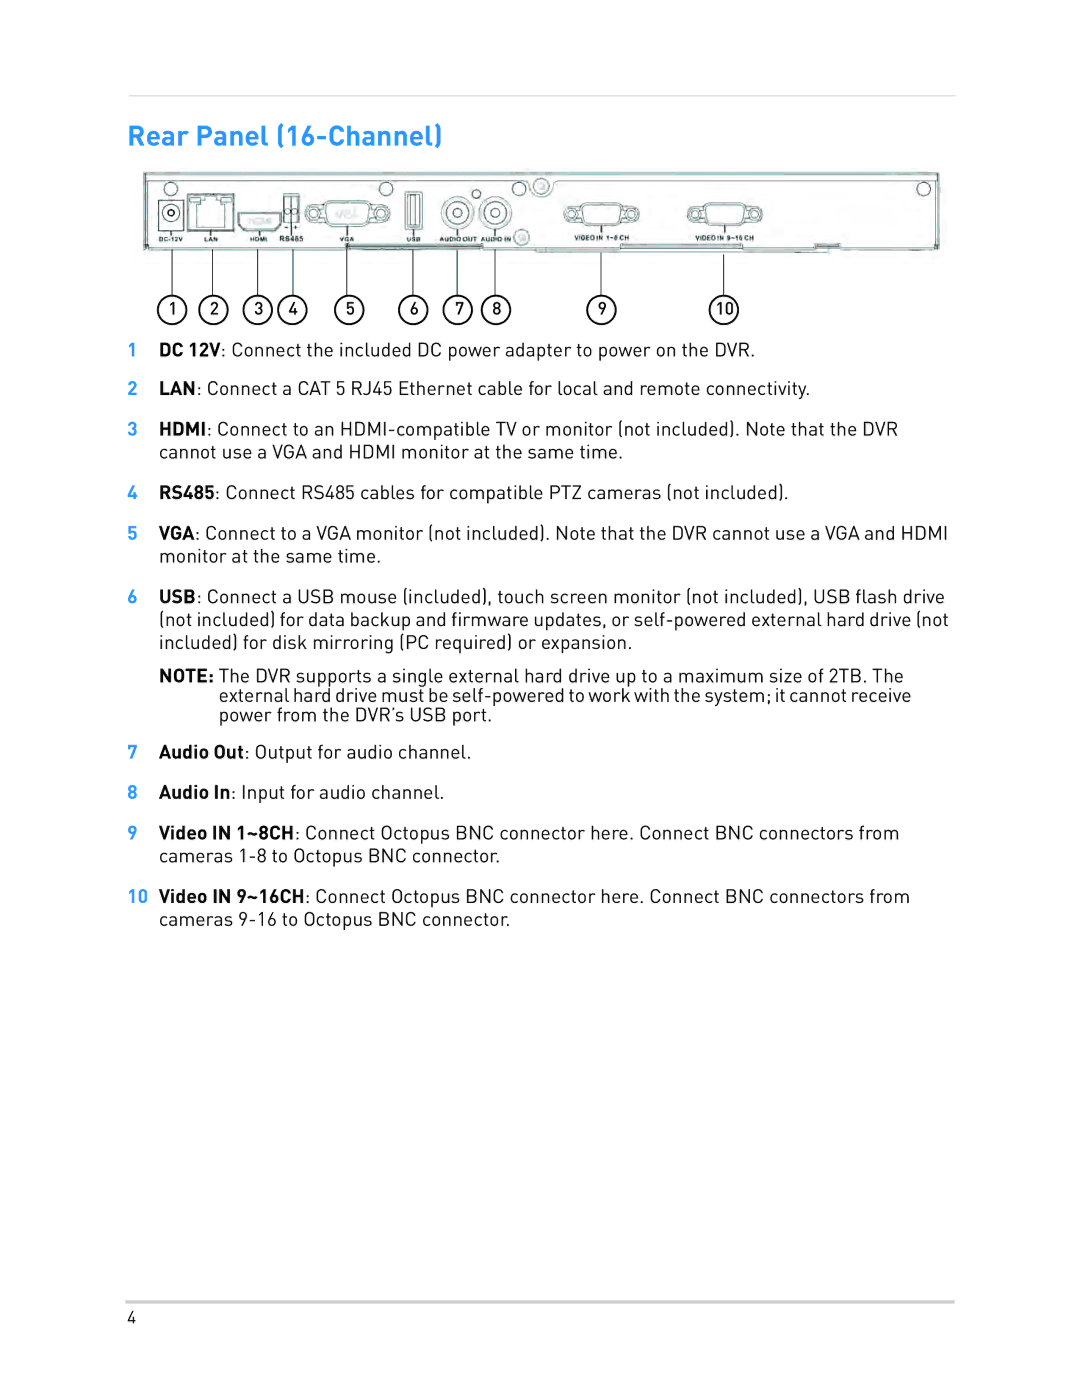
Rear Panel (16-Channel)
1 | 2 | 3 | 4 | 5 | 6 | 7 | 8 | 9 | 10 |
1DC 12V: Connect the included DC power adapter to power on the DVR.
2LAN: Connect a CAT 5 RJ45 Ethernet cable for local and remote connectivity.
3HDMI: Connect to an
4RS485: Connect RS485 cables for compatible PTZ cameras (not included).
5VGA: Connect to a VGA monitor (not included). Note that the DVR cannot use a VGA and HDMI monitor at the same time.
6USB: Connect a USB mouse (included), touch screen monitor (not included), USB flash drive (not included) for data backup and firmware updates, or
NOTE: The DVR supports a single external hard drive up to a maximum size of 2TB. The external hard drive must be
7Audio Out: Output for audio channel.
8Audio In: Input for audio channel.
9Video IN 1~8CH: Connect Octopus BNC connector here. Connect BNC connectors from cameras
10Video IN 9~16CH: Connect Octopus BNC connector here. Connect BNC connectors from cameras
4