Using the Main Menu
Step 1 of 3: Enable Motion Detection on your cameras:
1While viewing, click ![]() to open the Main Menu.
to open the Main Menu.
2Click ![]() to open the Alarm Menu.
to open the Alarm Menu.
3Under cameras that you wish to enable for motion detection, click Motion Enable and select O.
4
Step 2 of 3: Configure the Motion Alarm Schedule for 24/7 motion recording:
1From the Main Menu, click ![]() to open the Alarm Menu.
to open the Alarm Menu.
2Click Alarm Setup>Motion Alarm Schedule to open the Motion Alarm Schedule.
3Configure the Motion Alarm Schedule to enable motion events at all times. The schedule will be solid yellow when motion events have been enabled on a 24/7 basis.
NOTE: Use the range selectors below the Motion Alarm Schedule to configure multiple boxes at a time.
4
Step 3 of 3: Disable Continuous
Recording (Working and
Hours):
1From the Main Menu, click ![]() to open the Record Menu.
to open the Record Menu.
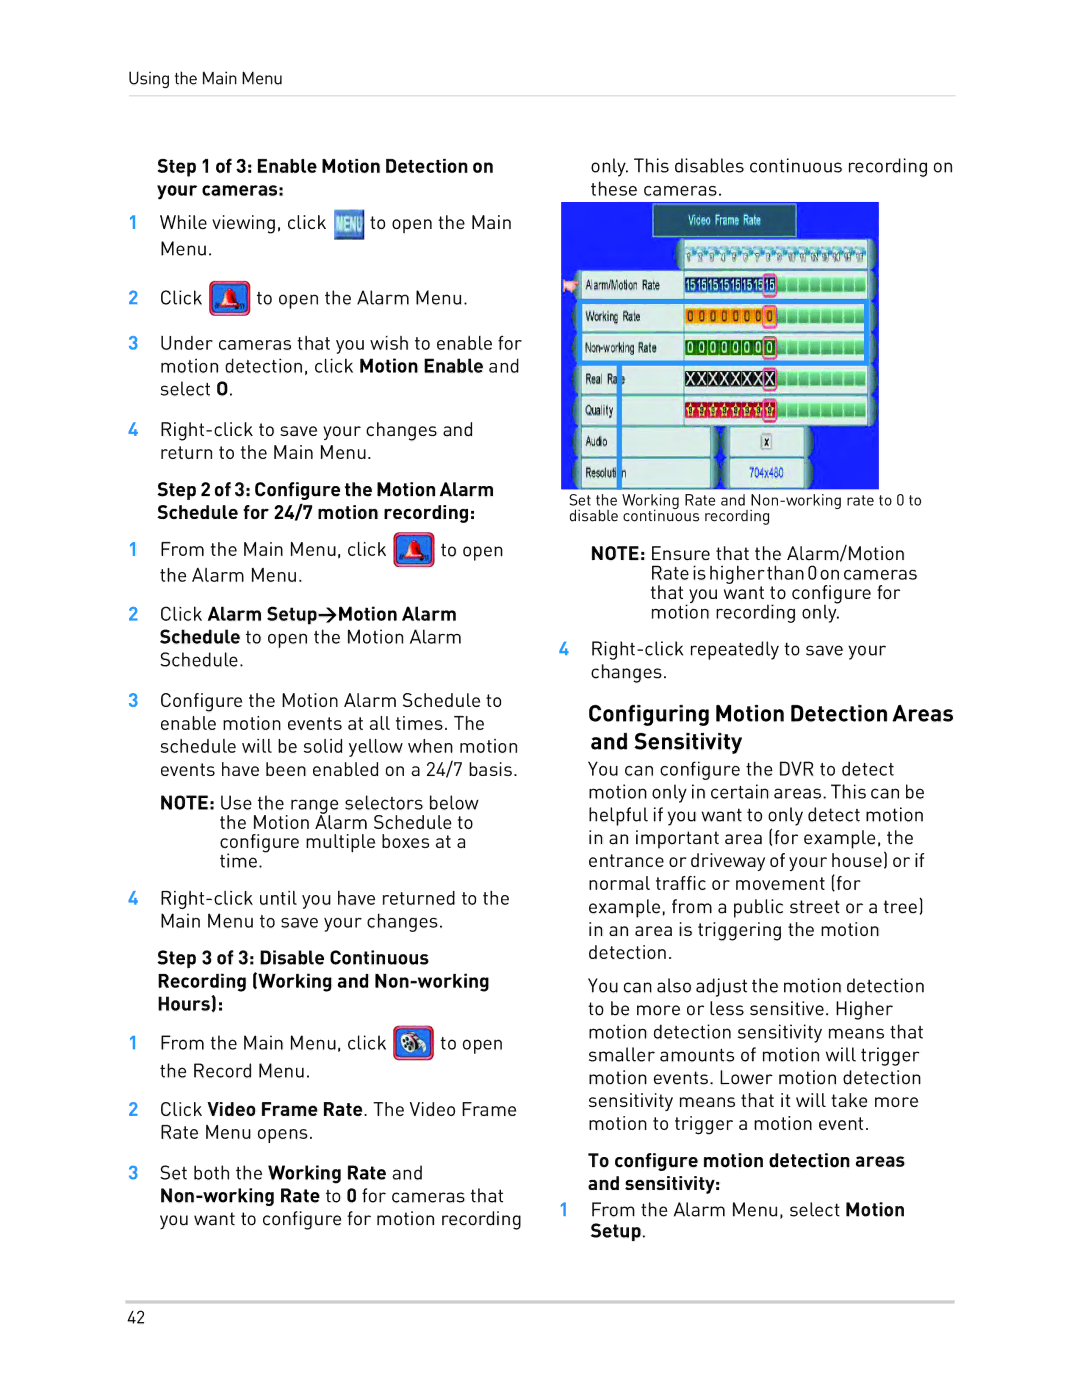
2Click Video Frame Rate. The Video Frame Rate Menu opens.
3Set both the Working Rate and
only. This disables continuous recording on these cameras.
Set the Working Rate and
NOTE: Ensure that the Alarm/Motion Rateishigherthan0oncameras that you want to configure for motion recording only.
4
Configuring Motion Detection Areas and Sensitivity
You can configure the DVR to detect motion only in certain areas. This can be helpful if you want to only detect motion in an important area (for example, the entrance or driveway of your house) or if normal traffic or movement (for example, from a public street or a tree) in an area is triggering the motion detection.
You can also adjust the motion detection to be more or less sensitive. Higher motion detection sensitivity means that smaller amounts of motion will trigger motion events. Lower motion detection sensitivity means that it will take more motion to trigger a motion event.
To configure motion detection areas and sensitivity:
1From the Alarm Menu, select Motion Setup.
42
