Setting up your DVR for Remote Connectivity
•URL Request: Enter the web site address that will be used to connect to your Lorex product. For example, if you enter tomsmith, the address to access your video will be tomsmith.lorexddns.net using Client Software or http://tomsmith.lorexddns.net using a compatible web browser.
9Click Save to register your product for DDNS. A confirmation email will be sent to the email address used to register for My Lorex.
You will need this information to enable remote access to your system. Record your information below:
Domain name/URL Request:
DDNS User Name:
DDNS Device Password:
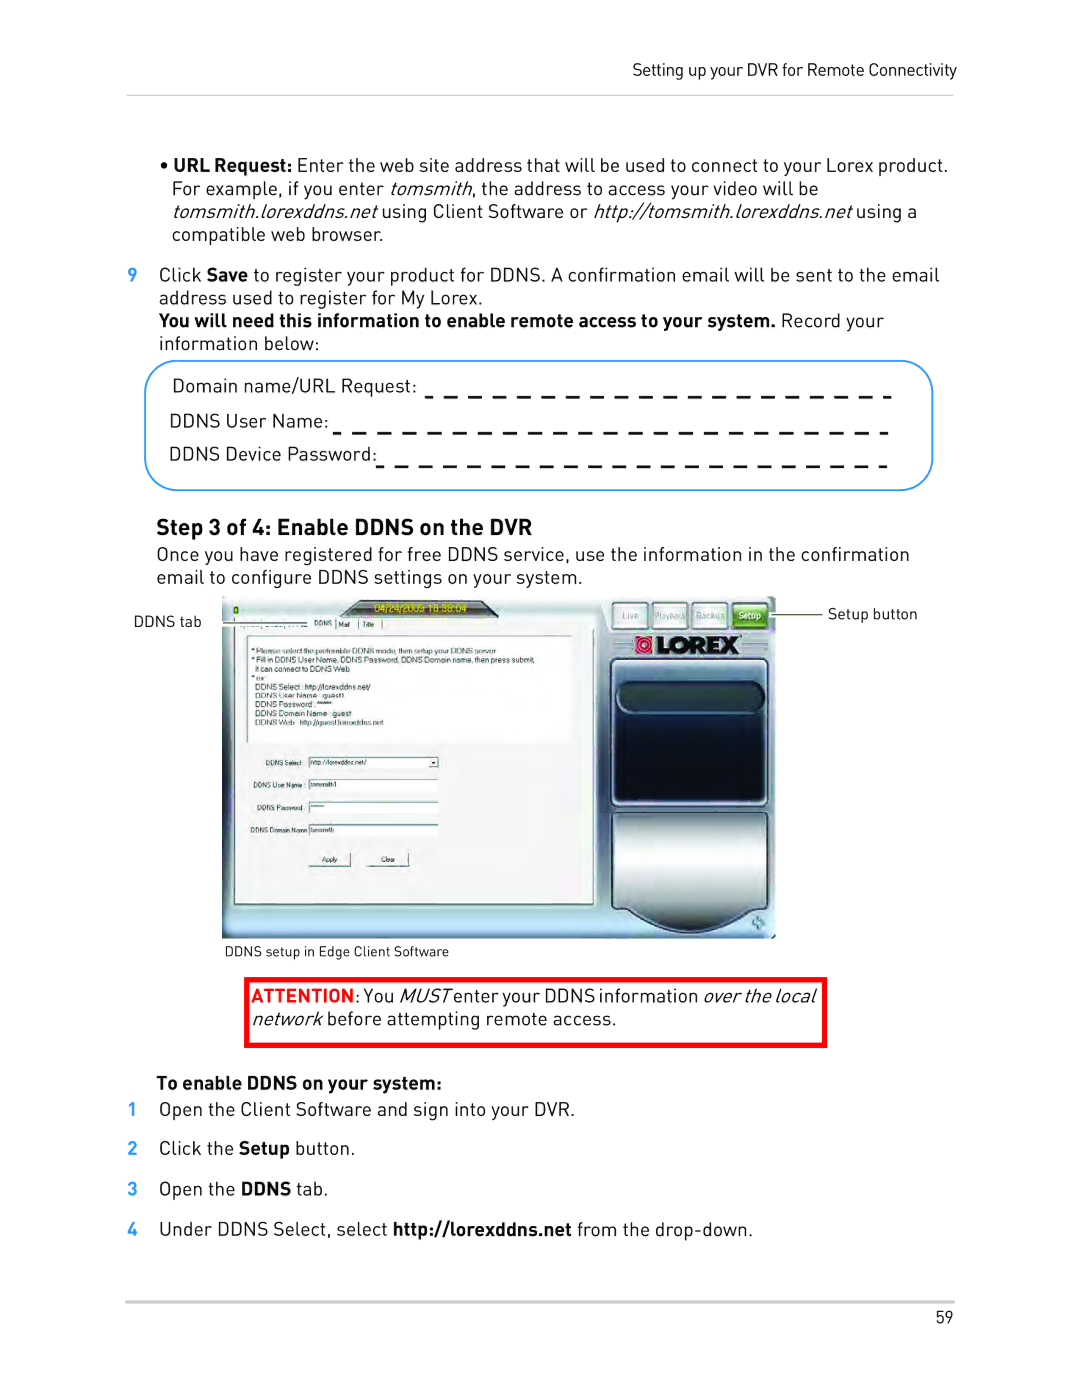
Step 3 of 4: Enable DDNS on the DVR
Once you have registered for free DDNS service, use the information in the confirmation email to configure DDNS settings on your system.
DDNS tab |
|
|
| Setup button |
|
|
| ||
|
|
|
|
DDNS setup in Edge Client Software
ATTENTION: You MUST enter your DDNS information over the local network before attempting remote access.
To enable DDNS on your system:
1Open the Client Software and sign into your DVR.
2Click the Setup button.
3Open the DDNS tab.
4Under DDNS Select, select http://lorexddns.net from the
59