Setting up your DVR for Remote Connectivity
Setting up your DVR for Remote Connectivity
The DVR supports two options for remote viewing over a local network (LAN) or the Internet: Client Software (provided on the CD) for PC and Mac and DVR Netviewer, a
NOTE: Except where noted, the instructions in this section are the same for PC and Mac.
System Requirements
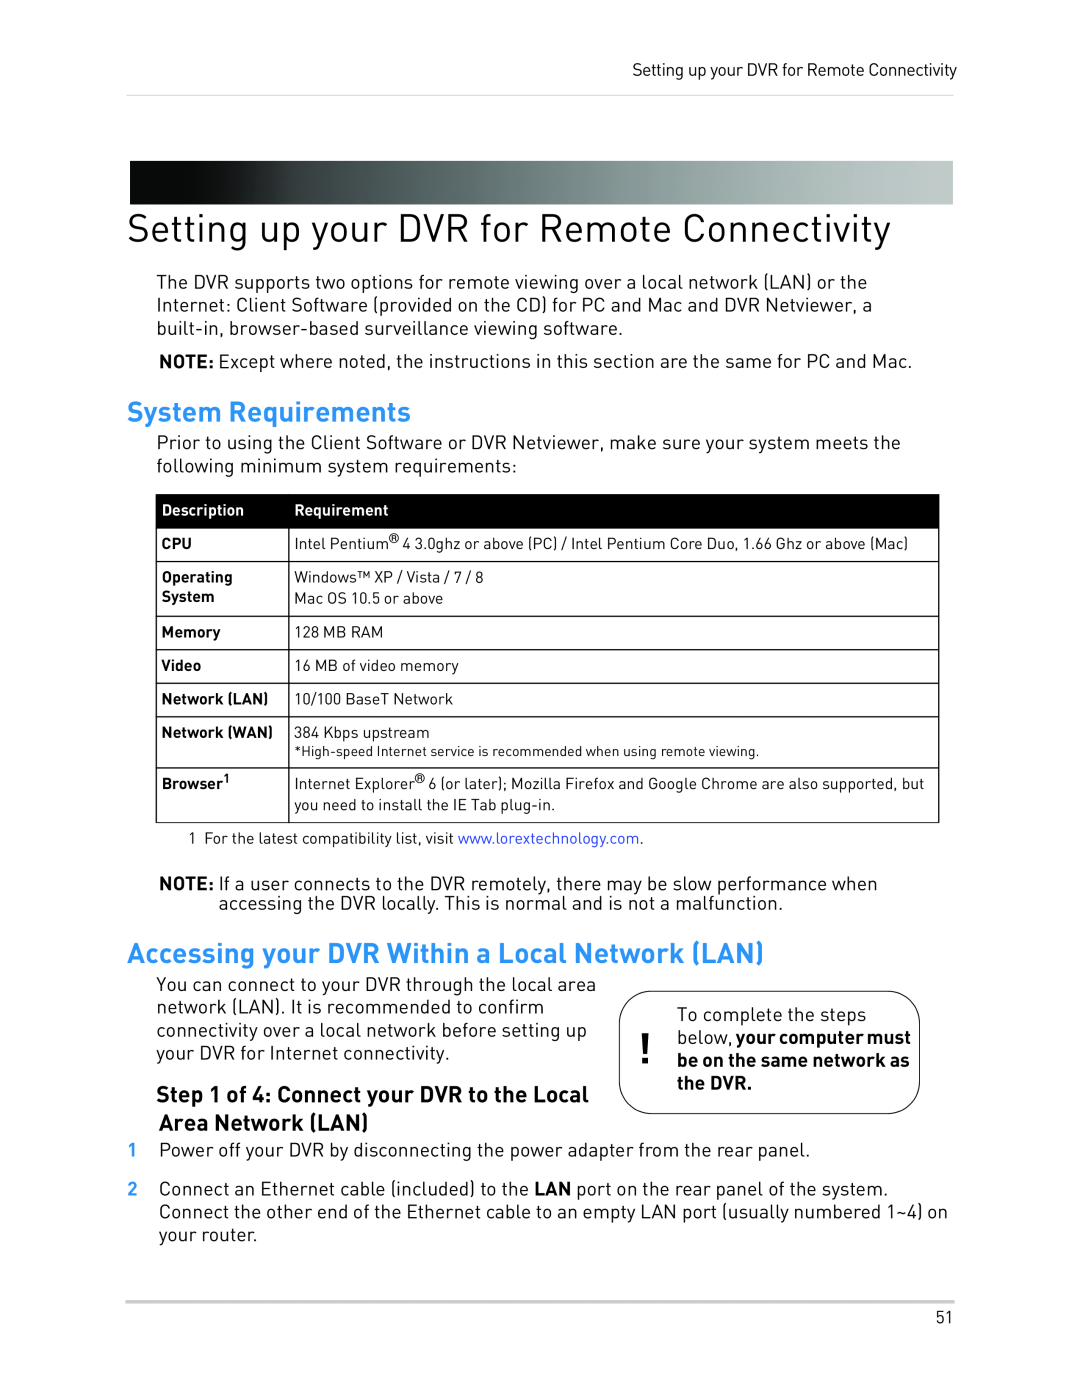
Prior to using the Client Software or DVR Netviewer, make sure your system meets the following minimum system requirements:
Description | Requirement |
|
|
CPU | Intel Pentium® 4 3.0ghz or above (PC) / Intel Pentium Core Duo, 1.66 Ghz or above (Mac) |
Operating | Windows™ XP / Vista / 7 / 8 |
System | Mac OS 10.5 or above |
|
|
Memory | 128 MB RAM |
|
|
Video | 16 MB of video memory |
|
|
Network (LAN) | 10/100 BaseT Network |
|
|
Network (WAN) | 384 Kbps upstream |
| |
|
|
Browser1 | Internet Explorer® 6 (or later); Mozilla Firefox and Google Chrome are also supported, but |
| you need to install the IE Tab |
|
|
1 For the latest compatibility list, visit www.lorextechnology.com.
NOTE: If a user connects to the DVR remotely, there may be slow performance when accessing the DVR locally. This is normal and is not a malfunction.
Accessing your DVR Within a Local Network (LAN)
You can connect to your DVR through the local area |
|
| |
network (LAN). It is recommended to confirm |
| To complete the steps | |
connectivity over a local network before setting up | ! | ||
below, your computer must | |||
your DVR for Internet connectivity. | |||
be on the same network as | |||
Step 1 of 4: Connect your DVR to the Local |
| the DVR. | |
|
|
Area Network (LAN)
1Power off your DVR by disconnecting the power adapter from the rear panel.
2Connect an Ethernet cable (included) to the LAN port on the rear panel of the system. Connect the other end of the Ethernet cable to an empty LAN port (usually numbered 1~4) on your router.
51