Using the Main Menu
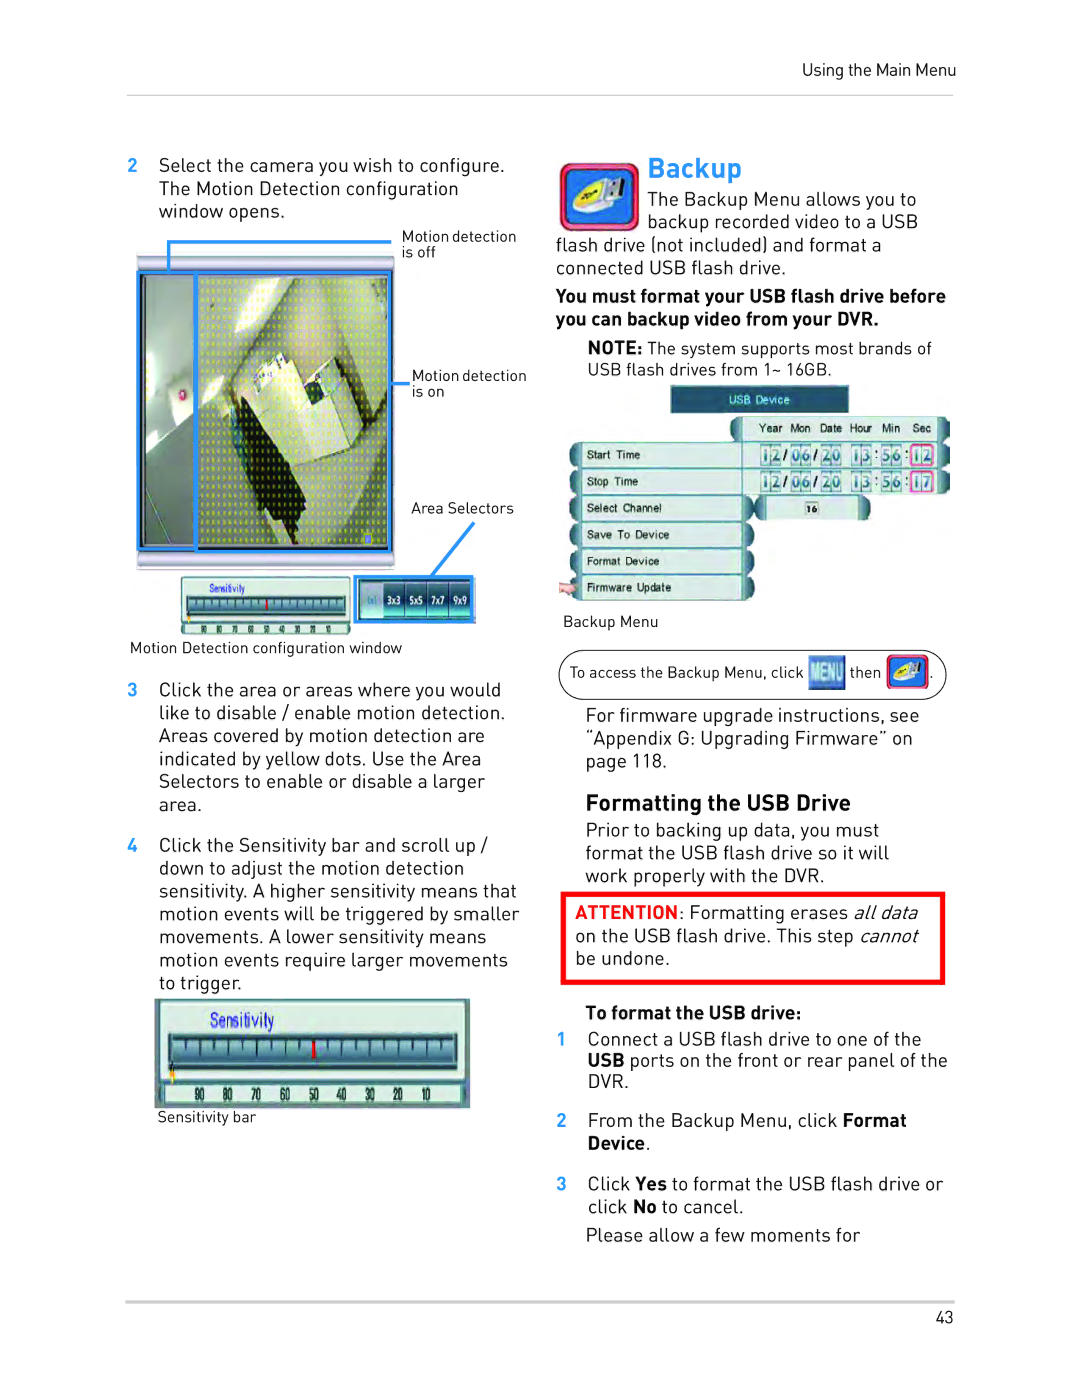
2Select the camera you wish to configure. The Motion Detection configuration window opens.
Motiondetection is off
Motiondetection is on
Area Selectors
Motion Detection configuration window
3Click the area or areas where you would like to disable / enable motion detection. Areas covered by motion detection are indicated by yellow dots. Use the Area Selectors to enable or disable a larger area.
4Click the Sensitivity bar and scroll up / down to adjust the motion detection sensitivity. A higher sensitivity means that motion events will be triggered by smaller movements. A lower sensitivity means motion events require larger movements to trigger.
Sensitivity bar
Backup
The Backup Menu allows you to backup recorded video to a USB
flash drive (not included) and format a connected USB flash drive.
You must format your USB flash drive before you can backup video from your DVR.
NOTE: The system supports most brands of USB flash drives from 1~ 16GB.
Backup Menu
To access the Backup Menu, click ![]() then
then ![]() .
.
For firmware upgrade instructions, see “Appendix G: Upgrading Firmware” on page 118.
Formatting the USB Drive
Prior to backing up data, you must format the USB flash drive so it will work properly with the DVR.
ATTENTION: Formatting erases all data on the USB flash drive. This step cannot be undone.
To format the USB drive:
1Connect a USB flash drive to one of the USB ports on the front or rear panel of the DVR.
2From the Backup Menu, click Format Device.
3Click Yes to format the USB flash drive or click No to cancel.
Please allow a few moments for
43
