Basic Setup
NOTE: This DVR features unique mounting options and can be mounted to back of LCD monitorswithaVESAmount.Formountinginstructions,see“AppendixE:Mounting the DVR to a VESA Mount” on page 113. If you intend to mount the DVR, it is recommended to do so before completing setup.
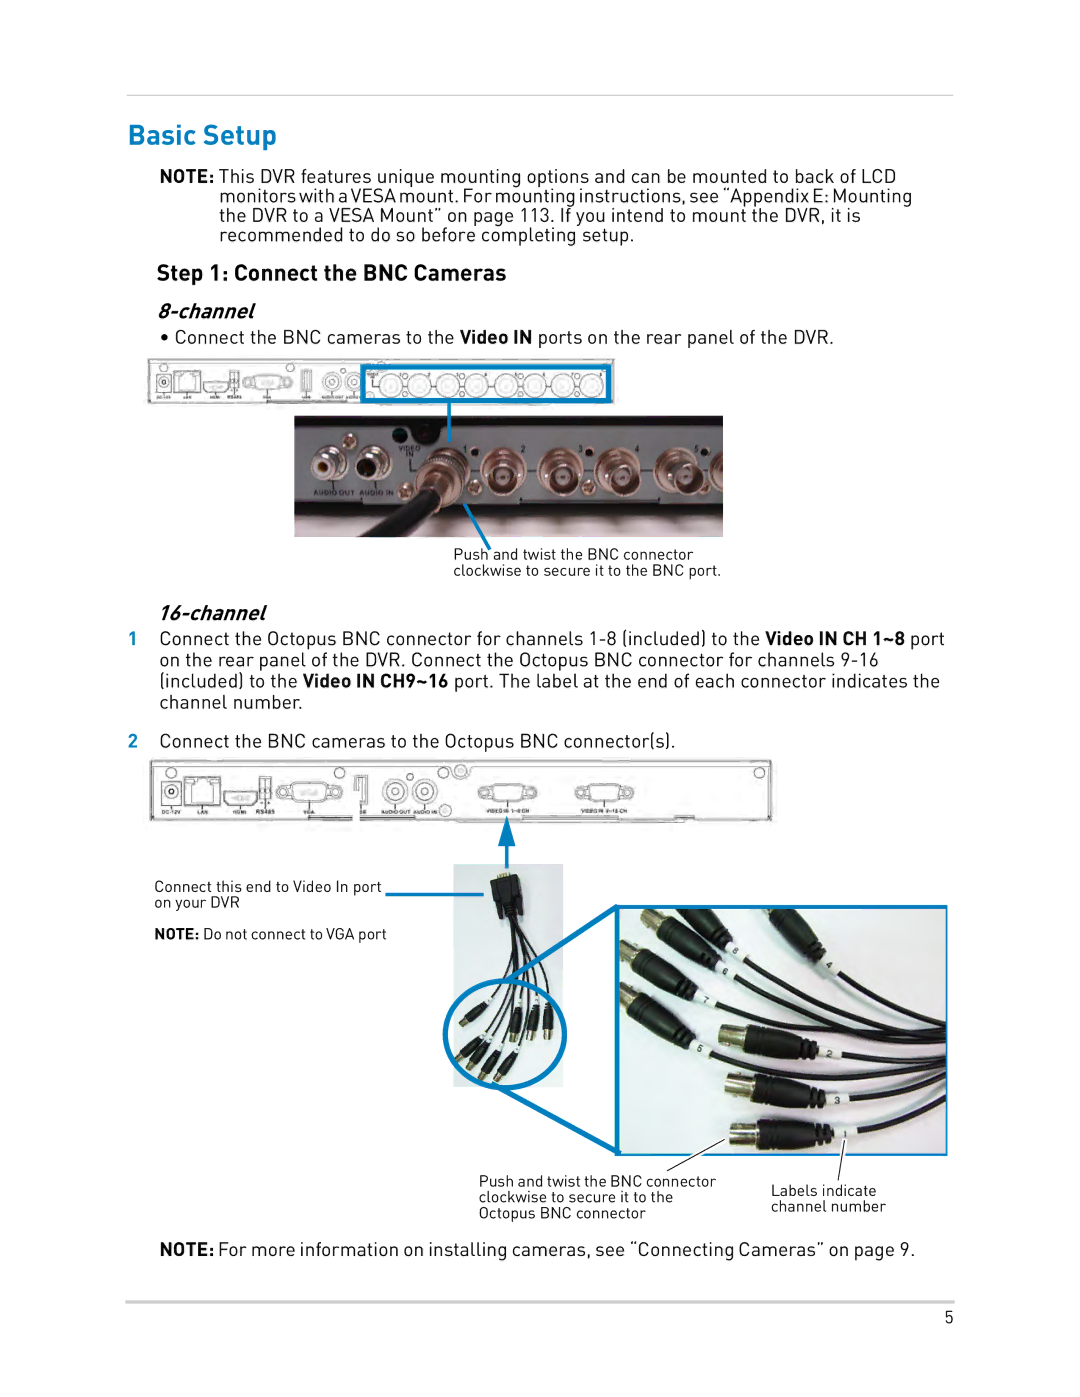
Step 1: Connect the BNC Cameras
8-channel
• Connect the BNC cameras to the Video IN ports on the rear panel of the DVR.
Push![]() and twist the BNC connector clockwise to secure it to the BNC port.
and twist the BNC connector clockwise to secure it to the BNC port.
1Connect the Octopus BNC connector for channels
2Connect the BNC cameras to the Octopus BNC connector(s).
Connect this end to Video In port on your DVR
NOTE: Do not connect to VGA port
Push and twist the BNC connector | Labels indicate | |
clockwise to secure it to the | ||
channel number | ||
Octopus BNC connector | ||
|
NOTE: For more information on installing cameras, see “Connecting Cameras” on page 9.
5