PC and Mac Client Software for Remote Viewing
Live Viewing Mode
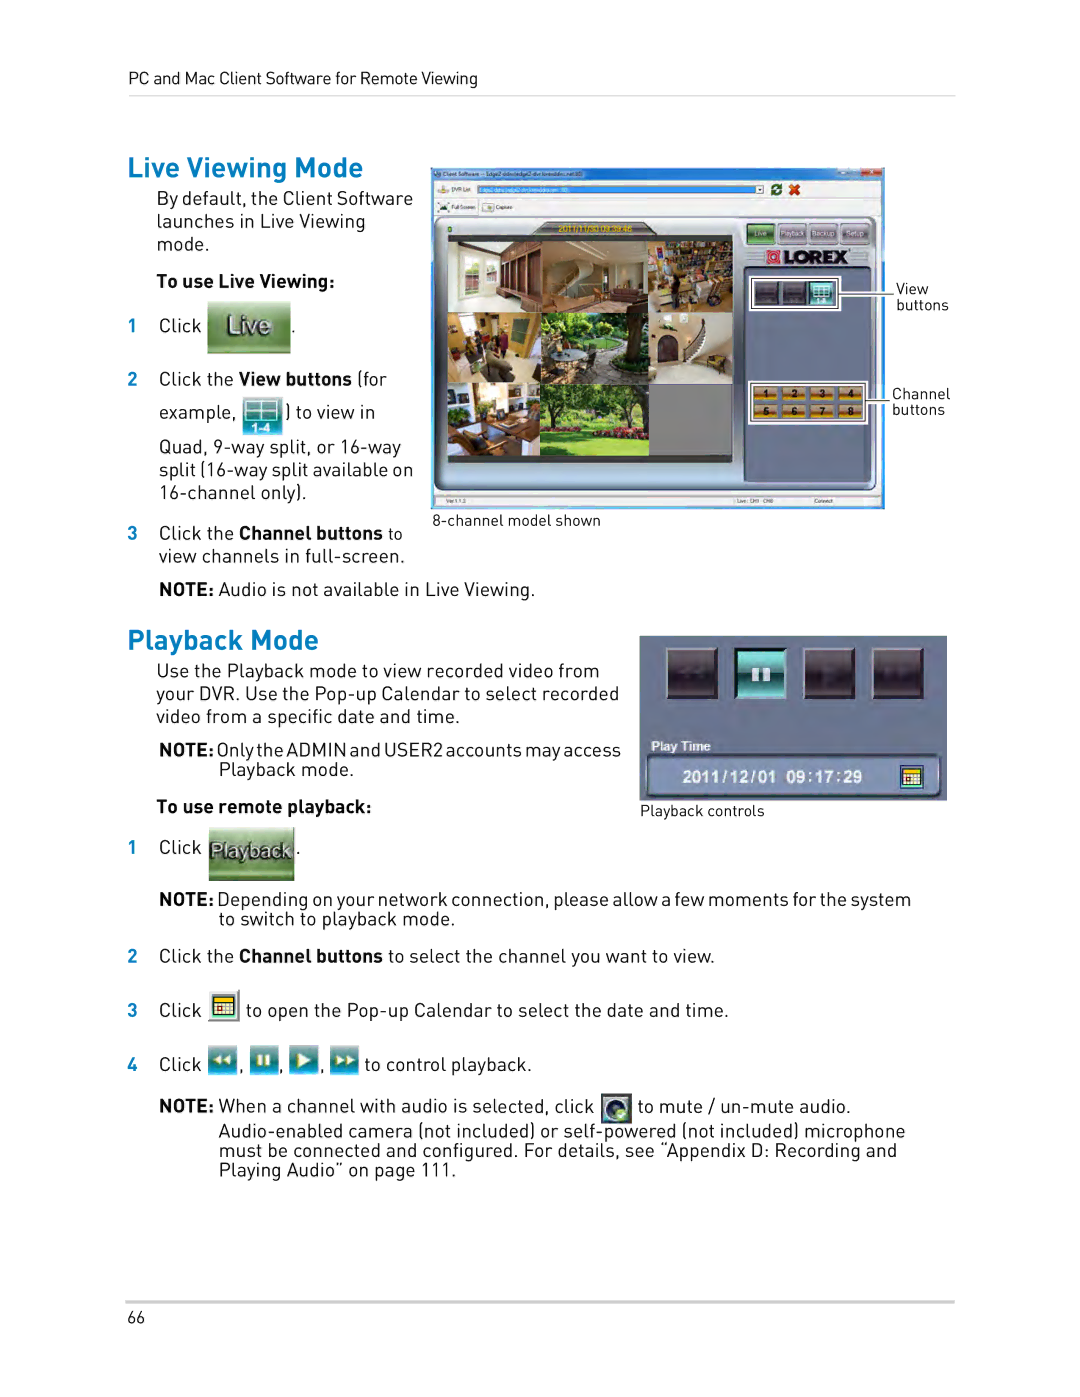
By default, the Client Software launches in Live Viewing mode.
To use Live Viewing:
1 Click | . |
2Click the View buttons (for
example, ![]() ) to view inChannel
) to view inChannel
Quad,
3Click the Channel buttons to view channels in
NOTE: Audio is not available in Live Viewing.
![]() View buttons
View buttons
Channel buttons
Playback Mode
Use the Playback mode to view recorded video from your DVR. Use the
NOTE:OnlytheADMINandUSER2accountsmayaccess
| Playback mode. |
|
To use remote playback: | Playback controls | |
1 Click | . |
|
NOTE: Depending on your network connection, please allow a few moments for the system to switch to playback mode.
2Click the Channel buttons to select the channel you want to view.
3Click ![]() to open the
to open the
4Click ![]() ,
, ![]() ,
, ![]() ,
, ![]() to control playback.
to control playback.
NOTE: When a channel with audio is selected, click ![]() to mute /
to mute /
66
