LOREX Technology LH340 EDGE3 Appendix F: Replacing the Hard Drive, Removing the Hard Drive

Models: LH330 EDGE2 LH3481001C8B LH340 EDGE3

1 144
Download 144 pages 9.37 Kb
Page 132
Image 132
Appendix F: Replacing the Hard Drive

Appendix F: Replacing the Hard Drive

Appendix F: Replacing the Hard Drive

The system comes with a pre-installed 3.5" SATA hard drive. You can expand the system with a replacement single hard drive up to 2 terabyte (TB).

NOTE: It is recommended to use surveillance or security-certified hard drives, which are designed to be reliable over long periods of time while recording 24/7. Security-certified hard drives are available at www.lorextechnology.com

Removing the Hard Drive

Make sure that the power cable has been disconnected before changing the hard drive.

To remove the hard drive:

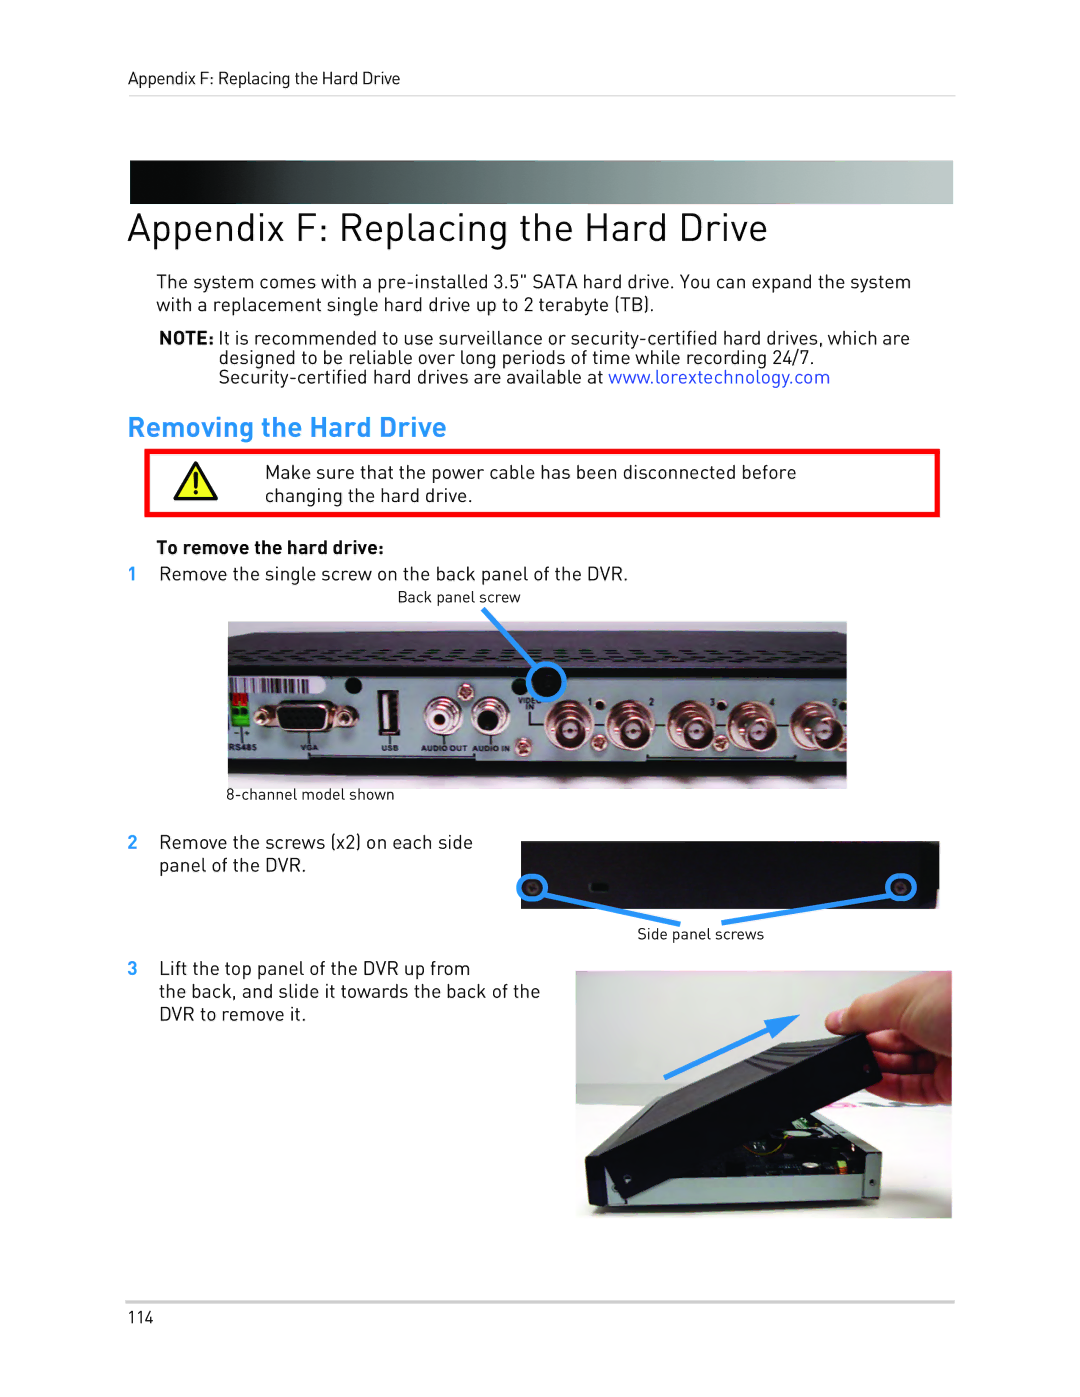
1Remove the single screw on the back panel of the DVR.

Back panel screw

8-channel model shown

2Remove the screws (x2) on each side panel of the DVR.

Side panel screws

3Lift the top panel of the DVR up from

the back, and slide it towards the back of the DVR to remove it.

114

Page 132
Image 132
LOREX Technology LH340 EDGE3 Appendix F: Replacing the Hard Drive, Removing the Hard Drive, To remove the hard drive