2.Installing Client Software
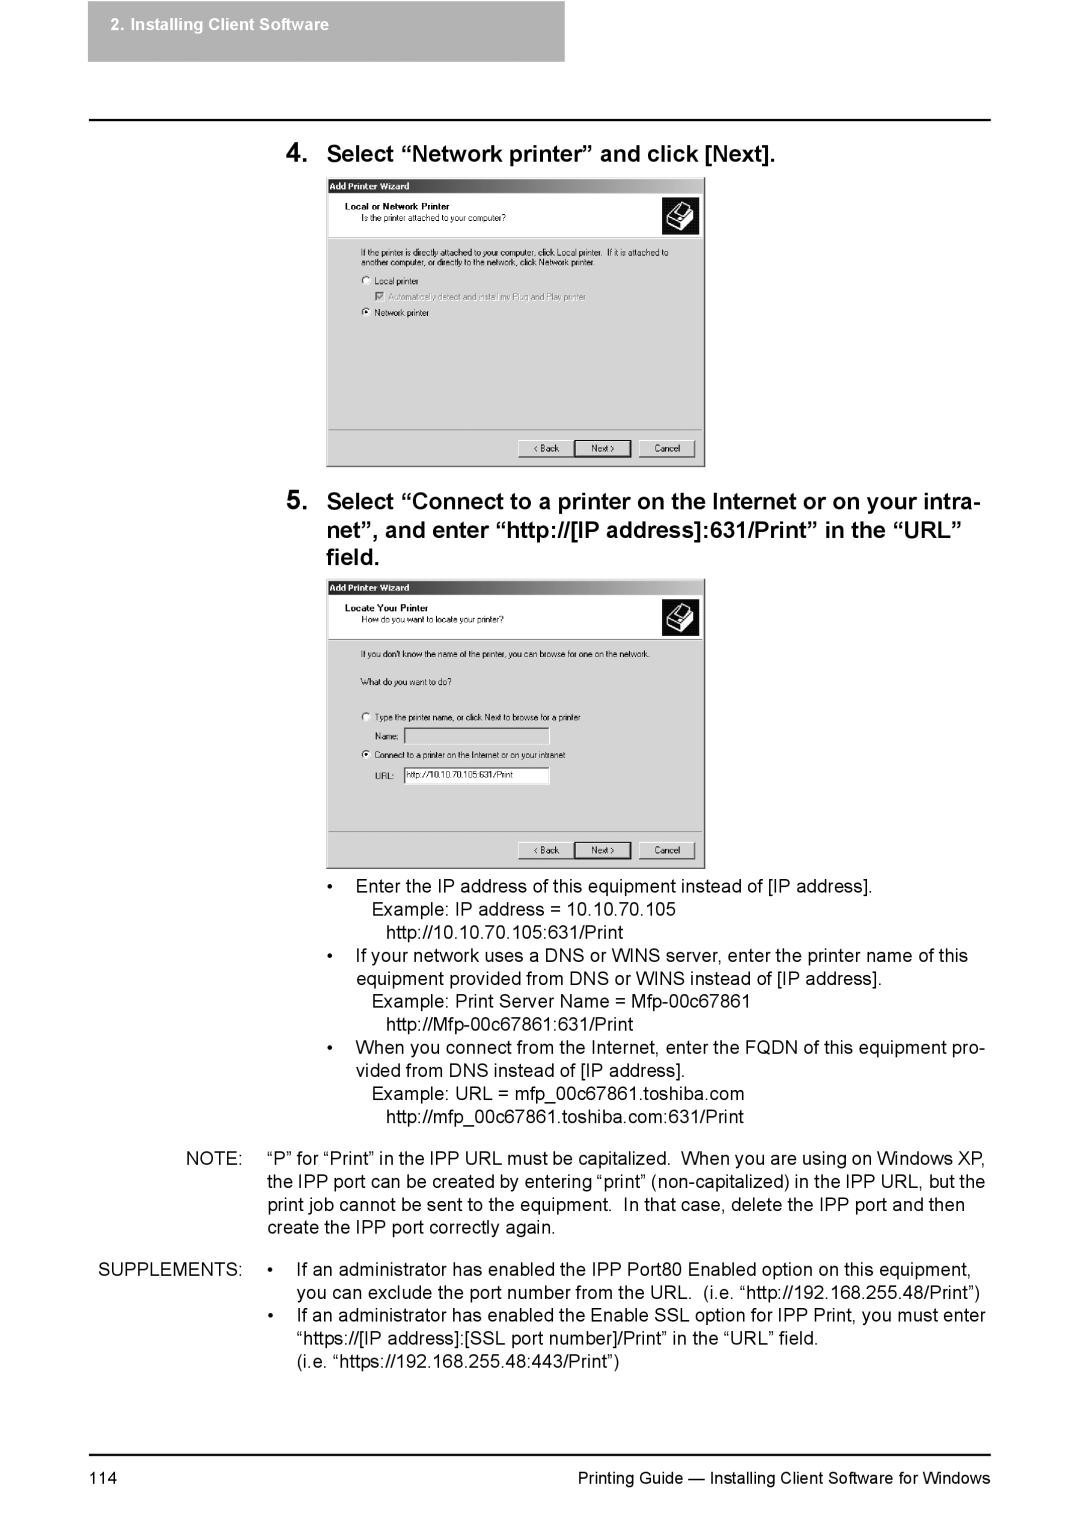
4.Select “Network printer” and click [Next].
5.Select “Connect to a printer on the Internet or on your intra- net”, and enter “http://[IP address]:631/Print” in the “URL” field.
•Enter the IP address of this equipment instead of [IP address]. Example: IP address = 10.10.70.105
http://10.10.70.105:631/Print
•If your network uses a DNS or WINS server, enter the printer name of this equipment provided from DNS or WINS instead of [IP address].
Example: Print Server Name =
•When you connect from the Internet, enter the FQDN of this equipment pro- vided from DNS instead of [IP address].
Example: URL = mfp_00c67861.toshiba.com http://mfp_00c67861.toshiba.com:631/Print
NOTE: “P” for “Print” in the IPP URL must be capitalized. When you are using on Windows XP, the IPP port can be created by entering “print”
SUPPLEMENTS: • If an administrator has enabled the IPP Port80 Enabled option on this equipment, you can exclude the port number from the URL. (i.e. “http://192.168.255.48/Print”)
•If an administrator has enabled the Enable SSL option for IPP Print, you must enter “https://[IP address]:[SSL port number]/Print” in the “URL” field.
(i.e. “https://192.168.255.48:443/Print”)
114 | Printing Guide — Installing Client Software for Windows |