|
| Table 1: Light Image |
|
|
|
Step |
| Action |
|
| |
1. | Clean the separation corona wire and the window of the density detection | |
| sensor (see “Cleaning the Separation Corona Wire” on page | |
| “Cleaning the Window of the Density Detection Sensor” on page | |
|
| |
2. | Clean the transfer drum (see “Cleaning the Transfer Drum” on page | |
|
| |
3. | Make sure that the paper loaded in the printer meets the specifications listed | |
| in “Choosing Paper” on page | |
|
| |
4. | Run several | |
| “Printing Test Prints from the Density Control Panel” on page | |
| • | If all the colors are light on the test prints, replace the photoconductor drum |
|
| cartridge (see “Replacing the Photoconductor Drum Cartridge” on page |
|
| |
| • | If only some of the colors are light, replace the toner cartridge for each color |
|
| that is light (see “Replacing Toner Cartridges” on page |
|
| |
5. | Adjust the color density (see “Adjusting the Color Density” on page | |
|
|
|
| Table 2: Dark image |
|
|
Step | Action |
1.Clean the window of the density detection sensor (see “Cleaning the Window of the Density Detection Sensor” on page
2.Make sure that the paper loaded in the printer meets the specifications listed in “Choosing Paper” on page
3.Replace the photoconductor drum cartridge (see “Replacing the Photoconductor Drum Cartridge” on page
4.Adjust the color density (see “Adjusting the Color Density” on page
Table 3: Blank Prints
Step | Action |
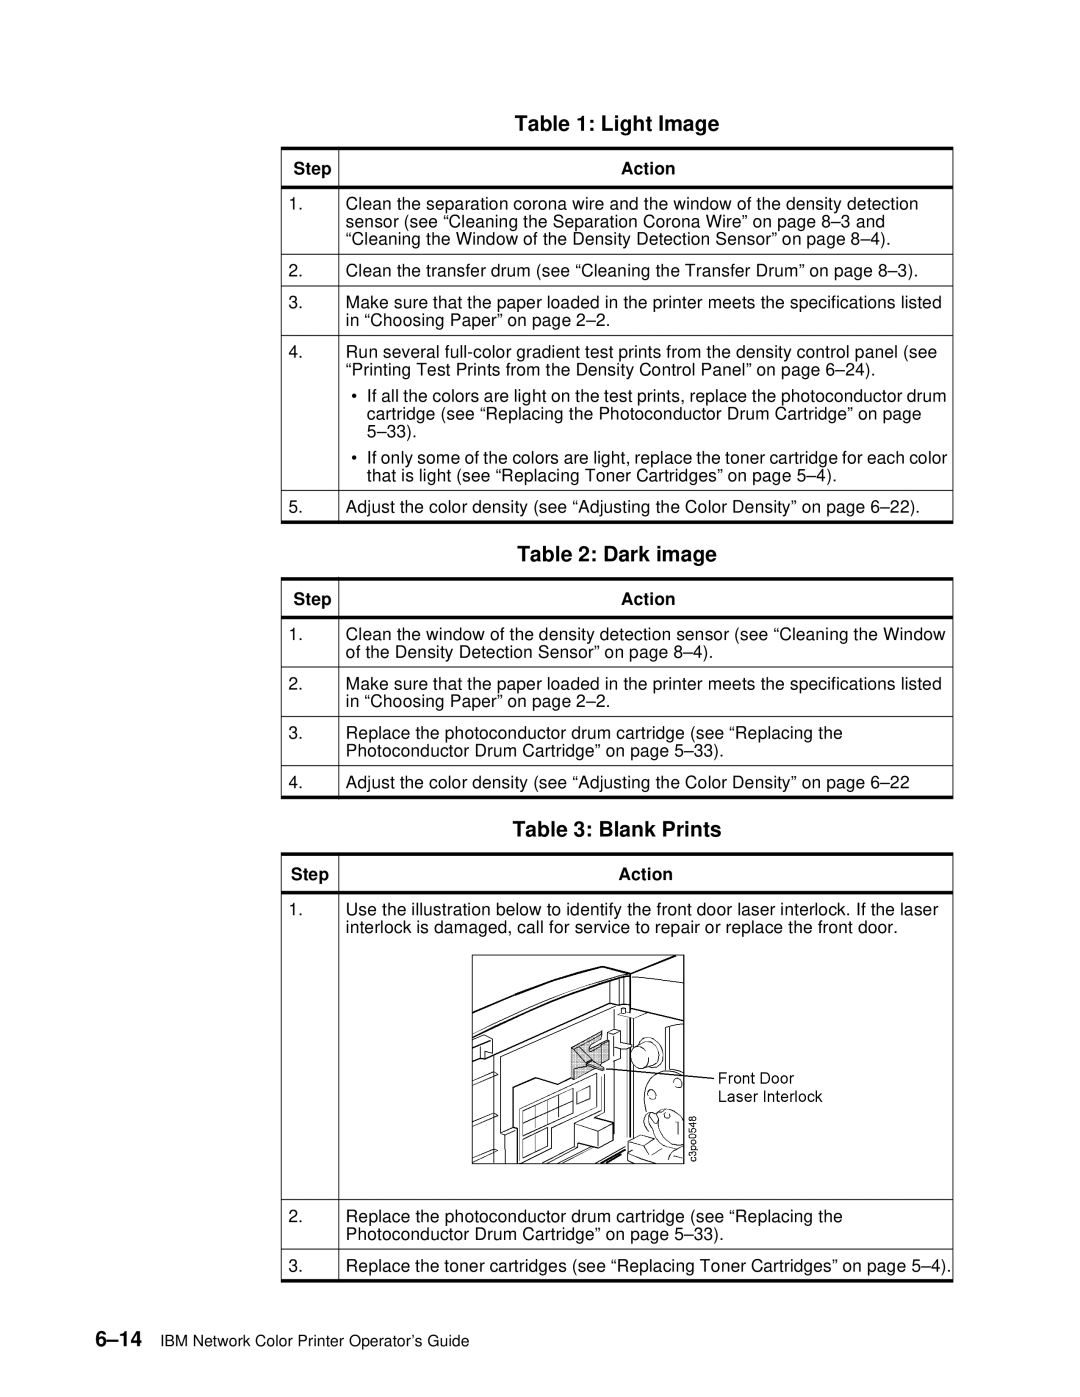
1.Use the illustration below to identify the front door laser interlock. If the laser interlock is damaged, call for service to repair or replace the front door.
2.Replace the photoconductor drum cartridge (see “Replacing the Photoconductor Drum Cartridge” on page
3.Replace the toner cartridges (see “Replacing Toner Cartridges” on page