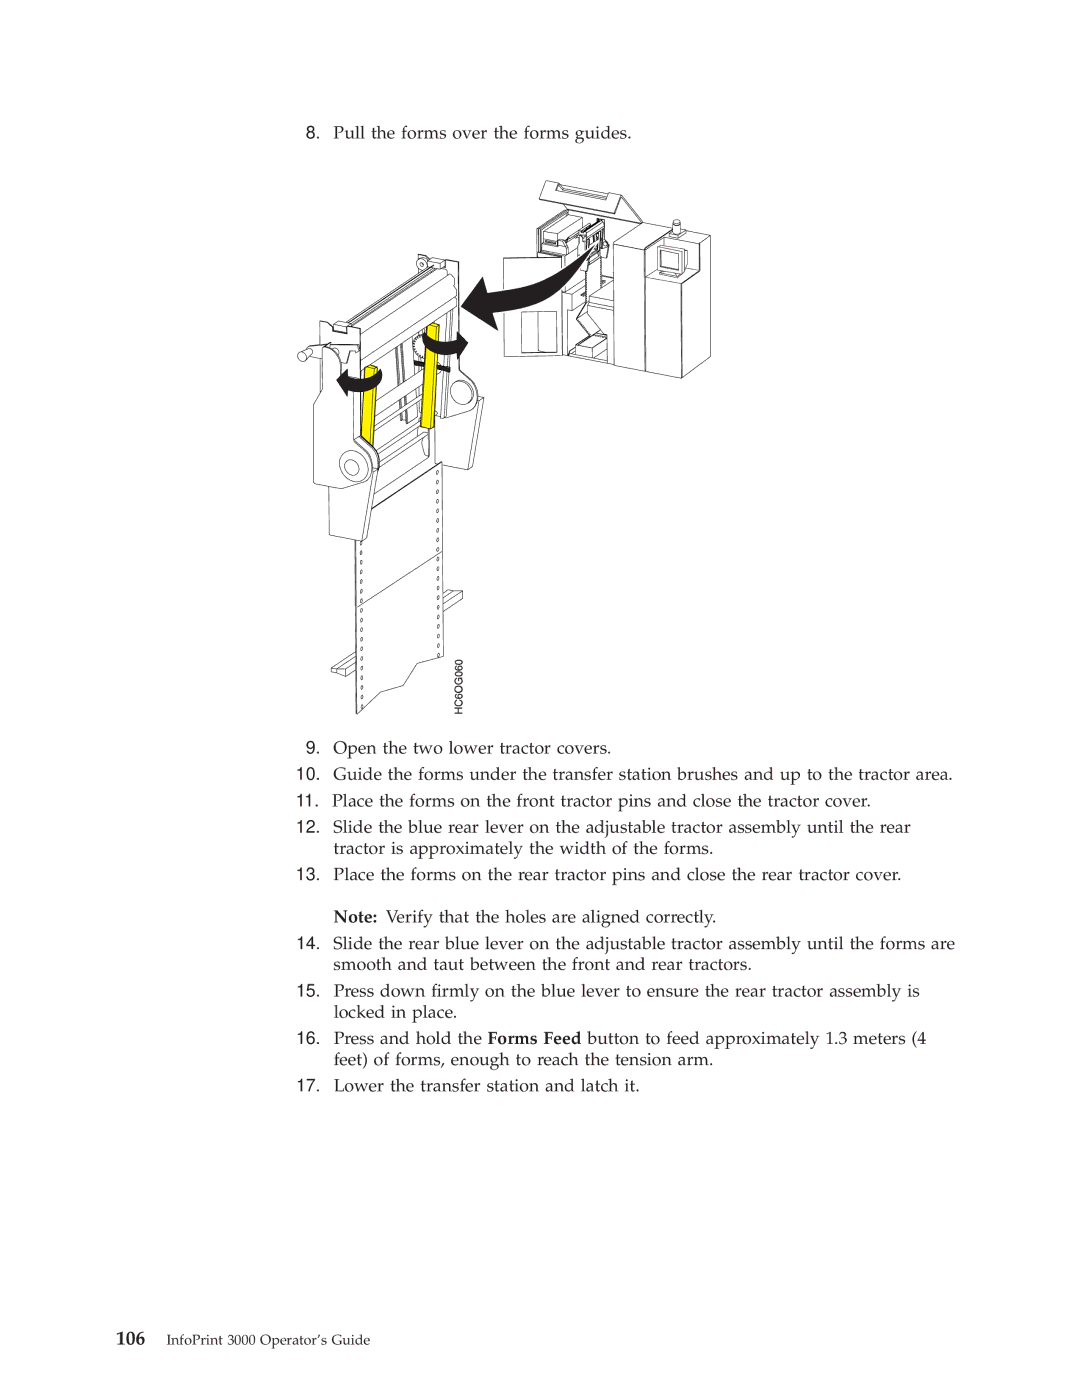
8.Pull the forms over the forms guides.
9.Open the two lower tractor covers.
10.Guide the forms under the transfer station brushes and up to the tractor area.
11.Place the forms on the front tractor pins and close the tractor cover.
12.Slide the blue rear lever on the adjustable tractor assembly until the rear tractor is approximately the width of the forms.
13.Place the forms on the rear tractor pins and close the rear tractor cover. Note: Verify that the holes are aligned correctly.
14.Slide the rear blue lever on the adjustable tractor assembly until the forms are smooth and taut between the front and rear tractors.
15.Press down ®rmly on the blue lever to ensure the rear tractor assembly is locked in place.
16.Press and hold the Forms Feed button to feed approximately 1.3 meters (4 feet) of forms, enough to reach the tension arm.
17.Lower the transfer station and latch it.
