|
|
| Important |
|
|
|
|
| |
|
|
| When you install the | |
|
|
| rolls with the tabs on the sprocket. If you do not do this, the oiler belt | |
|
|
| does not advance correctly. This causes reduced print quality. | |
|
|
| ||
| 15. | While you hold the upper (larger) roll against the lower roll, do the following: | ||
|
| a. Place the right end of the upper roll on the sprocket, lining up the notches | ||
|
|
| in the roll to the tabs on the sprocket. Press the upper roll to the right, | |
|
|
| against the spring. | |
|
| b. Place the left end of the upper roll on the sprocket, and let the right | ||
|
|
| ||
16. | Working with the lower roll, repeat step 15. | |||
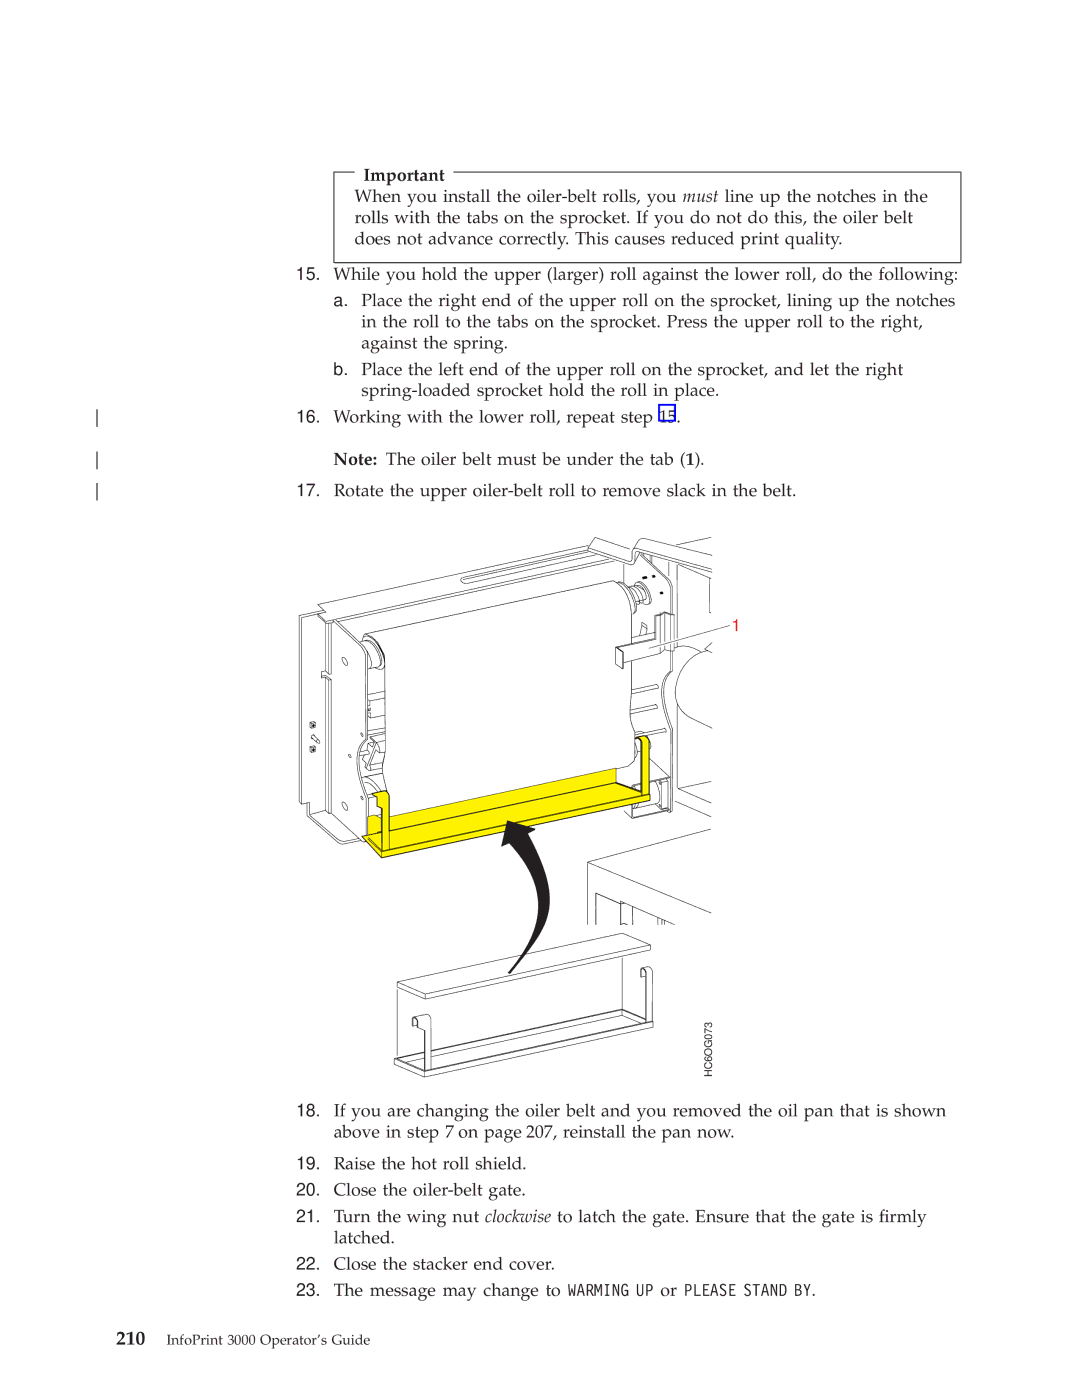
| Note: The oiler belt must be under the tab (1). | |||
17. | Rotate the upper | |||
![]() 1
1
HC6OG073
18.If you are changing the oiler belt and you removed the oil pan that is shown above in step 7 on page 207, reinstall the pan now.
19.Raise the hot roll shield.
20.Close the
21.Turn the wing nut clockwise to latch the gate. Ensure that the gate is ®rmly latched.
22.Close the stacker end cover.
23.The message may change to WARMING UP or PLEASE STAND BY.