AastraLink Pro 160 Administrator Guide
Configuring Network Settings
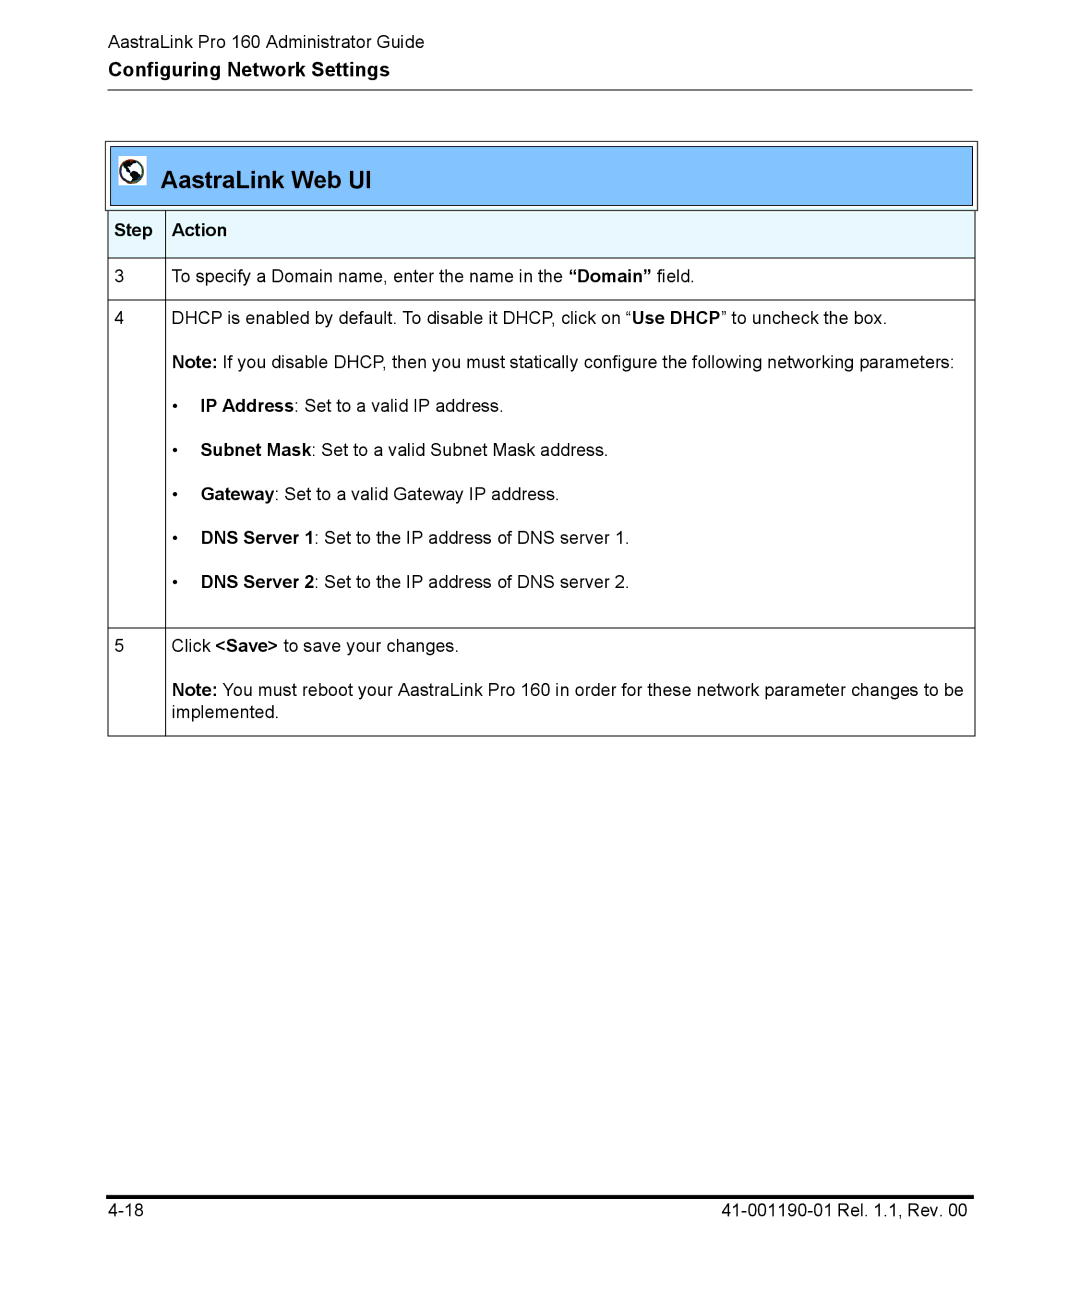
AastraLink Web UI
Step Action
3To specify a Domain name, enter the name in the “Domain” field.
4DHCP is enabled by default. To disable it DHCP, click on “Use DHCP” to uncheck the box.
Note: If you disable DHCP, then you must statically configure the following networking parameters:
•IP Address: Set to a valid IP address.
•Subnet Mask: Set to a valid Subnet Mask address.
•Gateway: Set to a valid Gateway IP address.
•DNS Server 1: Set to the IP address of DNS server 1.
•DNS Server 2: Set to the IP address of DNS server 2.
5Click <Save> to save your changes.
Note: You must reboot your AastraLink Pro 160 in order for these network parameter changes to be implemented.