AastraLink Pro 160 Administrator Guide
Configuring VoIP Settings
Adding a SIP Trunk
Use the following procedure to add a SIP Trunk to the AastraLink Pro 160.
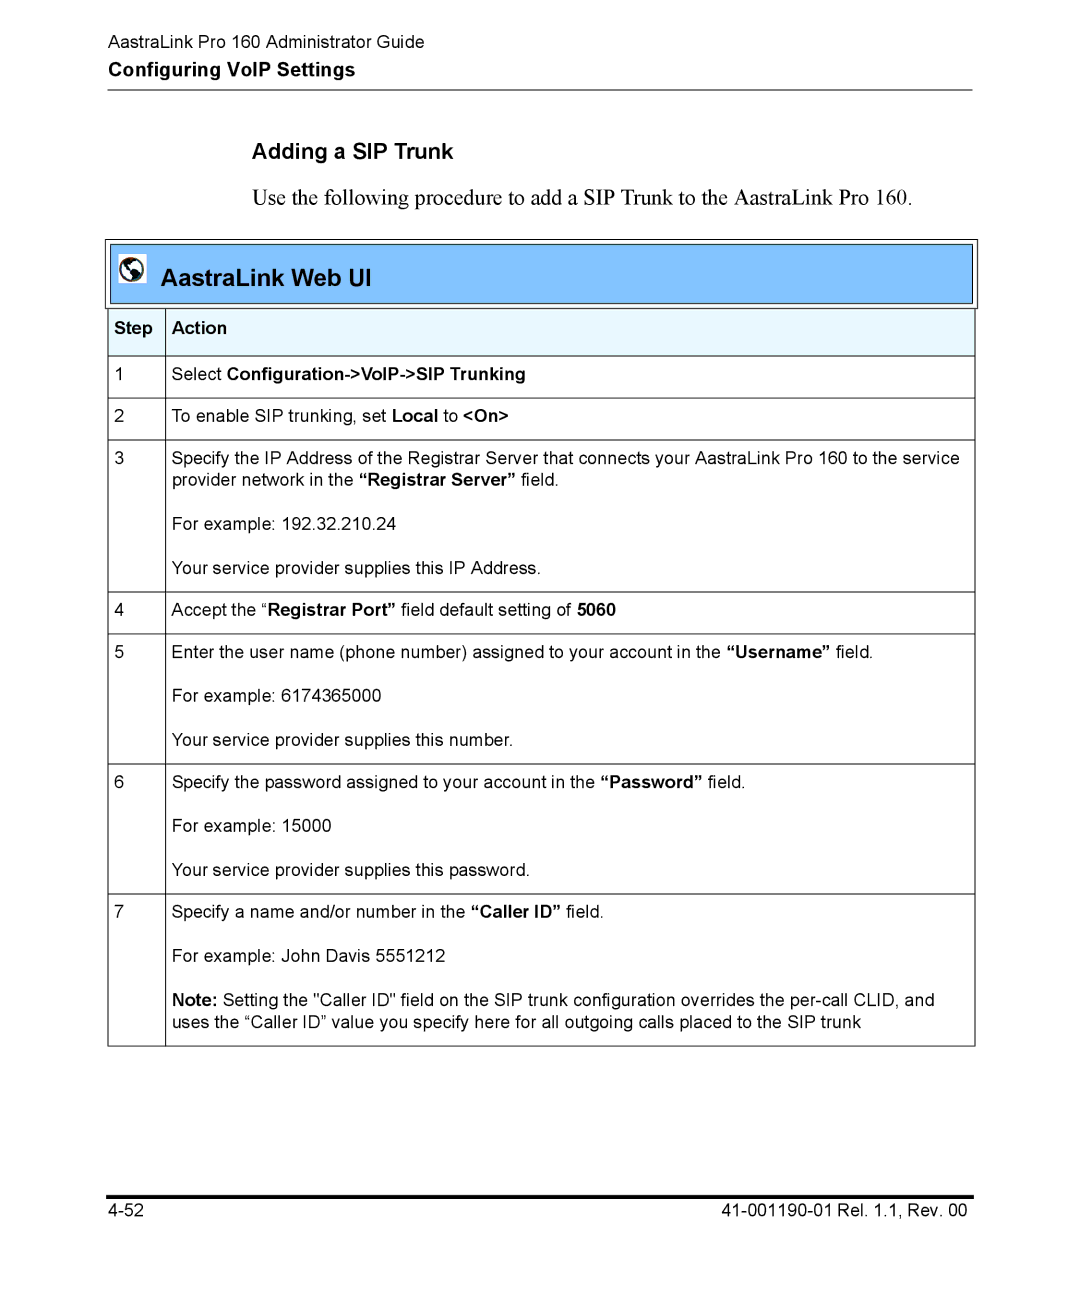
AastraLink Web UI
Step Action
1Select Configuration->VoIP->SIP Trunking
2To enable SIP trunking, set Local to <On>
3Specify the IP Address of the Registrar Server that connects your AastraLink Pro 160 to the service provider network in the “Registrar Server” field.
For example: 192.32.210.24
Your service provider supplies this IP Address.
4Accept the “Registrar Port” field default setting of 5060
5Enter the user name (phone number) assigned to your account in the “Username” field. For example: 6174365000
Your service provider supplies this number.
6Specify the password assigned to your account in the “Password” field. For example: 15000
Your service provider supplies this password.
7Specify a name and/or number in the “Caller ID” field. For example: John Davis 5551212
Note: Setting the "Caller ID" field on the SIP trunk configuration overrides the