Quick Reference Guide to Dynamic Reconfiguration
This guide shows what screens to select if you want to activate a different configuration or make changes in the current configuration. While CMS is running, you can:
●Reconfigure agent splits
●Change line group options
●Reconfigure call flow
●Use the Stored Shift Configurations screen to save your changes or to activate a different configuration
For detailed descriptions of these procedures, see “Dynamic Reconfiguration,” in Section 5, “Supervising CMS.”
You make changes in an operating CMS configuration from the Configuration screen. You can access this screen from:
●The Initialization screen, from which you start call management
(This screen becomes the System Menu screen after you make your first configuration selection).
●Any of the status screens
●System Menu screen for call management
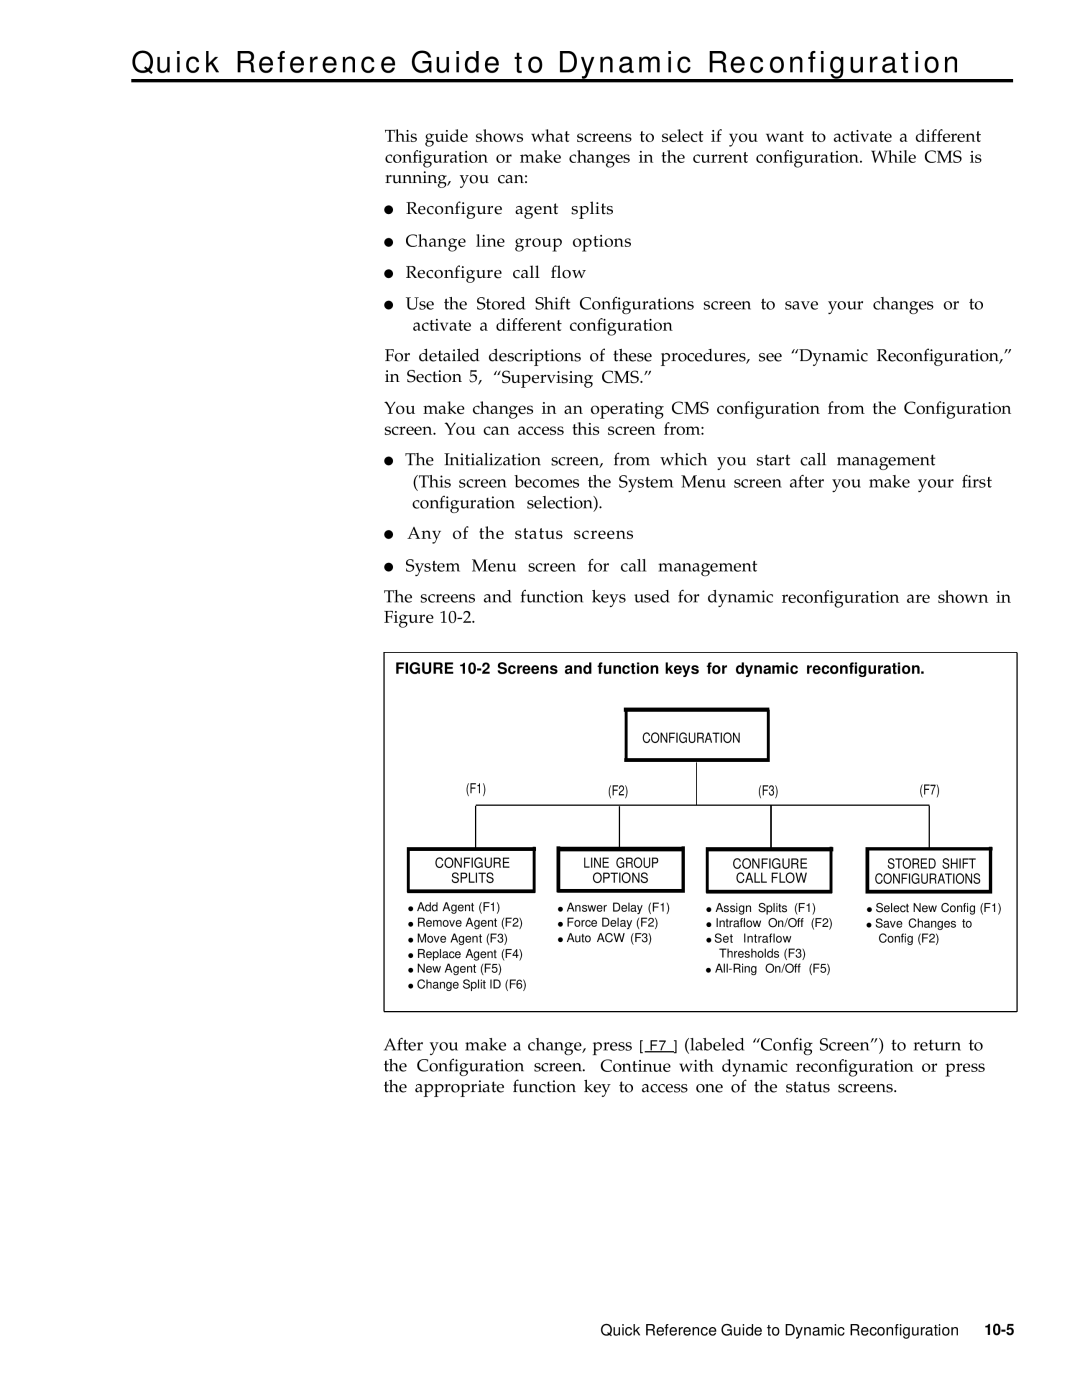
The screens and function keys used for dynamic reconfiguration are shown in
Figure
FIGURE 10-2 Screens and function keys for dynamic reconfiguration.
CONFIGURATION
(F1)(F2)
(F3)(F7)
CONFIGURE
SPLITS
●Add Agent (F1)
●Remove Agent (F2)
●Move Agent (F3)
●Replace Agent (F4)
●New Agent (F5)
●Change Split ID (F6)
LINE GROUP
OPTIONS
●Answer Delay (F1)
●Force Delay (F2)
●Auto ACW (F3)
CONFIGURE
CALL FLOW
●Assign Splits (F1)
●Intraflow On/Off (F2)
●Set Intraflow Thresholds (F3)
●
STORED SHIFT CONFIGURATIONS
●Select New Config (F1)
●Save Changes to Config (F2)
After you make a change, press [ F7 ] (labeled “Config Screen”) to return to the Configuration screen. Continue with dynamic reconfiguration or press the appropriate function key to access one of the status screens.
Quick Reference Guide to Dynamic Reconfiguration
