Appendix A Voice Cards and PIMG Units
Intel Dialogic
Step 2 Settings for jumpers JP2 through JP5 depend on the number of
One card |
| Set jumpers JP2 through JP5 to Off (Figure |
|
| the card. |
|
|
|
Two cards |
| Set jumpers JP2 through JP5 to On (Figure |
|
| both cards. |
|
| |
Three or more cards | Set jumpers JP2 through JP5 to On (Figure | |
|
| Set jumpers JP2 through JP5 to Off (Figure |
|
|
|
Figure |
| |
JP2
Setting
JP3
JP4
JP5
55490
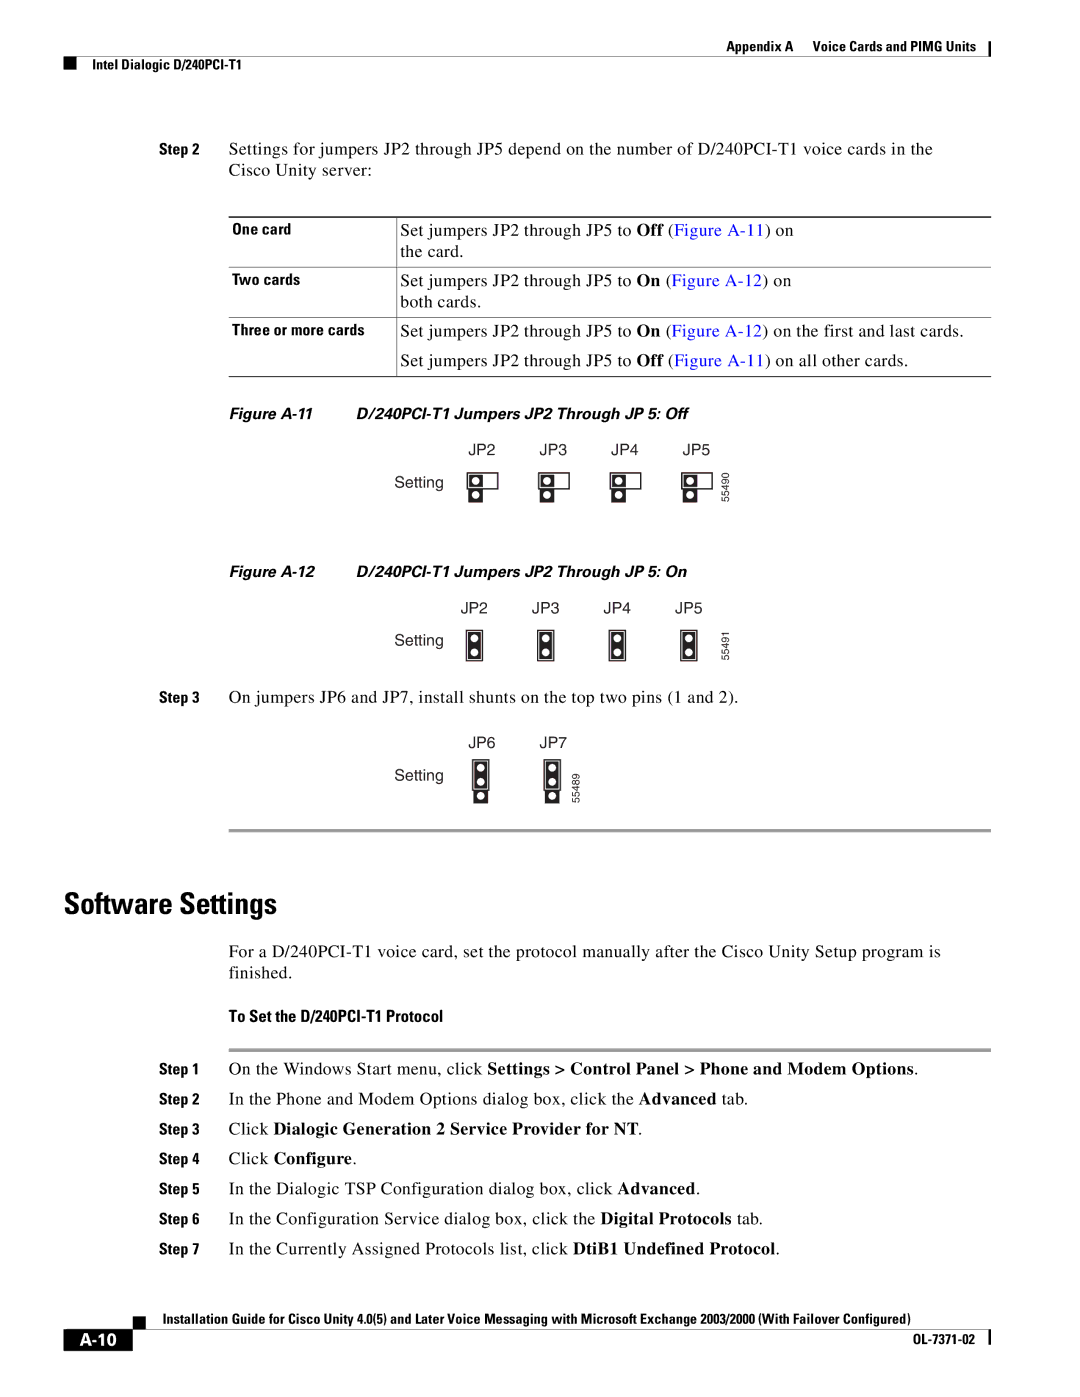
Figure A-12 D/240PCI-T1 Jumpers JP2 Through JP 5: On
JP2 JP3 JP4 JP5
Setting
55491
Step 3 On jumpers JP6 and JP7, install shunts on the top two pins (1 and 2).
Setting
JP6 JP7
55489
Software Settings
For a
To Set the D/240PCI-T1 Protocol
Step 1 On the Windows Start menu, click Settings > Control Panel > Phone and Modem Options. Step 2 In the Phone and Modem Options dialog box, click the Advanced tab.
Step 3 Click Dialogic Generation 2 Service Provider for NT.
Step 4 Click Configure.
Step 5 In the Dialogic TSP Configuration dialog box, click Advanced.
Step 6 In the Configuration Service dialog box, click the Digital Protocols tab.
Step 7 In the Currently Assigned Protocols list, click DtiB1 Undefined Protocol.
Installation Guide for Cisco Unity 4.0(5) and Later Voice Messaging with Microsoft Exchange 2003/2000 (With Failover Configured)
|
| ||
|
|