|
| Security Management (FIPS Mode) |
|
| Enabling SecurID |
|
|
|
|
|
|
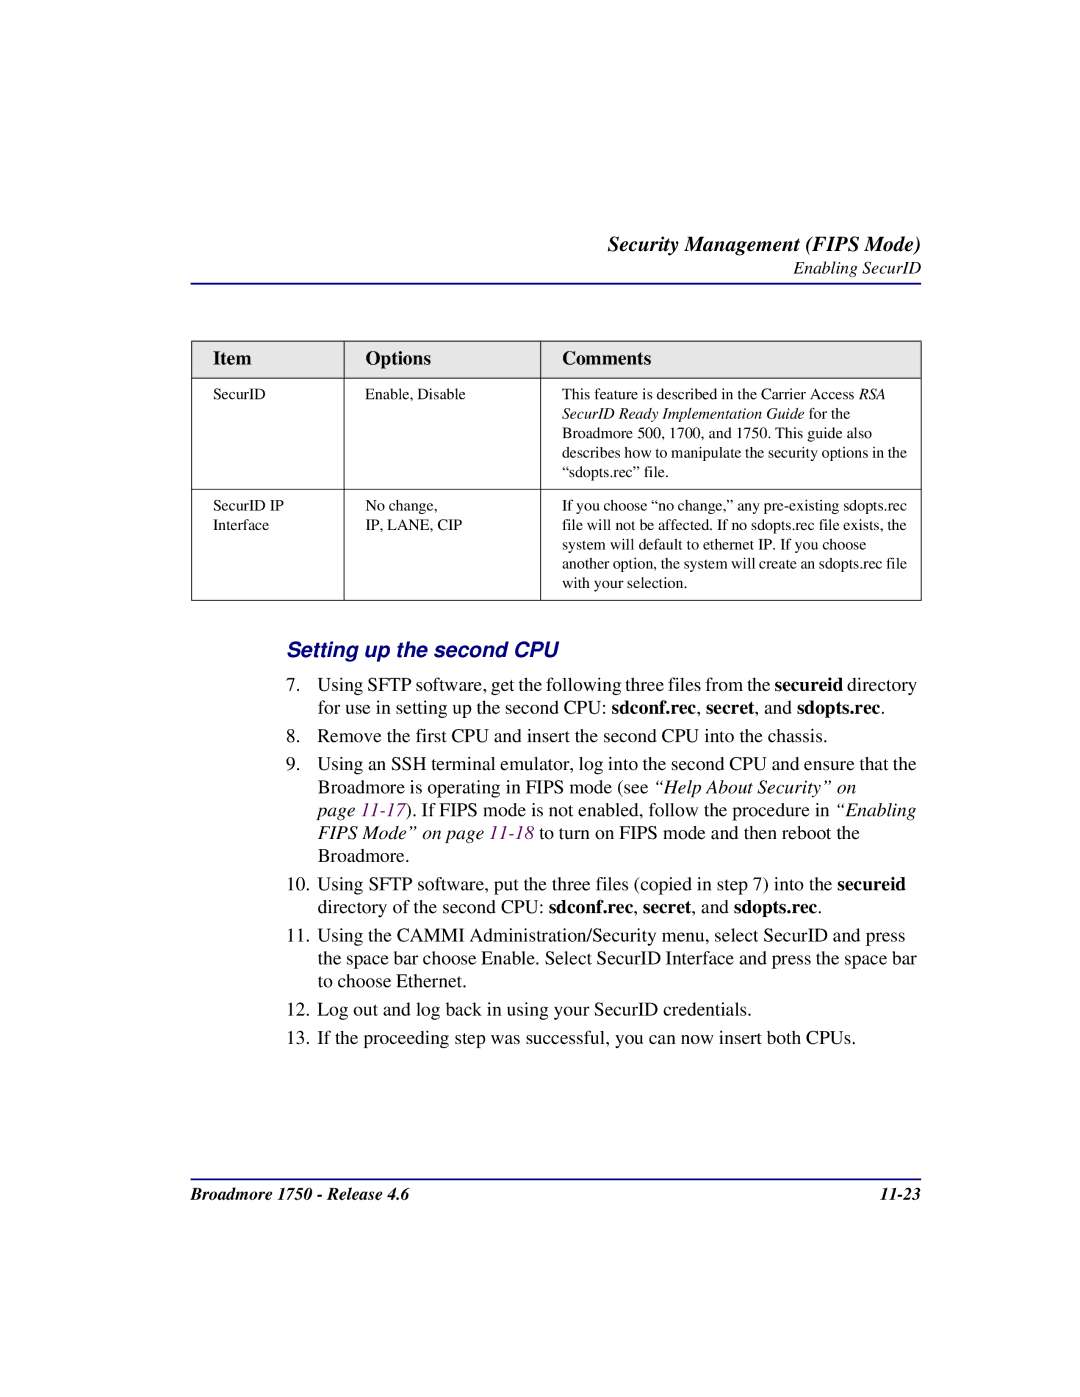
Item | Options | Comments |
|
|
|
SecurID | Enable, Disable | This feature is described in the Carrier Access RSA |
|
| SecurID Ready Implementation Guide for the |
|
| Broadmore 500, 1700, and 1750. This guide also |
|
| describes how to manipulate the security options in the |
|
| “sdopts.rec” file. |
|
|
|
SecurID IP | No change, | If you choose “no change,” any |
Interface | IP, LANE, CIP | file will not be affected. If no sdopts.rec file exists, the |
|
| system will default to ethernet IP. If you choose |
|
| another option, the system will create an sdopts.rec file |
|
| with your selection. |
|
|
|
Setting up the second CPU
7.Using SFTP software, get the following three files from the secureid directory for use in setting up the second CPU: sdconf.rec, secret, and sdopts.rec.
8.Remove the first CPU and insert the second CPU into the chassis.
9.Using an SSH terminal emulator, log into the second CPU and ensure that the Broadmore is operating in FIPS mode (see “Help About Security” on
page
10.Using SFTP software, put the three files (copied in step 7) into the secureid directory of the second CPU: sdconf.rec, secret, and sdopts.rec.
11.Using the CAMMI Administration/Security menu, select SecurID and press the space bar choose Enable. Select SecurID Interface and press the space bar to choose Ethernet.
12.Log out and log back in using your SecurID credentials.
13.If the proceeding step was successful, you can now insert both CPUs.
Broadmore 1750 - Release 4.6 |