Install Auxiliary Equipment
| 4 |
|
|
|
|
1 |
|
| 6 | 8 | |
|
|
| |||
|
|
| T |
|
|
|
|
|
|
| |
T | 3 | T | R |
|
|
|
| ||||
SZ |
|
| |||
|
| ||||
5 | R |
|
| ||
|
| ||||
R | SZ1 |
| 7 | ||
| |||||
2 |
|
| |||
|
| ||||
|
|
|
|
| |
|
|
|
|
| |
S ![]()
S1 ![]()
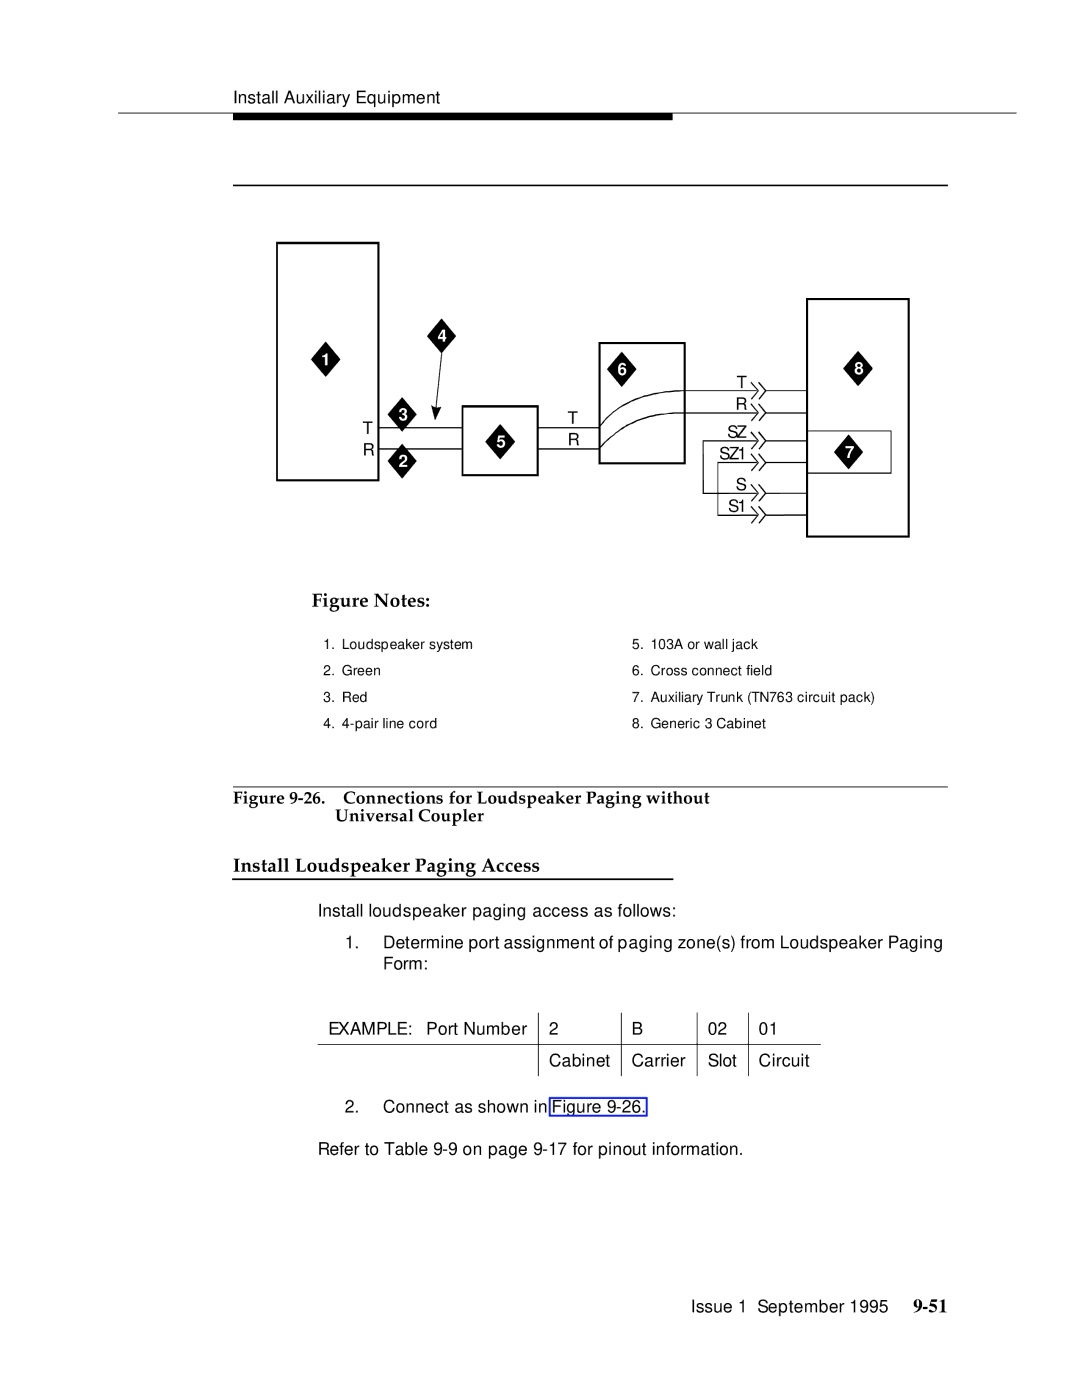
Figure Notes:
1. | Loudspeaker system | 5. | 103A or wall jack |
2. | Green | 6. | Cross connect field |
3. | Red | 7. | Auxiliary Trunk (TN763 circuit pack) |
4. | 8. | Generic 3 Cabinet |
Figure 9-26. Connections for Loudspeaker Paging without
Universal Coupler
Install Loudspeaker Paging Access
Install loudspeaker paging access as follows:
1.Determine port assignment of paging zone(s) from Loudspeaker Paging Form:
EXAMPLE: Port Number | 2 | B | 02 | 01 |
|
|
|
|
|
| Cabinet | Carrier | Slot | Circuit |
|
|
|
|
|
2.Connect as shown in Figure
Refer to Table
Issue 1 September 1995
