Advanced Installation Steps
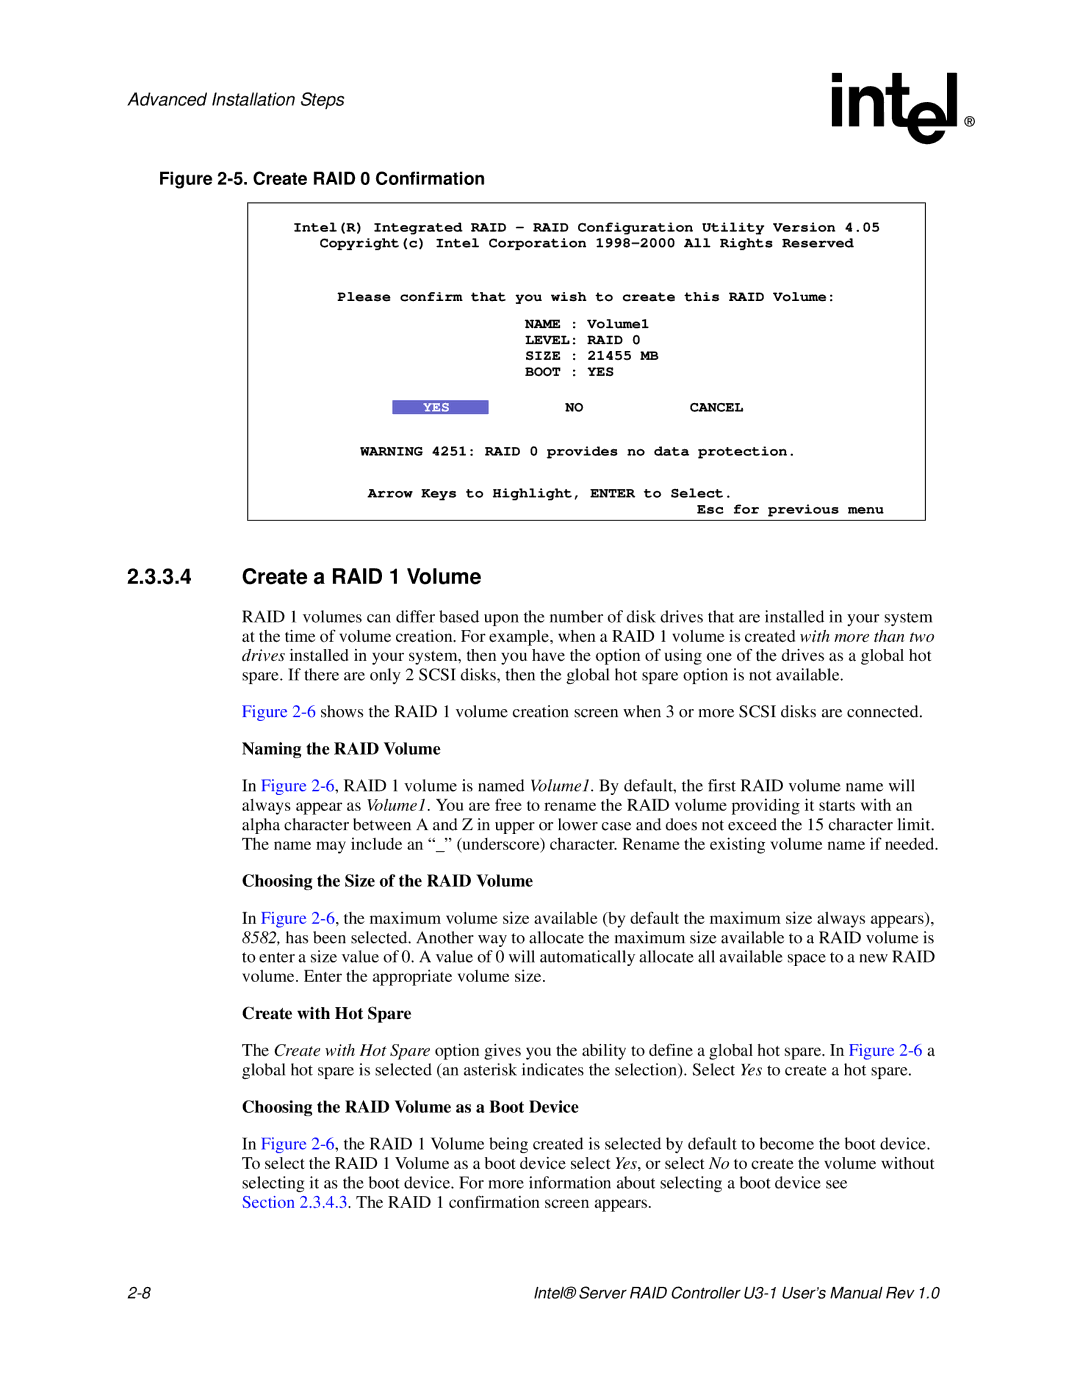
Figure 2-5. Create RAID 0 Confirmation
Intel(R) Integrated RAID - RAID Configuration Utility Version 4.05
Copyright(c) Intel Corporation
Please confirm that you wish to create this RAID Volume:
NAME : Volume1
LEVEL: RAID 0
SIZE : 21455 MB
BOOT : YES
YES | NO | CANCEL |
WARNING 4251: RAID 0 provides no data protection.
Arrow Keys to Highlight, ENTER to Select.
Esc for previous menu
2.3.3.4Create a RAID 1 Volume
RAID 1 volumes can differ based upon the number of disk drives that are installed in your system at the time of volume creation. For example, when a RAID 1 volume is created with more than two drives installed in your system, then you have the option of using one of the drives as a global hot spare. If there are only 2 SCSI disks, then the global hot spare option is not available.
Figure 2-6 shows the RAID 1 volume creation screen when 3 or more SCSI disks are connected.
Naming the RAID Volume
In Figure
Choosing the Size of the RAID Volume
In Figure
Create with Hot Spare
The Create with Hot Spare option gives you the ability to define a global hot spare. In Figure
Choosing the RAID Volume as a Boot Device
In Figure
Section 2.3.4.3. The RAID 1 confirmation screen appears.
Intel® Server RAID Controller |