Advanced Installation Steps
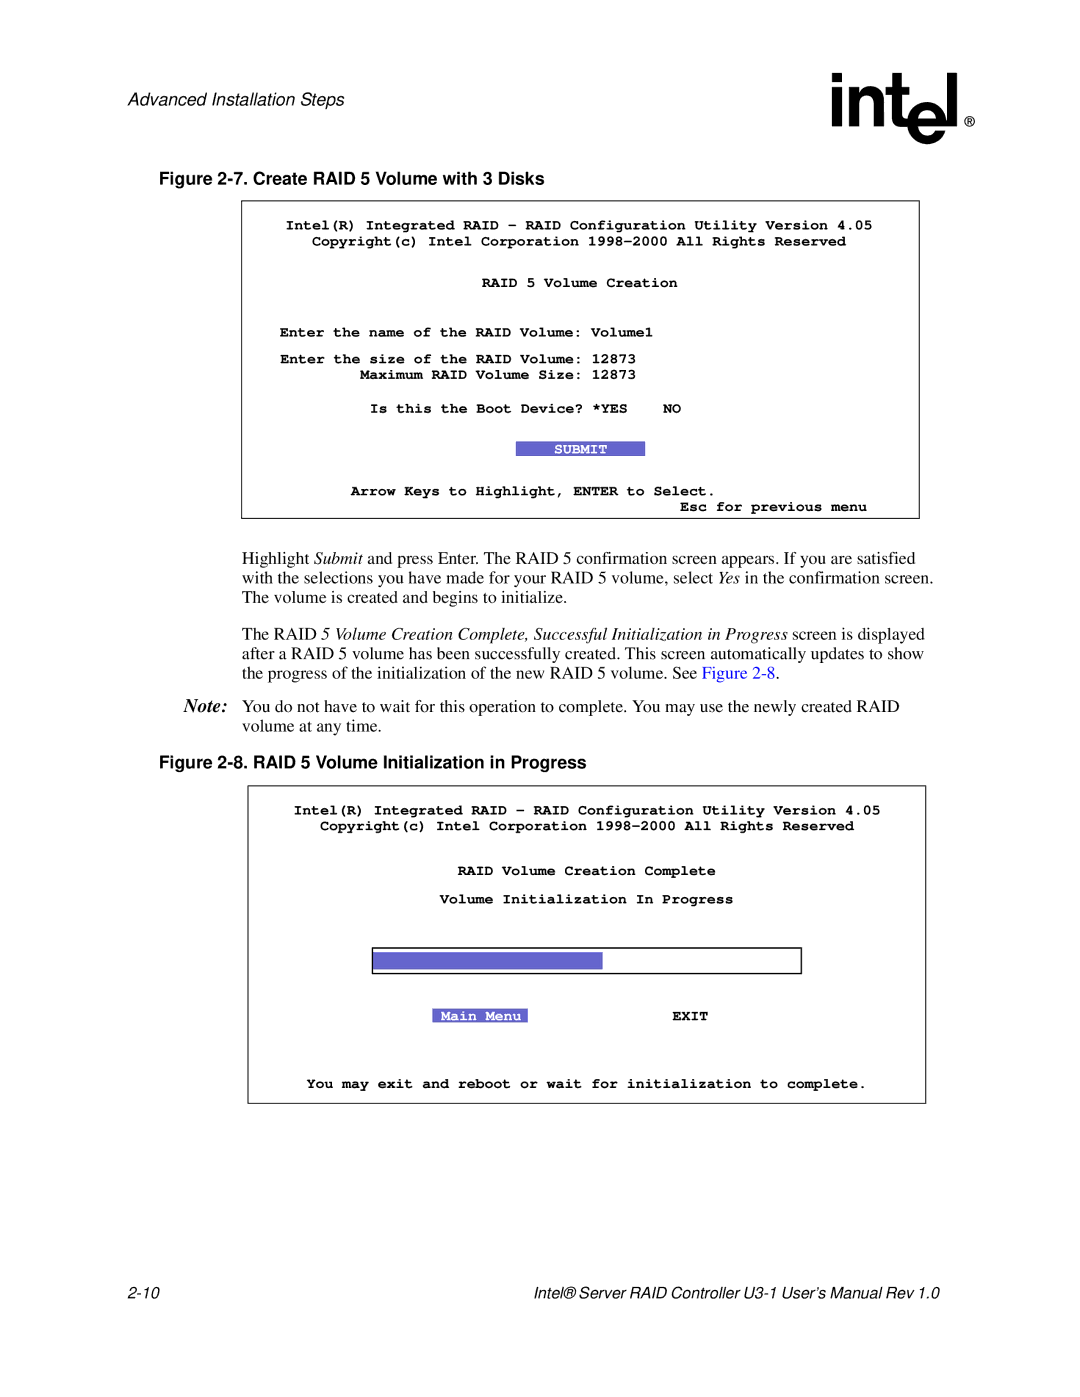
Figure 2-7. Create RAID 5 Volume with 3 Disks
Intel(R) Integrated RAID - RAID Configuration Utility Version 4.05
Copyright(c) Intel Corporation
RAID 5 Volume Creation
Enter the name of the RAID Volume: Volume1
Enter the size of the RAID Volume: 12873
Maximum RAID Volume Size: 12873
Is this the Boot Device? *YES | NO *YES | NO |
SUBMIT
Arrow Keys to Highlight, ENTER to Select.
Esc for previous menu
Highlight Submit and press Enter. The RAID 5 confirmation screen appears. If you are satisfied with the selections you have made for your RAID 5 volume, select Yes in the confirmation screen. The volume is created and begins to initialize.
The RAID 5 Volume Creation Complete, Successful Initialization in Progress screen is displayed after a RAID 5 volume has been successfully created. This screen automatically updates to show the progress of the initialization of the new RAID 5 volume. See Figure
Note: You do not have to wait for this operation to complete. You may use the newly created RAID volume at any time.
Figure 2-8. RAID 5 Volume Initialization in Progress
Intel(R) Integrated RAID - RAID Configuration Utility Version 4.05
Copyright(c) Intel Corporation
RAID Volume Creation Complete
Volume Initialization In Progress
Main Menu | EXIT |
You may exit and reboot or wait for initialization to complete.
Intel® Server RAID Controller |