Advanced Installation Steps
c.Select option 1 (by typing 1) to install the requirements and components (Figure
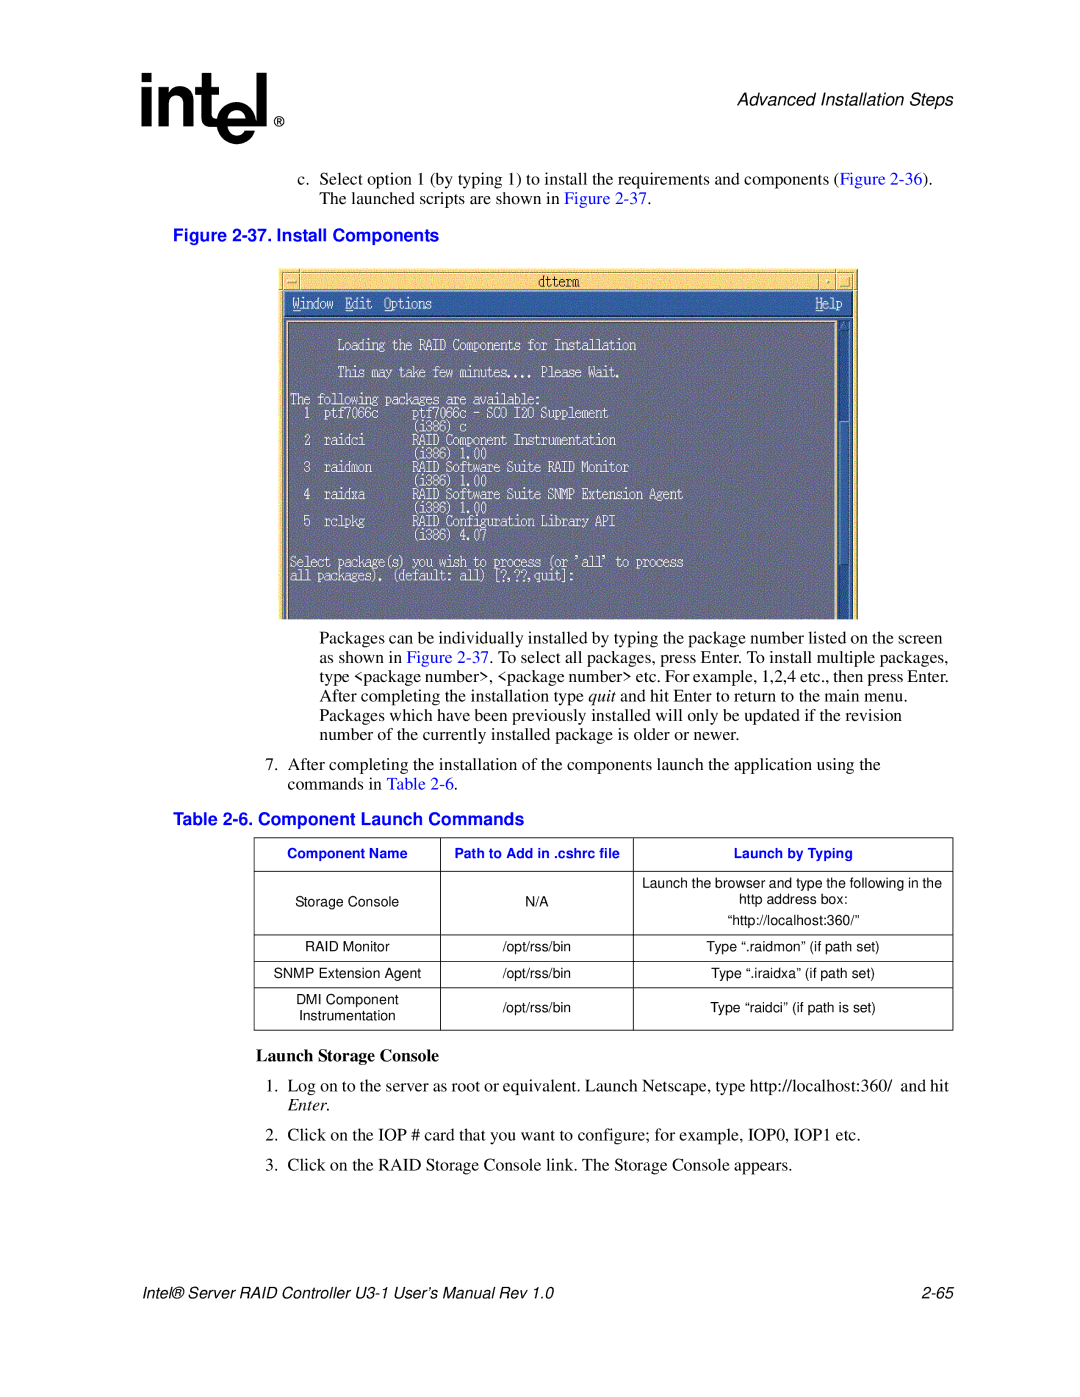
Figure 2-37. Install Components
Packages can be individually installed by typing the package number listed on the screen as shown in Figure
Packages which have been previously installed will only be updated if the revision number of the currently installed package is older or newer.
7.After completing the installation of the components launch the application using the commands in Table
Table 2-6. Component Launch Commands
Component Name | Path to Add in .cshrc file | Launch by Typing | |
|
|
| |
|
| Launch the browser and type the following in the | |
Storage Console | N/A | http address box: | |
|
| “http://localhost:360/” | |
|
|
| |
RAID Monitor | /opt/rss/bin | Type “.raidmon” (if path set) | |
|
|
| |
SNMP Extension Agent | /opt/rss/bin | Type “.iraidxa” (if path set) | |
|
|
| |
DMI Component | /opt/rss/bin | Type “raidci” (if path is set) | |
Instrumentation | |||
|
| ||
|
|
|
Launch Storage Console
1.Log on to the server as root or equivalent. Launch Netscape, type http://localhost:360/ and hit Enter.
2.Click on the IOP # card that you want to configure; for example, IOP0, IOP1 etc.
3.Click on the RAID Storage Console link. The Storage Console appears.
Intel® Server RAID Controller |