Section 3 Fax Operation (Various Functions)
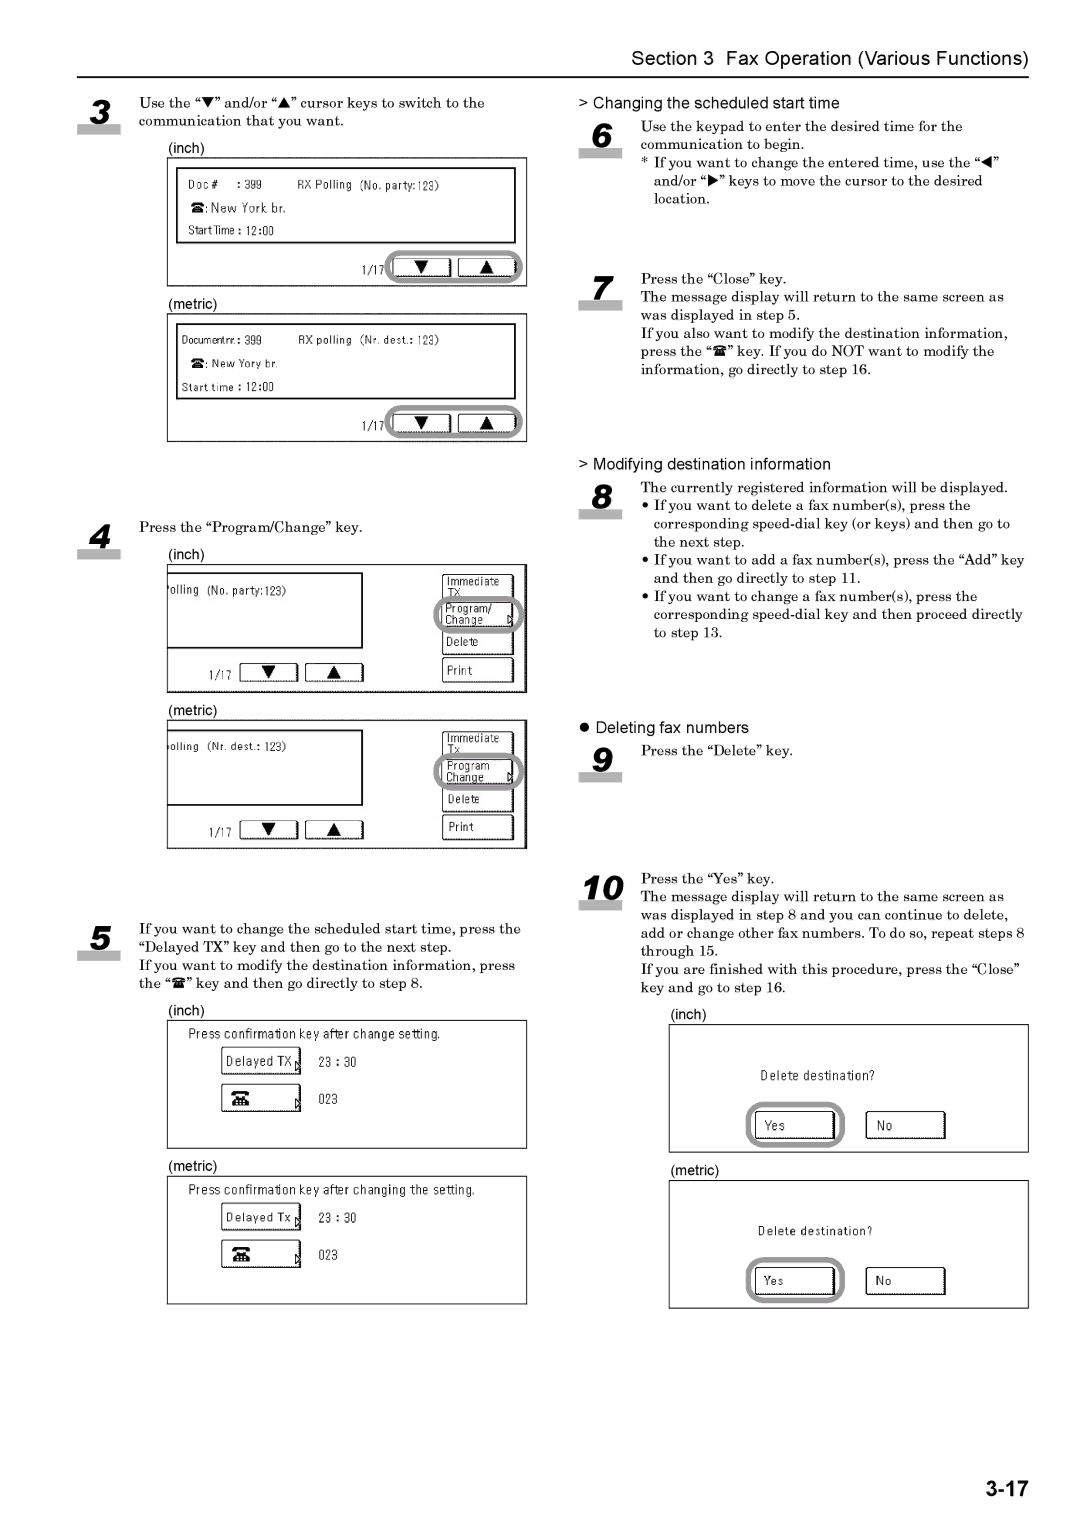
3 | Use the “T” and/or “S” cursor keys to switch to the |
communication that you want. | |
|
|
(inch)
(metric)
> Changing the scheduled start time
6 | Use the keypad to enter the desired time for the |
communication to begin. | |
| * If you want to change the entered time, use the “W” |
| |
| and/or “X” keys to move the cursor to the desired |
| location. |
7 | Press the “Close” key. |
The message display will return to the same screen as |
was displayed in step 5.
If you also want to modify the destination information, press the “ ” key. If you do NOT want to modify the information, go directly to step 16.
4 | Press the “Program/Change” key. | |
|
| (inch) |
|
|
|
|
|
|
(metric)
> Modifying destination information
8 | The currently registered information will be displayed. |
• If you want to delete a fax number(s), press the |
corresponding
• If you want to add a fax number(s), press the “Add” key and then go directly to step 11.
• If you want to change a fax number(s), press the corresponding
zDeleting fax numbers
9 | Press the “Delete” key. |
|
|
5 | If you want to change the scheduled start time, press the |
“Delayed TX” key and then go to the next step. |
If you want to modify the destination information, press the “ ” key and then go directly to step 8.
(inch)
(metric)
10 | Press the “Yes” key. |
The message display will return to the same screen as |
was displayed in step 8 and you can continue to delete, add or change other fax numbers. To do so, repeat steps 8 through 15.
If you are finished with this procedure, press the “Close” key and go to step 16.
