Section 9 Network FAX Settings (Option)
Registering the Network FAX Information
Register the following items when you want to use the Network FAX functions.
•File name (Transmission/Reception)...For registering the default file name when documents which have been transmitted or received using the Network FAX functions are saved in the designated folder.
•IP address / Host name...For registering the IP address or host name of the server computer in which documents which have been sent or received using the Network FAX functions are saved. In this case, the Scanner File Utility needs to be installed.
•Administrator's
*If you want to use SMTP authorization, be sure to register the appropriate account name and password in the Mail Server.
*In order to use SMTP authorization, the SMTP authorization setting must be turned ON in the scanner. Refer to the Operation Guide for your scanner.
*If no information is entered here, the Activity Report and Power Failure Report will be printed out at the fax machine.
•Save Folder Number...For registering the number of the folder in which documents which have been transmitted or received using the Network FAX functions will be saved.
*The folder in which the documents will be saved is set in the Scanner File Utility.
* If you want to cancel the procedure part way through, press the Reset key. The touch panel will return to the initial mode settings.
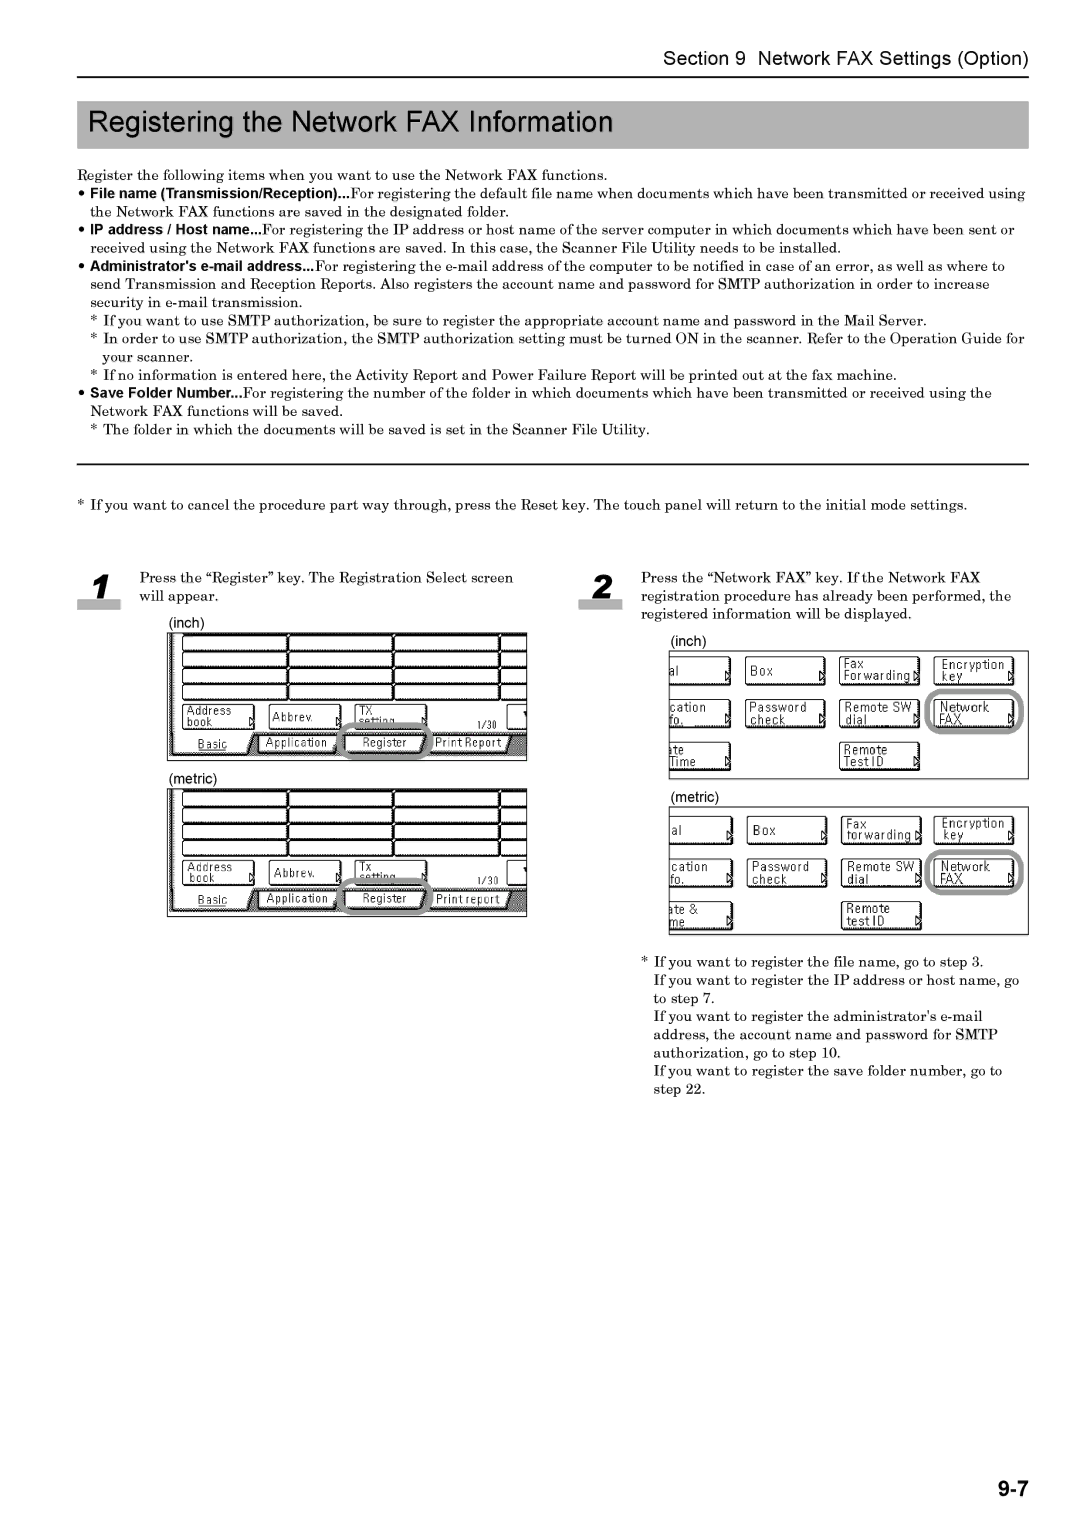
1 | Press the “Register” key. The Registration Select screen |
will appear. | |
|
|
(inch)
2 | Press the “Network FAX” key. If the Network FAX |
registration procedure has already been performed, the |
registered information will be displayed. (inch)
(metric) (metric)
* If you want to register the file name, go to step 3.
If you want to register the IP address or host name, go to step 7.
If you want to register the administrator's
If you want to register the save folder number, go to step 22.
