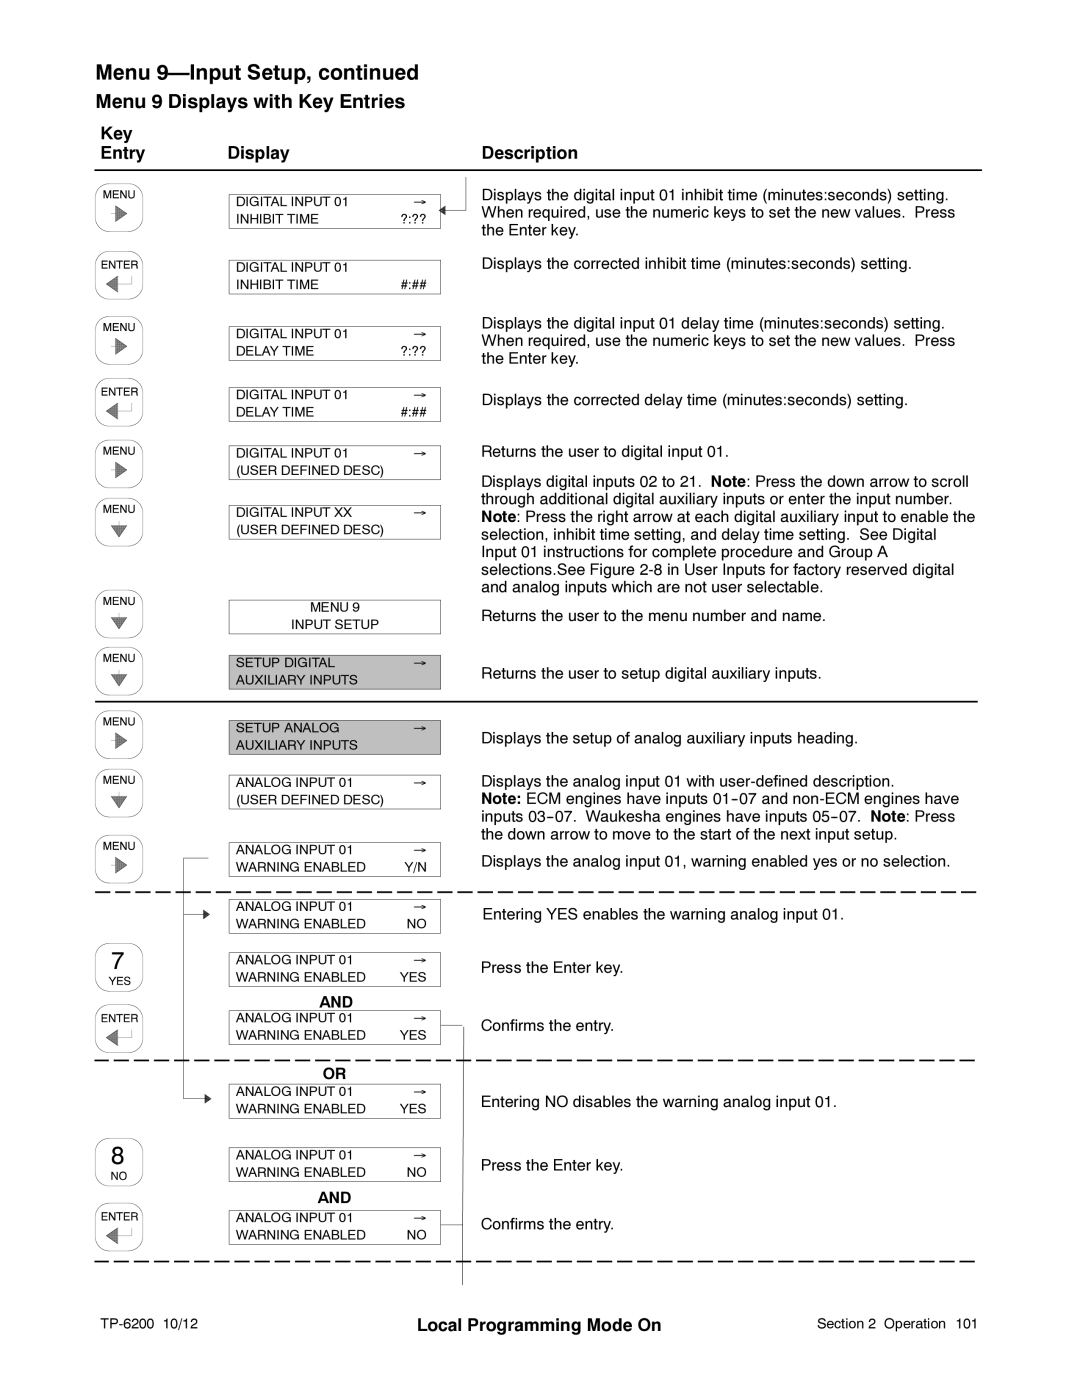
Menu 9—Input Setup, continued
Menu 9 Displays with Key Entries
Key |
|
|
Entry | Display | Description |
DIGITAL INPUT 01 | → |
INHIBIT TIME | ?:?? |
|
|
DIGITAL INPUT 01 |
|
INHIBIT TIME | #:## |
|
|
DIGITAL INPUT 01 | → |
DELAY TIME | ?:?? |
|
|
DIGITAL INPUT 01 | → |
DELAY TIME | #:## |
|
|
DIGITAL INPUT 01 | → |
(USER DEFINED DESC) |
|
|
|
DIGITAL INPUT XX | → |
(USER DEFINED DESC) |
|
Displays the digital input 01 inhibit time (minutes:seconds) setting. When required, use the numeric keys to set the new values. Press the Enter key.
Displays the corrected inhibit time (minutes:seconds) setting.
Displays the digital input 01 delay time (minutes:seconds) setting. When required, use the numeric keys to set the new values. Press the Enter key.
Displays the corrected delay time (minutes:seconds) setting.
Returns the user to digital input 01.
Displays digital inputs 02 to 21. Note: Press the down arrow to scroll through additional digital auxiliary inputs or enter the input number. Note: Press the right arrow at each digital auxiliary input to enable the selection, inhibit time setting, and delay time setting. See Digital Input 01 instructions for complete procedure and Group A selections.See Figure
MENU 9
INPUT SETUP
SETUP DIGITAL | → |
AUXILIARY INPUTS |
|
|
|
Returns the user to the menu number and name.
Returns the user to setup digital auxiliary inputs.
SETUP ANALOG | → |
AUXILIARY INPUTS |
|
|
|
ANALOG INPUT 01 | → |
(USER DEFINED DESC) |
|
Displays the setup of analog auxiliary inputs heading.
Displays the analog input 01 with
Note: ECM engines have inputs
inputs
| ANALOG INPUT 01 |
|
|
|
| → |
| ||||||||||||||||
| WARNING ENABLED |
|
|
| Y/N |
| |||||||||||||||||
|
|
|
|
|
|
|
|
|
|
|
|
|
|
|
|
|
|
|
|
|
|
|
|
|
|
|
|
|
|
|
| ||||||||||||||||
| ANALOG INPUT 01 |
|
|
|
| → |
| ||||||||||||||||
| WARNING ENABLED |
|
|
| NO |
| |||||||||||||||||
|
|
|
|
|
|
|
|
|
|
|
|
|
|
|
|
|
|
|
|
|
|
|
|
| ANALOG INPUT 01 |
|
|
|
| → |
| ||||||||||||||||
| WARNING ENABLED |
|
|
| YES |
| |||||||||||||||||
|
|
|
|
|
|
|
|
|
|
|
|
|
|
|
|
|
|
|
|
|
|
|
|
AND
Displays the analog input 01, warning enabled yes or no selection.
Entering YES enables the warning analog input 01.
Press the Enter key.
ANALOG INPUT 01 | → |
WARNING ENABLED | YES |
OR
| ANALOG INPUT 01 |
|
|
|
| → |
| |||||||||||||||
| WARNING ENABLED |
|
|
| YES |
| ||||||||||||||||
|
|
|
|
|
|
|
|
|
|
|
|
|
|
|
|
|
|
|
|
|
|
|
| ANALOG INPUT 01 |
|
|
|
| → |
| |||||||||||||||
| WARNING ENABLED |
|
|
| NO |
| ||||||||||||||||
|
|
|
|
|
|
|
|
| AND |
|
|
|
|
|
|
|
|
| ||||
|
|
|
|
|
|
|
|
|
|
|
|
|
|
|
|
|
|
|
|
|
|
|
| ANALOG INPUT 01 |
|
|
|
| → |
| |||||||||||||||
| WARNING ENABLED |
|
|
| NO |
| ||||||||||||||||
|
|
|
|
|
|
|
|
|
|
|
|
|
|
|
|
|
|
|
|
|
|
|
Confirms the entry.
Entering NO disables the warning analog input 01.
Press the Enter key.
Confirms the entry.
| Local Programming Mode On | Section 2 Operation 101 |