2.5 Reviewing Digital Display
The user interacts with the controller with a keypad and digital display. Use the keypad to access the generator set informational data and preset settings. This review section shows how to access the data. See Section 2.8, Local Programming Mode On, for instructions on how to change the information. See Figure
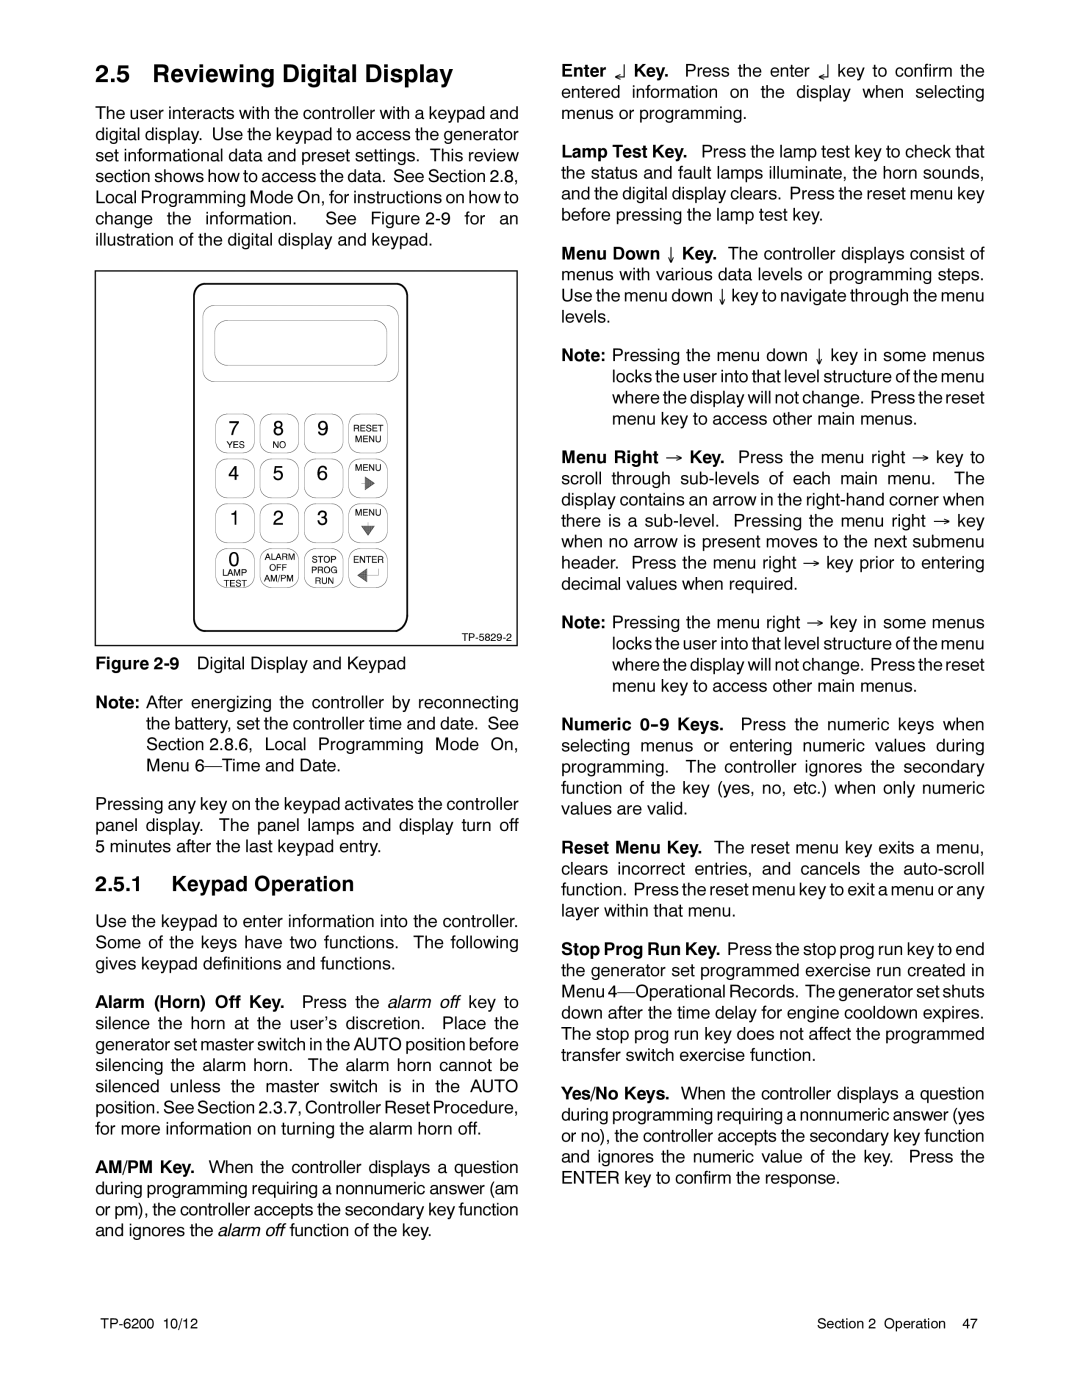
Figure 2-9 Digital Display and Keypad
Note: After energizing the controller by reconnecting the battery, set the controller time and date. See Section 2.8.6, Local Programming Mode On, Menu
Pressing any key on the keypad activates the controller panel display. The panel lamps and display turn off 5 minutes after the last keypad entry.
2.5.1Keypad Operation
Use the keypad to enter information into the controller. Some of the keys have two functions. The following gives keypad definitions and functions.
Alarm (Horn) Off Key. Press the alarm off key to silence the horn at the user’s discretion. Place the generator set master switch in the AUTO position before silencing the alarm horn. The alarm horn cannot be silenced unless the master switch is in the AUTO position. See Section 2.3.7, Controller Reset Procedure, for more information on turning the alarm horn off.
AM/PM Key. When the controller displays a question during programming requiring a nonnumeric answer (am or pm), the controller accepts the secondary key function and ignores the alarm off function of the key.
Enter ↵ Key. Press the enter ↵ key to confirm the entered information on the display when selecting menus or programming.
Lamp Test Key. Press the lamp test key to check that the status and fault lamps illuminate, the horn sounds, and the digital display clears. Press the reset menu key before pressing the lamp test key.
Menu Down ↓ Key. The controller displays consist of menus with various data levels or programming steps. Use the menu down ↓ key to navigate through the menu levels.
Note: Pressing the menu down ↓ key in some menus locks the user into that level structure of the menu where the display will not change. Press the reset menu key to access other main menus.
Menu Right → Key. Press the menu right → key to scroll through
Note: Pressing the menu right → key in some menus locks the user into that level structure of the menu where the display will not change. Press the reset menu key to access other main menus.
Numeric
Reset Menu Key. The reset menu key exits a menu, clears incorrect entries, and cancels the
Stop Prog Run Key. Press the stop prog run key to end the generator set programmed exercise run created in Menu
Yes/No Keys. When the controller displays a question during programming requiring a nonnumeric answer (yes or no), the controller accepts the secondary key function and ignores the numeric value of the key. Press the ENTER key to confirm the response.
| Section 2 Operation 47 |