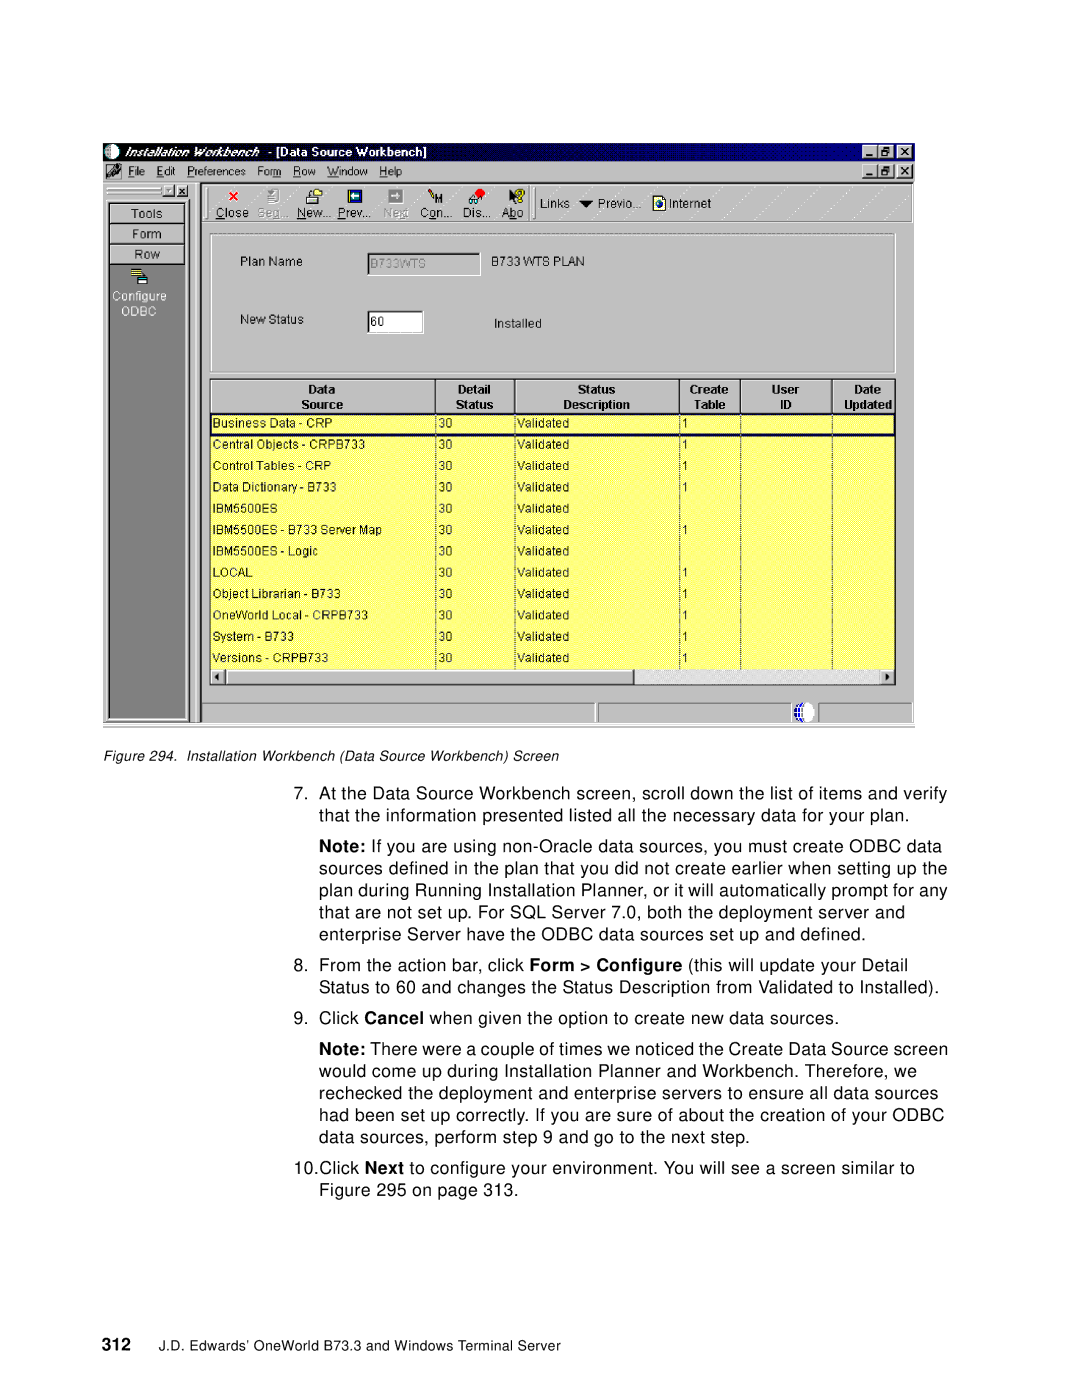
Figure 294. Installation Workbench (Data Source Workbench) Screen
7.At the Data Source Workbench screen, scroll down the list of items and verify that the information presented listed all the necessary data for your plan.
Note: If you are using
8.From the action bar, click Form > Configure (this will update your Detail Status to 60 and changes the Status Description from Validated to Installed).
9.Click Cancel when given the option to create new data sources.
Note: There were a couple of times we noticed the Create Data Source screen would come up during Installation Planner and Workbench. Therefore, we rechecked the deployment and enterprise servers to ensure all data sources had been set up correctly. If you are sure of about the creation of your ODBC data sources, perform step 9 and go to the next step.
10.Click Next to configure your environment. You will see a screen similar to Figure 295 on page 313.
312J.D. Edwards’ OneWorld B73.3 and Windows Terminal Server