7.5.4Adding a Logical Printer
1.On the Printers (GH9013), choose Work with Logical Printers (P98616).
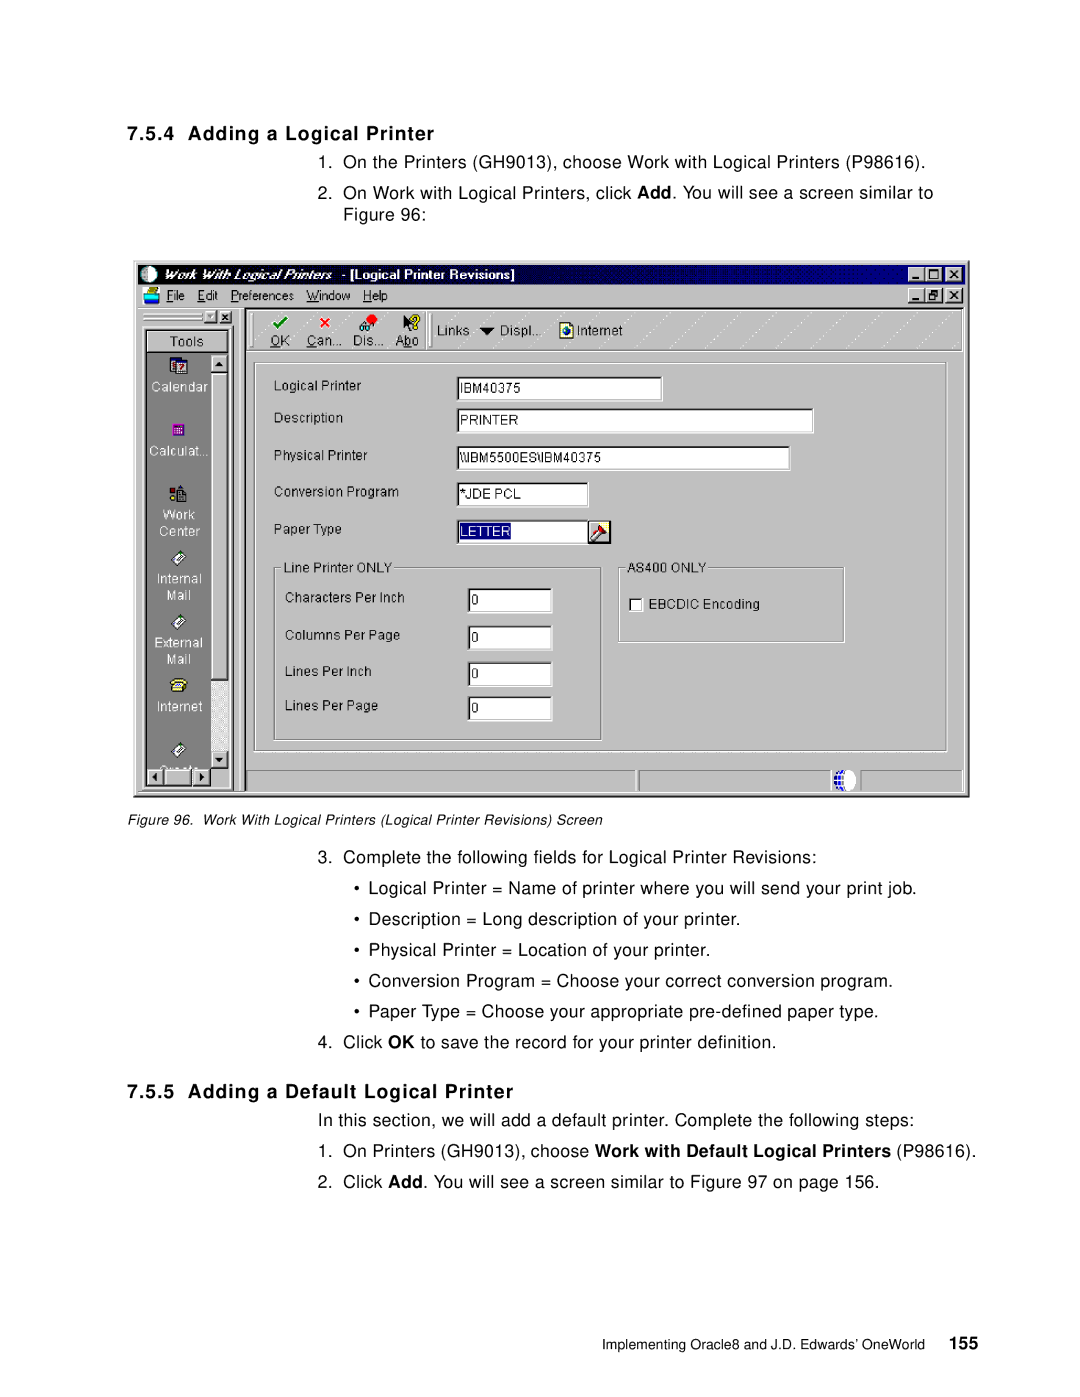
2.On Work with Logical Printers, click Add. You will see a screen similar to Figure 96:
Figure 96. Work With Logical Printers (Logical Printer Revisions) Screen
3.Complete the following fields for Logical Printer Revisions:
•Logical Printer = Name of printer where you will send your print job.
•Description = Long description of your printer.
•Physical Printer = Location of your printer.
•Conversion Program = Choose your correct conversion program.
•Paper Type = Choose your appropriate
4.Click OK to save the record for your printer definition.
7.5.5Adding a Default Logical Printer
In this section, we will add a default printer. Complete the following steps:
1.On Printers (GH9013), choose Work with Default Logical Printers (P98616).
2.Click Add. You will see a screen similar to Figure 97 on page 156.
Implementing Oracle8 and J.D. Edwards’ OneWorld 155