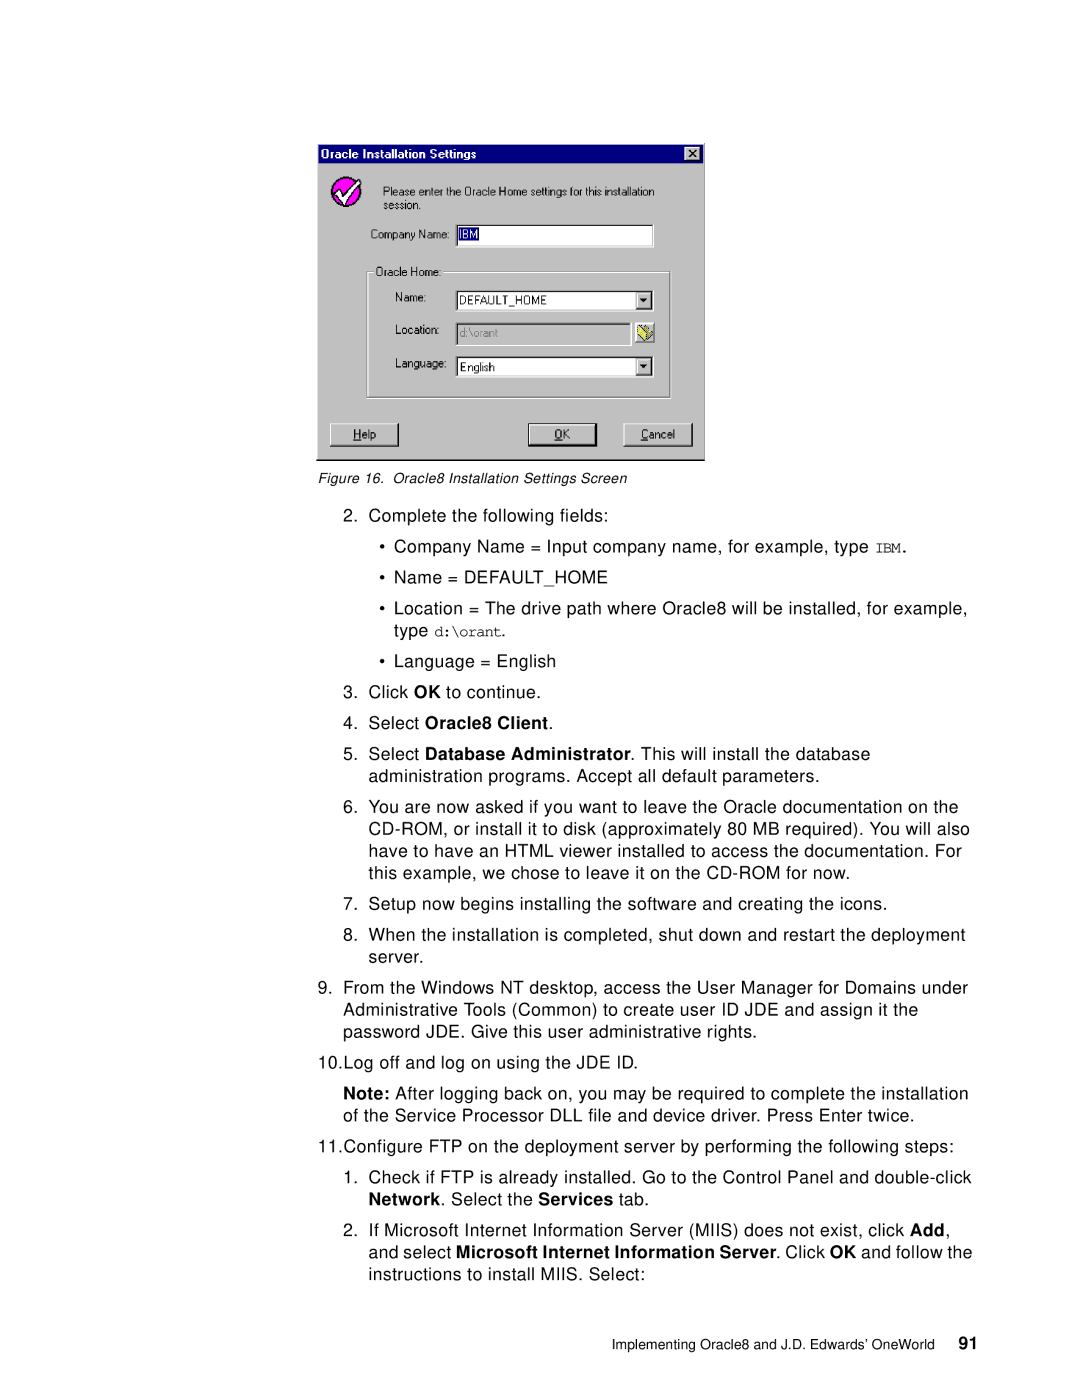
Figure 16. Oracle8 Installation Settings Screen
2.Complete the following fields:
•Company Name = Input company name, for example, type IBM.
•Name = DEFAULT_HOME
•Location = The drive path where Oracle8 will be installed, for example, type d:\orant.
•Language = English
3.Click OK to continue.
4.Select Oracle8 Client.
5.Select Database Administrator. This will install the database administration programs. Accept all default parameters.
6.You are now asked if you want to leave the Oracle documentation on the
7.Setup now begins installing the software and creating the icons.
8.When the installation is completed, shut down and restart the deployment server.
9.From the Windows NT desktop, access the User Manager for Domains under Administrative Tools (Common) to create user ID JDE and assign it the password JDE. Give this user administrative rights.
10.Log off and log on using the JDE ID.
Note: After logging back on, you may be required to complete the installation of the Service Processor DLL file and device driver. Press Enter twice.
11.Configure FTP on the deployment server by performing the following steps:
1.Check if FTP is already installed. Go to the Control Panel and
2.If Microsoft Internet Information Server (MIIS) does not exist, click Add, and select Microsoft Internet Information Server. Click OK and follow the instructions to install MIIS. Select:
Implementing Oracle8 and J.D. Edwards’ OneWorld 91
