HP Classroom Manager 10.61
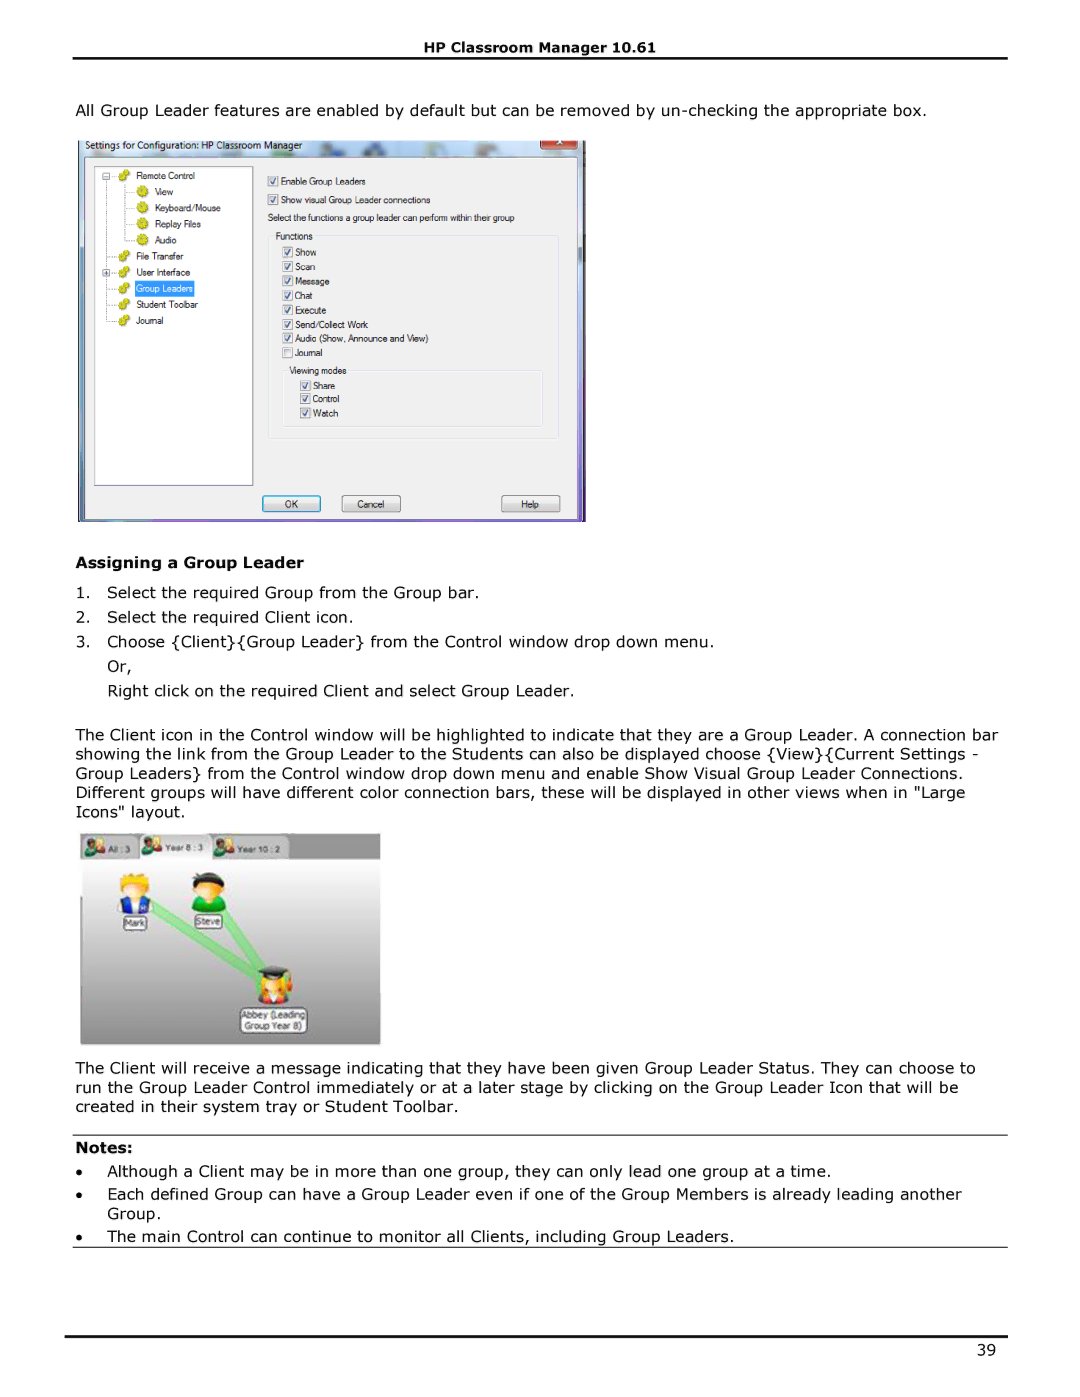
All Group Leader features are enabled by default but can be removed by
Assigning a Group Leader
1.Select the required Group from the Group bar.
2.Select the required Client icon.
3.Choose {Client}{Group Leader} from the Control window drop down menu. Or,
Right click on the required Client and select Group Leader.
The Client icon in the Control window will be highlighted to indicate that they are a Group Leader. A connection bar showing the link from the Group Leader to the Students can also be displayed choose {View}{Current Settings - Group Leaders} from the Control window drop down menu and enable Show Visual Group Leader Connections. Different groups will have different color connection bars, these will be displayed in other views when in "Large Icons" layout.
The Client will receive a message indicating that they have been given Group Leader Status. They can choose to run the Group Leader Control immediately or at a later stage by clicking on the Group Leader Icon that will be created in their system tray or Student Toolbar.
Notes:
∙Although a Client may be in more than one group, they can only lead one group at a time.
∙Each defined Group can have a Group Leader even if one of the Group Members is already leading another Group.
∙The main Control can continue to monitor all Clients, including Group Leaders.
39