HP Classroom Manager 10.61
5.The location on the Client workstations where the files/directories are copied to is called the Destination Directory. Unless otherwise specified, the Client Destination Directory will be the same as the item(s) location on the Control workstation. If the Client does not have the same Directory available, the item(s) will be copied to the C Drive by default and the folders automatically created.
Or,
To set a specific Destination Directory on the Client workstation, right click on the Client icon in the Remote Pane and choose Set Destination. Specify a destination, click OK.
6.Click Copy.
Sending and Collecting Work
The Send/Collect work feature enables you to send a document or a number of documents to individual or multiple Client workstations. You can then collect Students‟ responses on your workstation.
To Send work
Two methods are available for sending
∙Quick Send is useful for
∙Advanced Send enables you to store the properties of an operation that will be performed regularly and provides greater flexibility as to which Students the work is sent to.
To Send Work Using Quick Send
1.Decide which Students to send work to, All or a defined Group. You cannot select individual Students using Quick Send.
2.Choose {School}{Send/Collect Work – Quick Send} from the Control window drop down menu. Or,
Click the Send/Collect icon on the Control toolbar and choose Send Work.
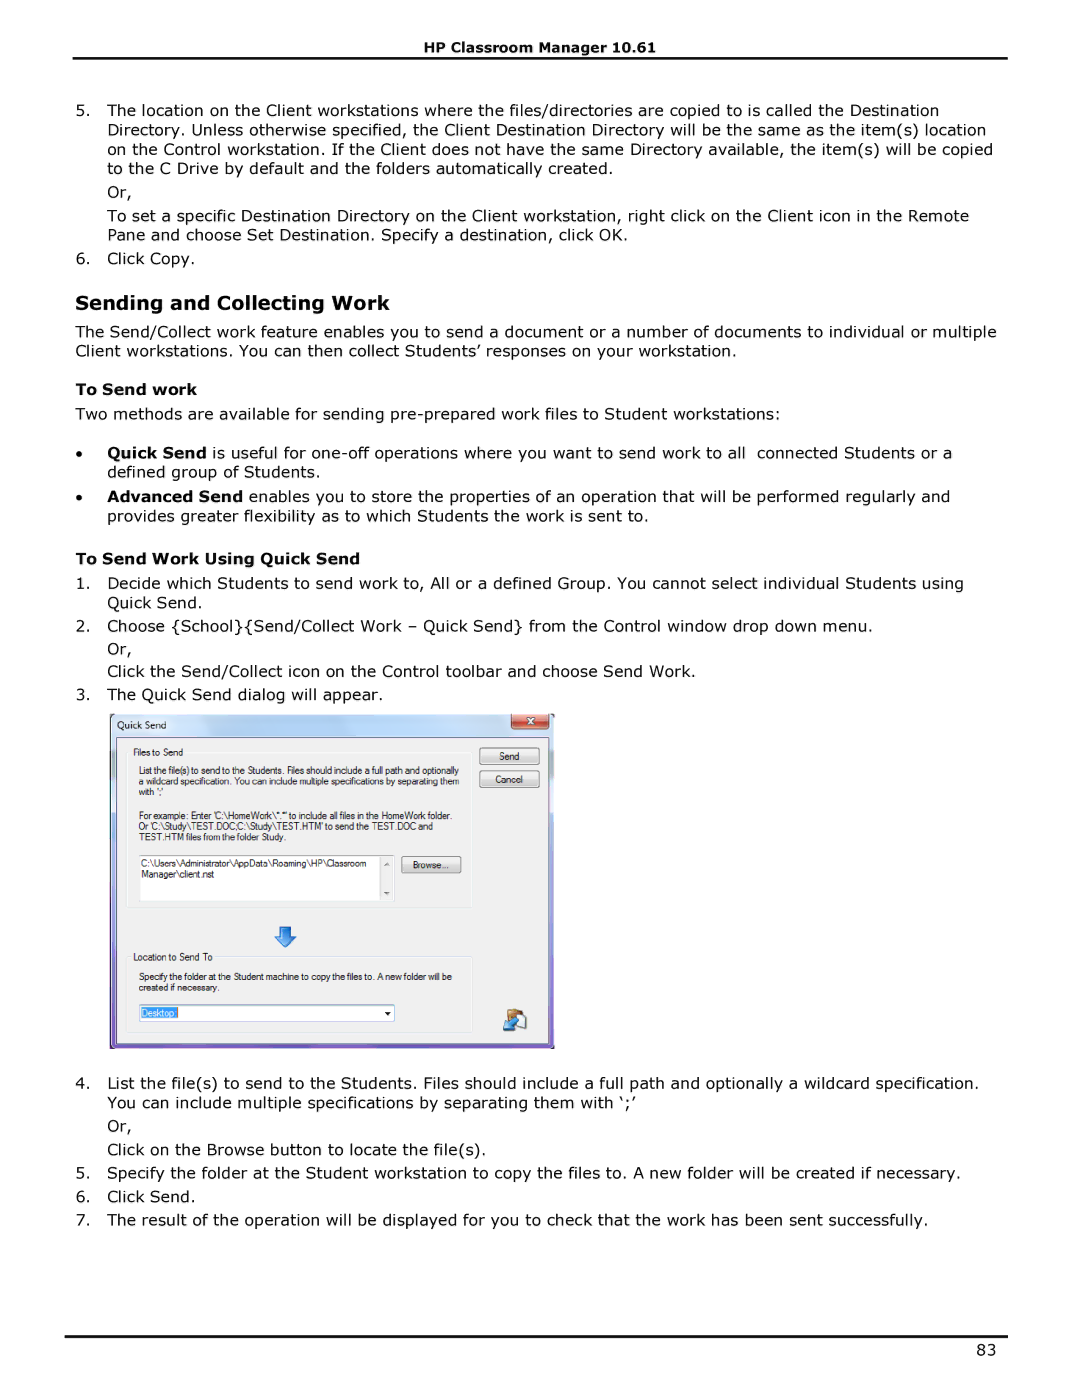
3.The Quick Send dialog will appear.
4.List the file(s) to send to the Students. Files should include a full path and optionally a wildcard specification.
You can include multiple specifications by separating them with „;‟
Or,
Click on the Browse button to locate the file(s).
5.Specify the folder at the Student workstation to copy the files to. A new folder will be created if necessary.
6.Click Send.
7.The result of the operation will be displayed for you to check that the work has been sent successfully.
83
