XS712T Smart Switch
IPv6 Network Configuration
Use the IPv6 Network Configuration screen to configure the IPv6 network interface, which is the logical interface used for
To access the switch over a IPv6 network, you must initially configure the switch with IPv6 information (IPv6 prefix, prefix length, and default gateway). IPv6 can be configured using any of the following options:
•IPv6 Auto Configuration
•DHCPv6
When
•
•
To configure the network information for an IPv6 network:
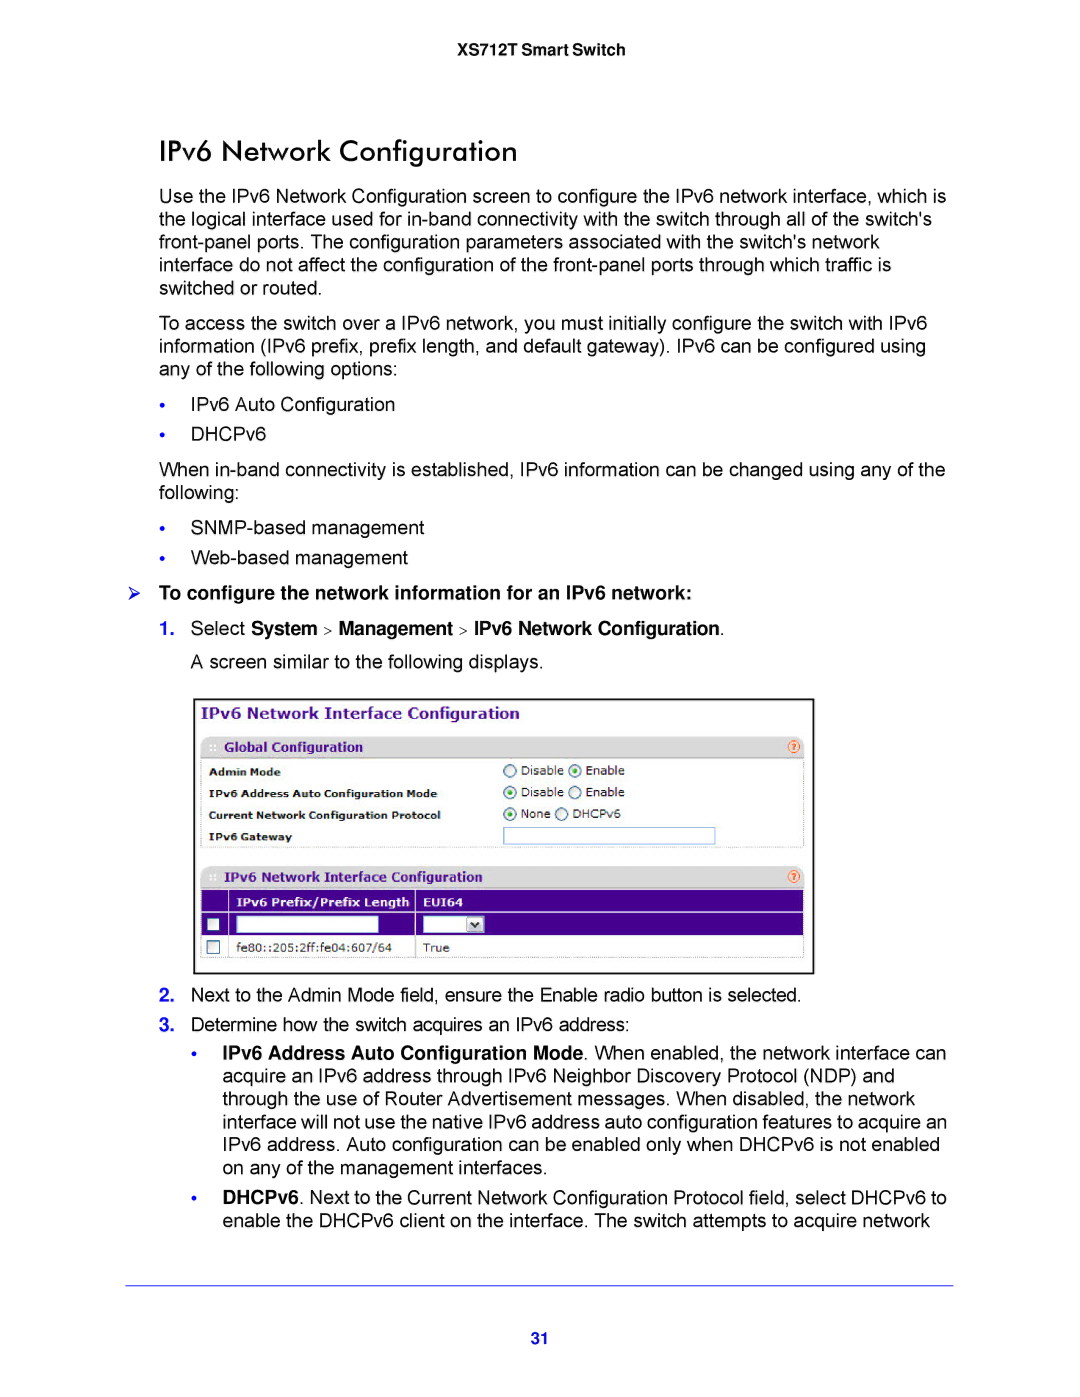
1. Select System > Management > IPv6 Network Configuration. A screen similar to the following displays.
2.Next to the Admin Mode field, ensure the Enable radio button is selected.
3.Determine how the switch acquires an IPv6 address:
•IPv6 Address Auto Configuration Mode. When enabled, the network interface can acquire an IPv6 address through IPv6 Neighbor Discovery Protocol (NDP) and through the use of Router Advertisement messages. When disabled, the network interface will not use the native IPv6 address auto configuration features to acquire an IPv6 address. Auto configuration can be enabled only when DHCPv6 is not enabled on any of the management interfaces.
•DHCPv6. Next to the Current Network Configuration Protocol field, select DHCPv6 to enable the DHCPv6 client on the interface. The switch attempts to acquire network
31