XS712T Smart Switch
host (administrative system) in the 192.168.0.0/24 network and change the settings by using the web management interface on the switch. For information about how to set the IP address on the administrative system so it is in the same subnet as the default IP address of the switch, see Configure the Network Settings on the Administrative System on page 12.
Discover a Switch in a Network with a DHCP Server
This section describes how to set up your switch in a network that has a DHCP server. The DHCP client on the switch is enabled by default. When you connect it to your network, the DHCP server will automatically assign an IP address to your switch. Use the Smart Control Center to discover the IP address automatically assigned to the switch.
To install the switch in a network with a DHCP server:
1.Connect the switch to a network with a DHCP server.
2.Power on the switch by connecting its power cord.
3.Install the Smart Control Center on your computer.
4.Start the Smart Control Center.
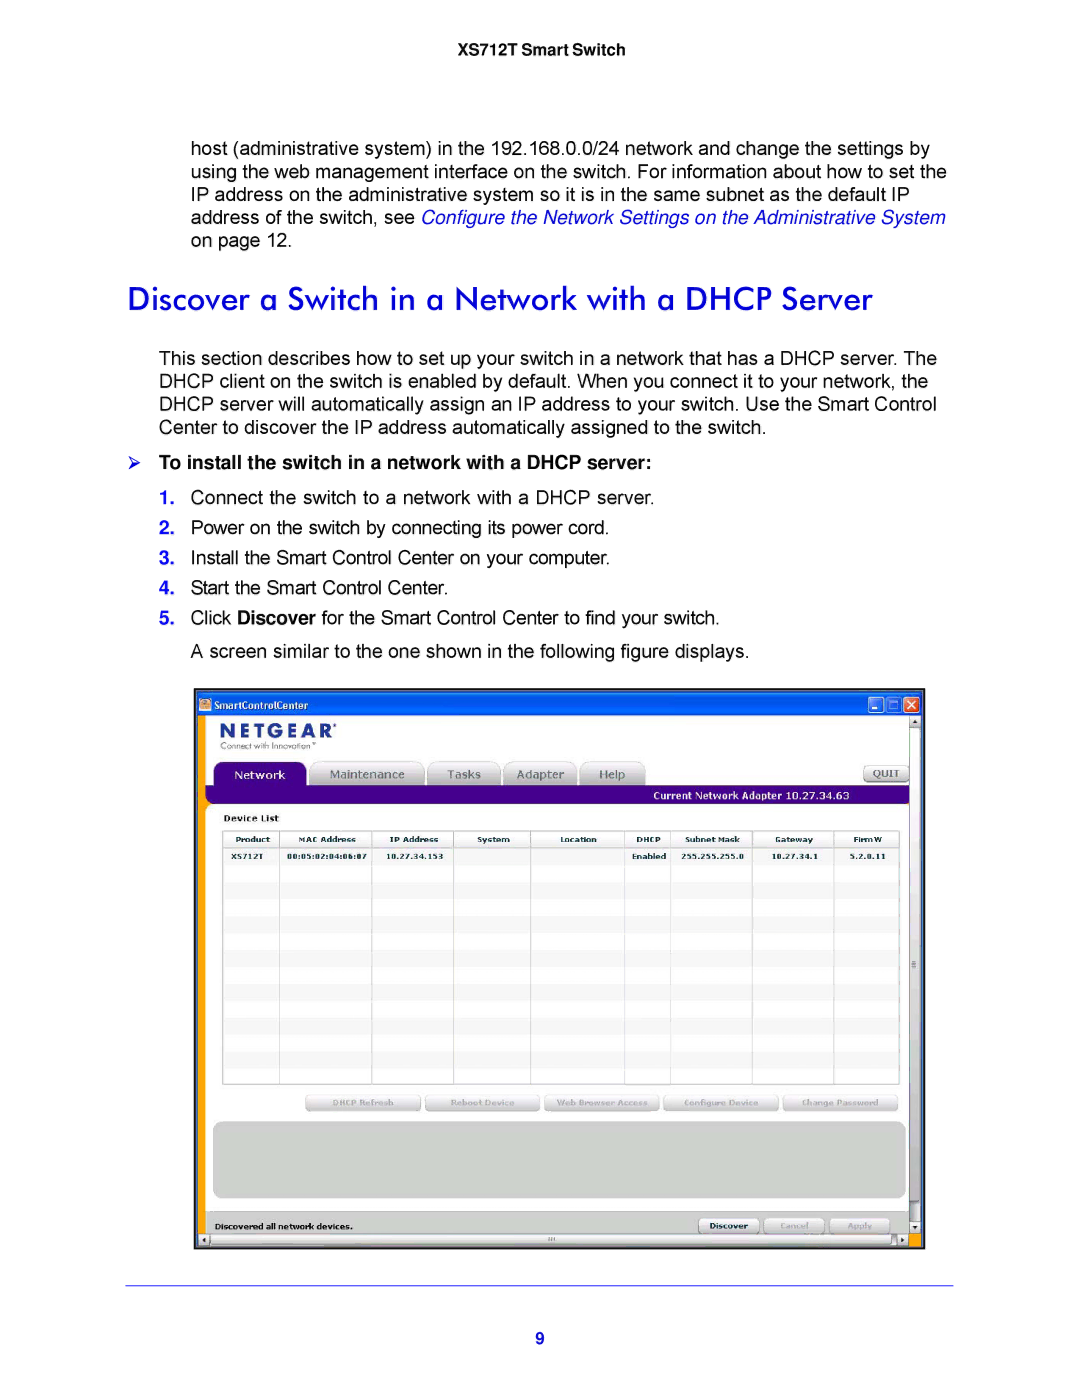
5.Click Discover for the Smart Control Center to find your switch.
A screen similar to the one shown in the following figure displays.
9