ENGLISH
FRANÇAIS
Miscellaneous Information | Divers |
Printing Images | Impression des images |
✤After selecting images and the PRINTER SETUP settings, print your pictures by choosing the PRINT
menu.
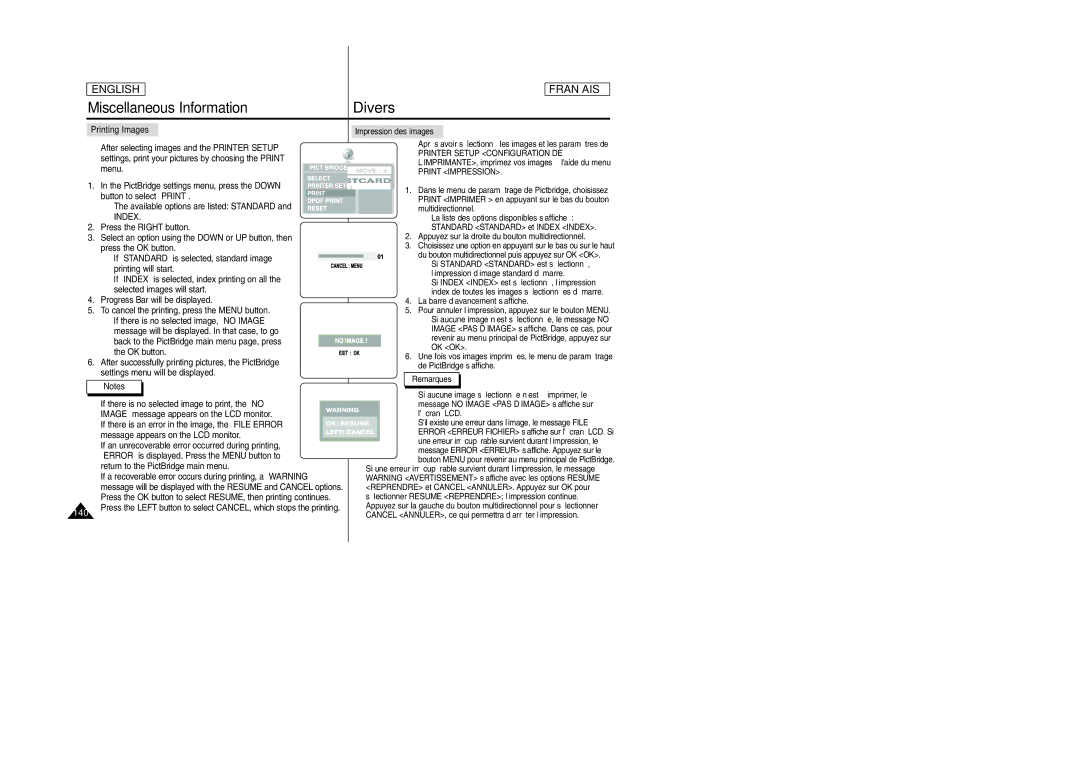
1. In the PictBridge settings menu, press the DOWN button to select “PRINT”.
■ The available options are listed: STANDARD and
INDEX.
2.Press the RIGHT button.
3.Select an option using the DOWN or UP button, then press the OK button.
■If “STANDARD” is selected, standard image
printing will start.
■If “INDEX” is selected, index printing on all the selected images will start.
4.Progress Bar will be displayed.
5.To cancel the printing, press the MENU button.
■If there is no selected image, “NO IMAGE”
message will be displayed. In that case, to go back to the PictBridge main menu page, press the OK button.
6.After successfully printing pictures, the PictBridge settings menu will be displayed.
Notes
✤If there is no selected image to print, the “NO IMAGE” message appears on the LCD monitor.
✤ If there is an error in the image, the “FILE ERROR” message appears on the LCD monitor.
✤If an unrecoverable error occurred during printing, “ERROR” is displayed. Press the MENU button to return to the PictBridge main menu.
✤If a recoverable error occurs during printing, a “WARNING” message will be displayed with the RESUME and CANCEL options. Press the OK button to select RESUME, then printing continues.
✤Après avoir sélectionné les images et les paramètres de
PRINTER SETUP <CONFIGURATION DE
L’IMPRIMANTE>, imprimez vos images à l'aide du menu
PRINT <IMPRESSION>.
1.Dans le menu de paramétrage de Pictbridge, choisissez PRINT <IMPRIMER > en appuyant sur le bas du bouton multidirectionnel.
■La liste des options disponibles s’affiche : STANDARD <STANDARD> et INDEX <INDEX>.
2.Appuyez sur la droite du bouton multidirectionnel.
3.Choisissez une option en appuyant sur le bas ou sur le haut
du bouton multidirectionnel puis appuyez sur OK <OK>. ■ Si STANDARD <STANDARD> est sélectionné,
l’impression d’image standard démarre.
■Si INDEX <INDEX> est sélectionné, l’impression index de toutes les images sélectionnées démarre.
4.La barre d’avancement s’affiche.
5.Pour annuler l’impression, appuyez sur le bouton MENU.
■Si aucune image n’est sélectionnée, le message NO IMAGE <PAS D’IMAGE> s’affiche. Dans ce cas, pour
revenir au menu principal de PictBridge, appuyez sur OK <OK>.
6. Une fois vos images imprimées, le menu de paramétrage de PictBridge s’affiche.
Remarques
✤Si aucune image sélectionnée n’est à imprimer, le message NO IMAGE <PAS D’IMAGE> s’affiche sur
l'écran LCD.
✤ S'il existe une erreur dans l’image, le message FILE ERROR <ERREUR FICHIER> s’affiche sur l'écran LCD. Si une erreur irrécupérable survient durant l’impression, le message ERROR <ERREUR> s’affiche. Appuyez sur le bouton MENU pour revenir au menu principal de PictBridge.
✤ Si une erreur irrécupérable survient durant l’impression, le message |
WARNING <AVERTISSEMENT> s’affiche avec les options RESUME |
<REPRENDRE> et CANCEL <ANNULER>. Appuyez sur OK pour |
sélectionner RESUME <REPRENDRE>; l’impression continue. |
140
Press the LEFT button to select CANCEL, which stops the printing.
✤ Appuyez sur la gauche du bouton multidirectionnel pour sélectionner |
CANCEL <ANNULER>, ce qui permettra d’arrêter l’impression. |
