10... HYPERTRACK™ R EAL-TIME DATA DISPLAY

Program Net that contains the desired Probe Point icons.

The OMP-MODL may be in either the Enabled or

Stopped mode.

2.From the HyperComm Window, click and drag the Program Net icon on the OMP-MODL to the PC and release it. The Program Net and Probe Point icon information will be automatically downloaded to the PC and a Probe Point icon will display overlaying the image of the PC. NOTE: If the Probe Point icon does not display on the PC, then the transferred Program Net does not contain Probe Point icon(s) and this Program Net can not be used for tracking. (In this case, develop a new Program Net containing Probe Point icons and upload it to the OMP-MODL.)

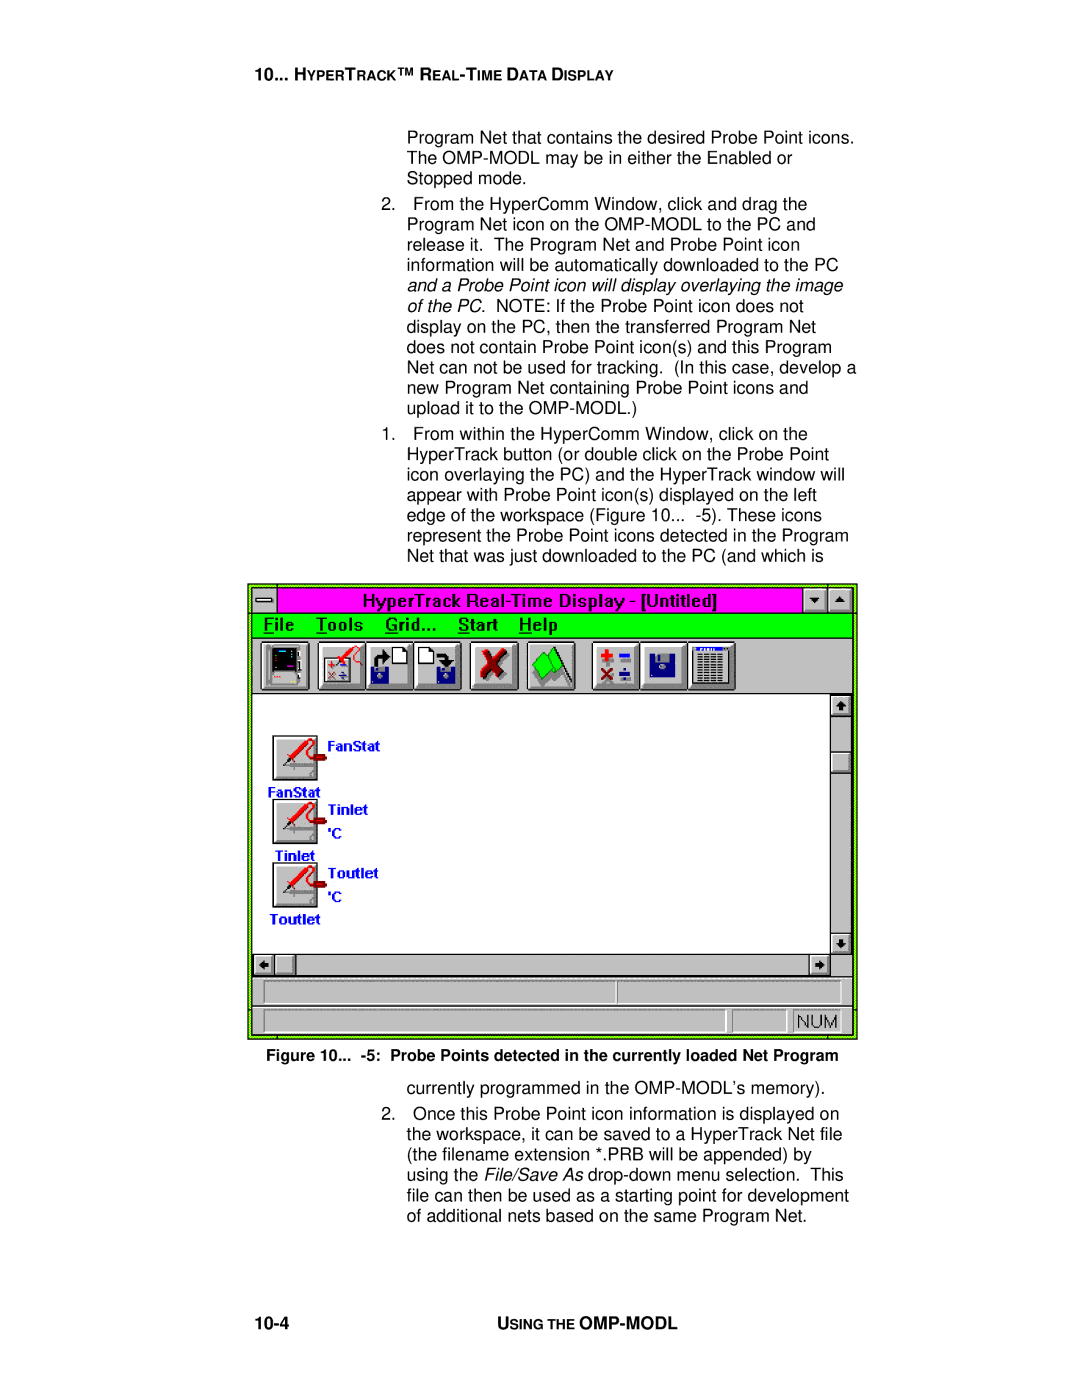
1.From within the HyperComm Window, click on the HyperTrack button (or double click on the Probe Point icon overlaying the PC) and the HyperTrack window will appear with Probe Point icon(s) displayed on the left edge of the workspace (Figure 10... -5). These icons represent the Probe Point icons detected in the Program Net that was just downloaded to the PC (and which is

Figure 10... -5: Probe Points detected in the currently loaded Net Program

currently programmed in the OMP-MODL’s memory).

2.Once this Probe Point icon information is displayed on the workspace, it can be saved to a HyperTrack Net file (the filename extension *.PRB will be appended) by using the File/Save As drop-down menu selection. This file can then be used as a starting point for development of additional nets based on the same Program Net.

10-4

USING THE OMP-MODL

Page 153
Image 153
Omega Vehicle Security OMP-MODL manual 10-4, Probe Points detected in the currently loaded Net Program