The Captured Image window opens by Capture button on the tool bar section of the operation panel, Captured Image command in the Window menu and the shortcut [Ctrl – L] at any time. Refer to <2.3.9 Captured Image Dialog Window>
3.6.5Saving a Scanning Image (Direct Save)
The scanning Image, simply frozen or captured, can be saved. Resolution of saved image is 1280x960 or 640×480 depending on present screen mode when saved just after freezing the image. When saved after capturing, resolution follows capturing resolution
Graphics and texts written using Data Entry function and CD measurement function are put on saved images when saved while they are shown on the image.
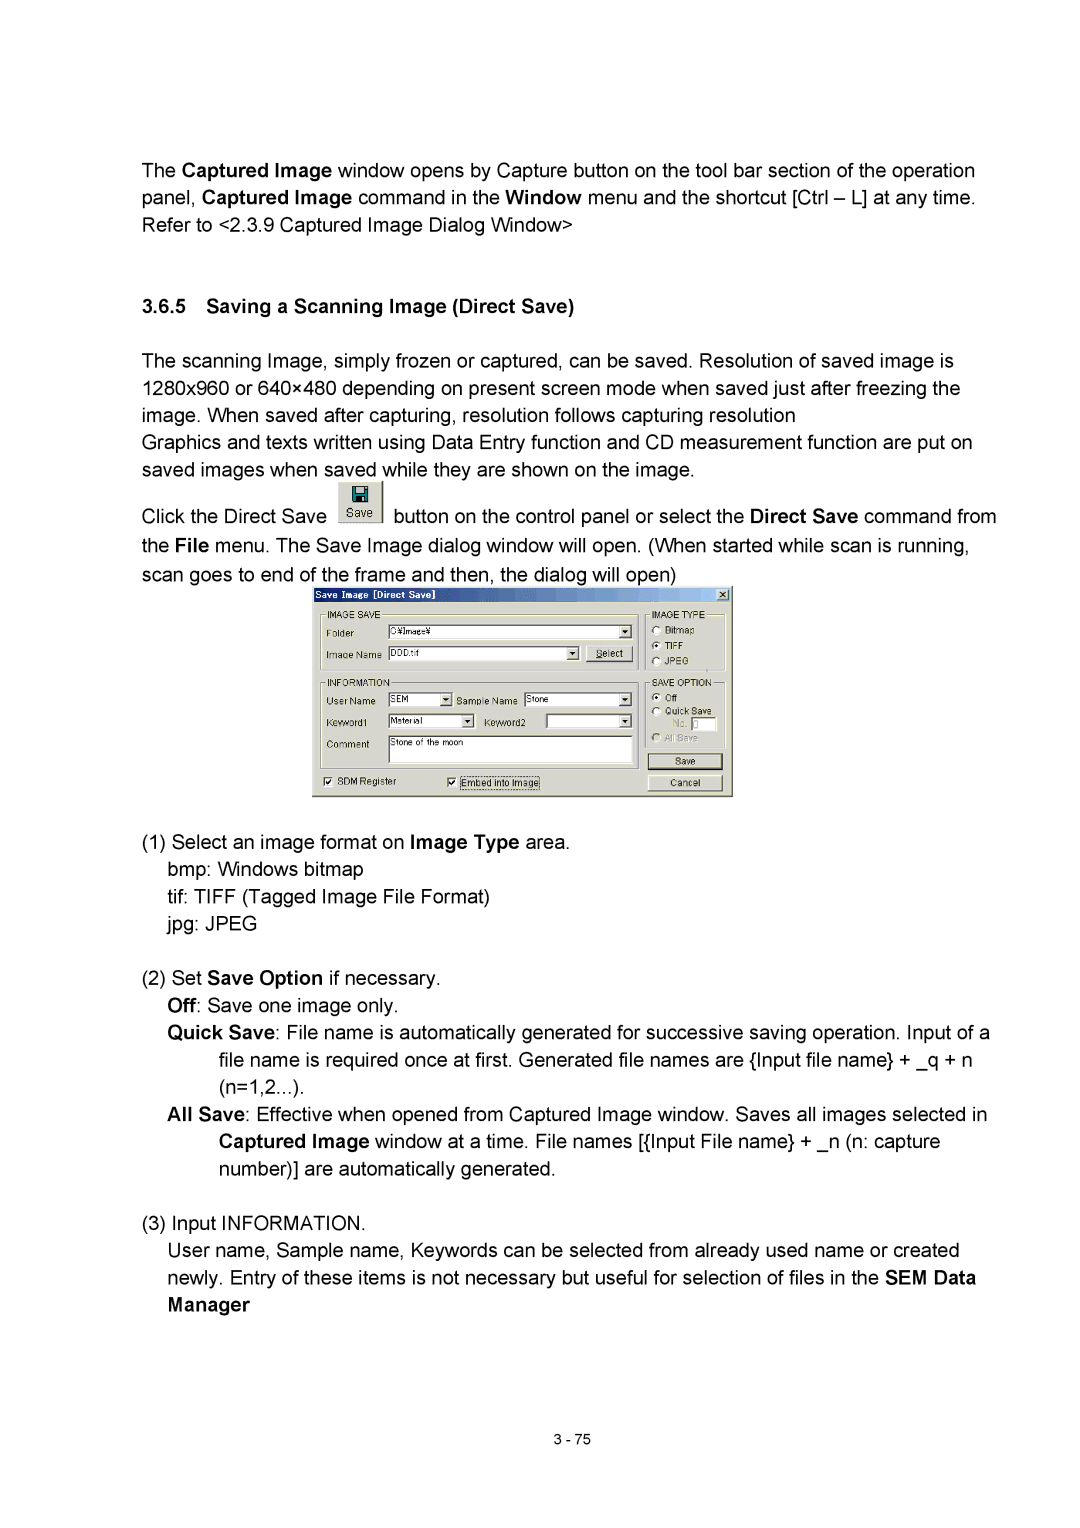
Click the Direct Save ![]() button on the control panel or select the Direct Save command from the File menu. The Save Image dialog window will open. (When started while scan is running, scan goes to end of the frame and then, the dialog will open)
button on the control panel or select the Direct Save command from the File menu. The Save Image dialog window will open. (When started while scan is running, scan goes to end of the frame and then, the dialog will open)
(1)Select an image format on Image Type area. bmp: Windows bitmap
tif: TIFF (Tagged Image File Format)
jpg: JPEG
(2)Set Save Option if necessary.
Off: Save one image only.
Quick Save: File name is automatically generated for successive saving operation. Input of a file name is required once at first. Generated file names are {Input file name} + _q + n (n=1,2...).
All Save: Effective when opened from Captured Image window. Saves all images selected in Captured Image window at a time. File names [{Input File name} + _n (n: capture number)] are automatically generated.
(3) Input INFORMATION.
User name, Sample name, Keywords can be selected from already used name or created newly. Entry of these items is not necessary but useful for selection of files in the SEM Data
Manager
3 - 75