(11) Starting gun baking on the
You can start gun baking on the
NOTICE
Before starting gun baking, set WD to longer than 10mm on the OPE CONDITION tab of the Operation panel. It is because in case that objective lens is excited with full maximum current, total electrical power may exceeds 40kVA rating.
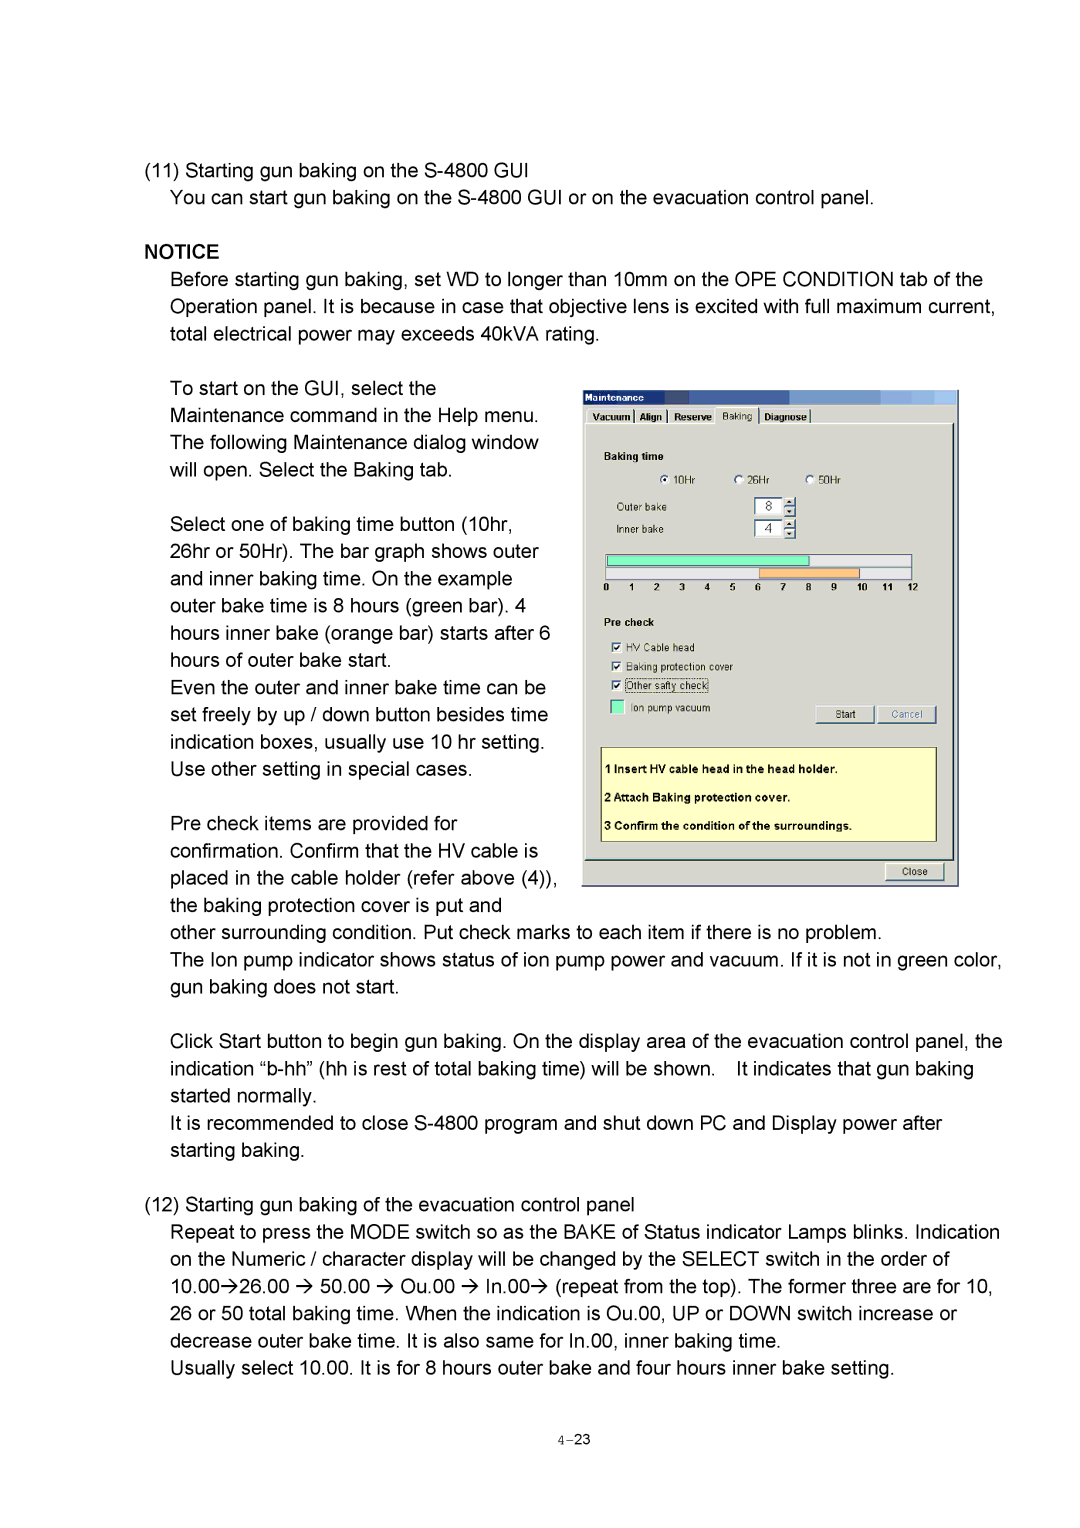
To start on the GUI, select the Maintenance command in the Help menu. The following Maintenance dialog window will open. Select the Baking tab.
Select one of baking time button (10hr, 26hr or 50Hr). The bar graph shows outer and inner baking time. On the example outer bake time is 8 hours (green bar). 4 hours inner bake (orange bar) starts after 6 hours of outer bake start.
Even the outer and inner bake time can be set freely by up / down button besides time indication boxes, usually use 10 hr setting. Use other setting in special cases.
Pre check items are provided for confirmation. Confirm that the HV cable is placed in the cable holder (refer above (4)), the baking protection cover is put and
other surrounding condition. Put check marks to each item if there is no problem.
The Ion pump indicator shows status of ion pump power and vacuum. If it is not in green color, gun baking does not start.
Click Start button to begin gun baking. On the display area of the evacuation control panel, the indication
It is recommended to close
(12) Starting gun baking of the evacuation control panel
Repeat to press the MODE switch so as the BAKE of Status indicator Lamps blinks. Indication on the Numeric / character display will be changed by the SELECT switch in the order of
10.00Æ26.00 Æ 50.00 Æ Ou.00 Æ In.00Æ (repeat from the top). The former three are for 10, 26 or 50 total baking time. When the indication is Ou.00, UP or DOWN switch increase or decrease outer bake time. It is also same for In.00, inner baking time.
Usually select 10.00. It is for 8 hours outer bake and four hours inner bake setting.
