(3)Flashing Procedure
(a)Check and set up intensity of flashing as follows:
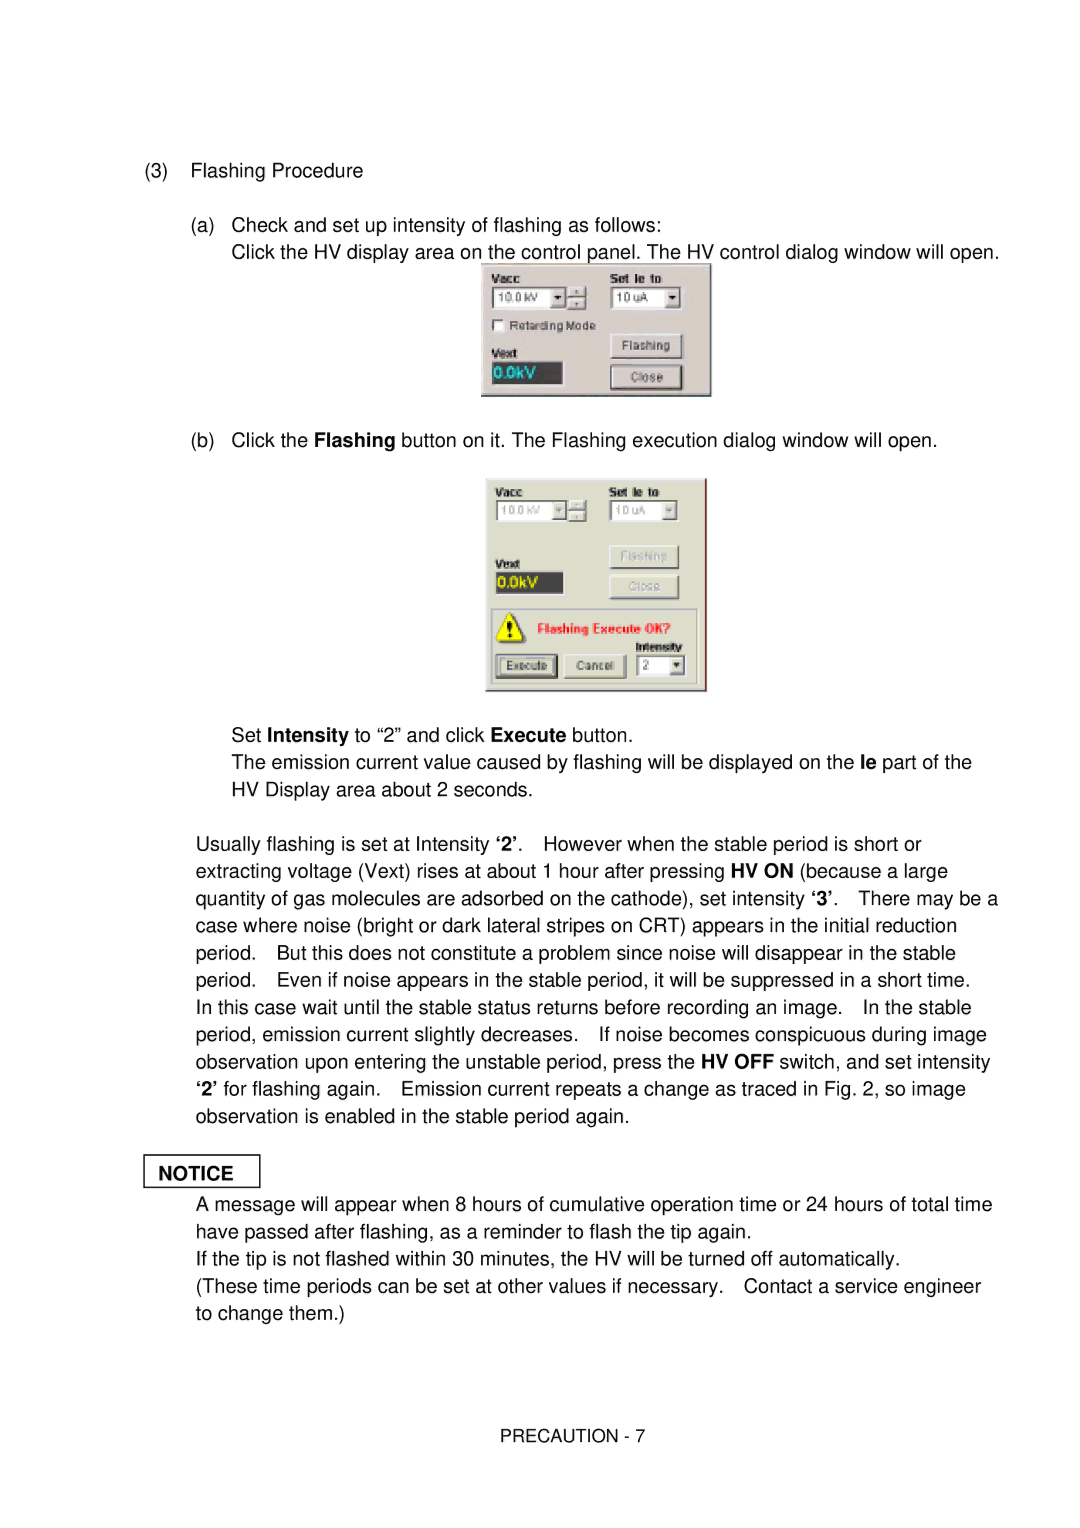
Click the HV display area on the control panel. The HV control dialog window will open.
(b)Click the Flashing button on it. The Flashing execution dialog window will open.
Set Intensity to “2” and click Execute button.
The emission current value caused by flashing will be displayed on the Ie part of the HV Display area about 2 seconds.
Usually flashing is set at Intensity ‘2’. However when the stable period is short or extracting voltage (Vext) rises at about 1 hour after pressing HV ON (because a large quantity of gas molecules are adsorbed on the cathode), set intensity ‘3’. There may be a case where noise (bright or dark lateral stripes on CRT) appears in the initial reduction period. But this does not constitute a problem since noise will disappear in the stable period. Even if noise appears in the stable period, it will be suppressed in a short time.
In this case wait until the stable status returns before recording an image. In the stable period, emission current slightly decreases. If noise becomes conspicuous during image observation upon entering the unstable period, press the HV OFF switch, and set intensity ‘2’ for flashing again. Emission current repeats a change as traced in Fig. 2, so image observation is enabled in the stable period again.
NOTICE
A message will appear when 8 hours of cumulative operation time or 24 hours of total time have passed after flashing, as a reminder to flash the tip again.
If the tip is not flashed within 30 minutes, the HV will be turned off automatically.
(These time periods can be set at other values if necessary. Contact a service engineer to change them.)