9-22 Upgrading Your Server
Rear Access Cover
The rear access cover provides access to the
![]()
![]() CAUTION
CAUTION
Observe the following instructions to use the server safely. Failure to follow these instructions may result in death or serious personal injury. See pages
■Do not install the server on a rack with leaving covers removed.
Removal
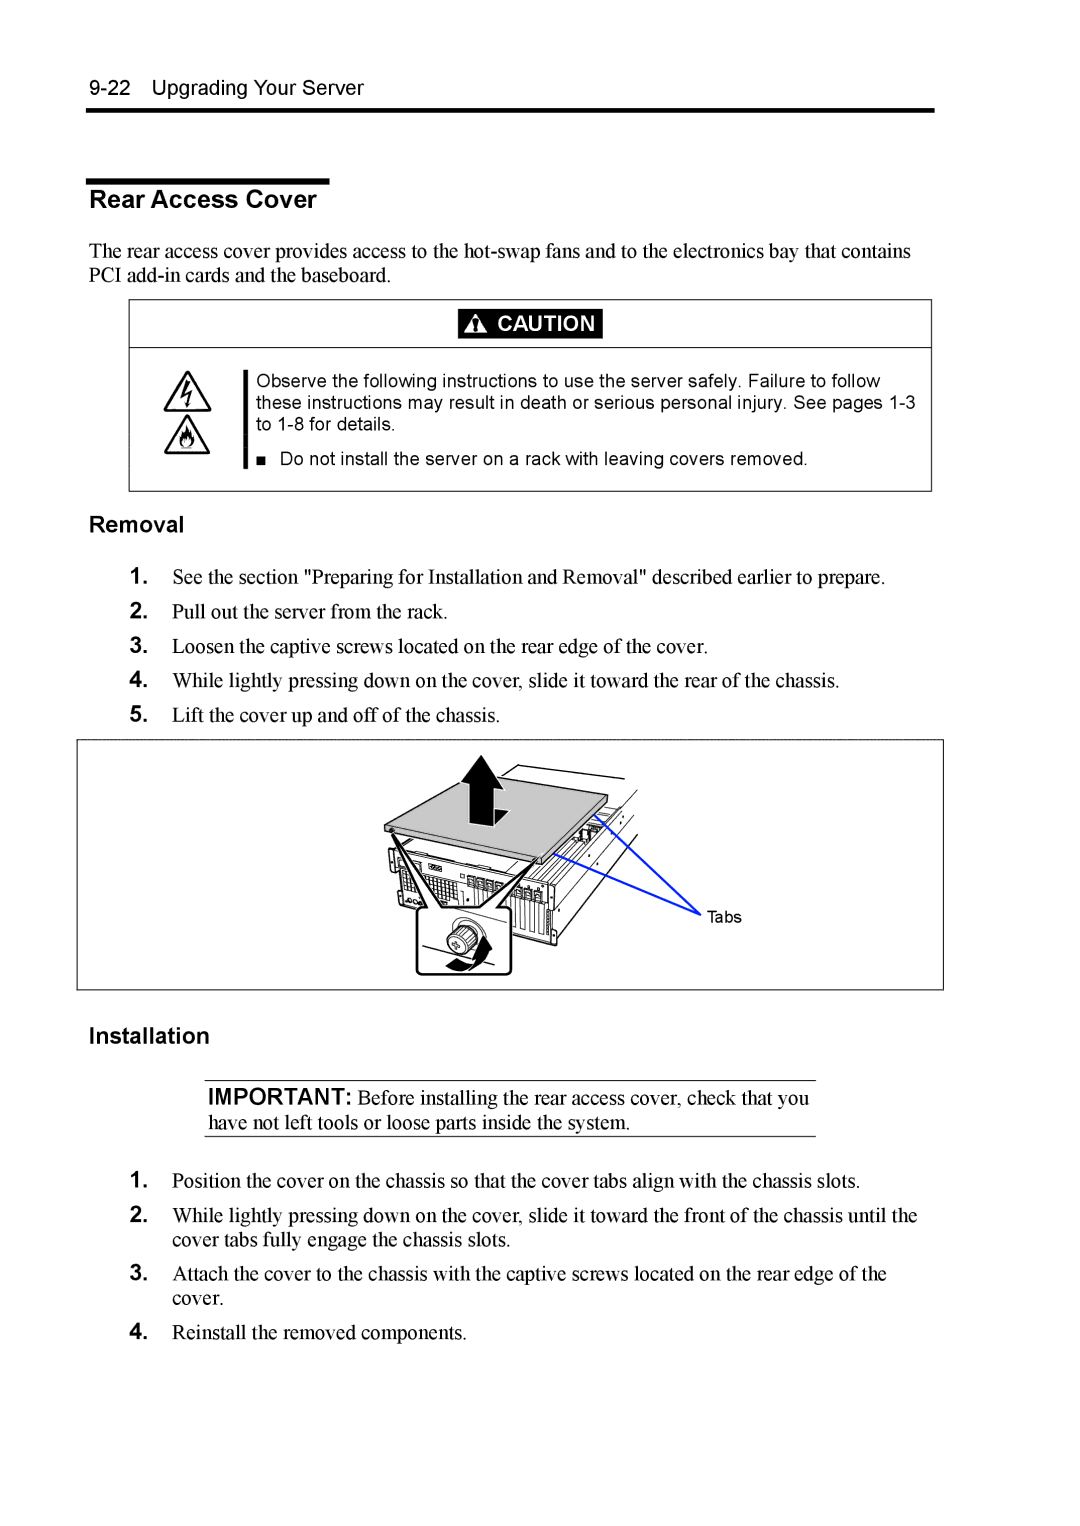
1.See the section "Preparing for Installation and Removal" described earlier to prepare.
2.Pull out the server from the rack.
3.Loosen the captive screws located on the rear edge of the cover.
4.While lightly pressing down on the cover, slide it toward the rear of the chassis.
5.Lift the cover up and off of the chassis.
Tabs |
Installation |
IMPORTANT: Before installing the rear access cover, check that you have not left tools or loose parts inside the system.
1.Position the cover on the chassis so that the cover tabs align with the chassis slots.
2.While lightly pressing down on the cover, slide it toward the front of the chassis until the cover tabs fully engage the chassis slots.
3.Attach the cover to the chassis with the captive screws located on the rear edge of the cover.
4.Reinstall the removed components.