9-20 Upgrading Your Server
10.Position the drive with the left side lower so that the latching rails engage the guide rails in the
Push the drive into the bay until the latching rails lock in place.
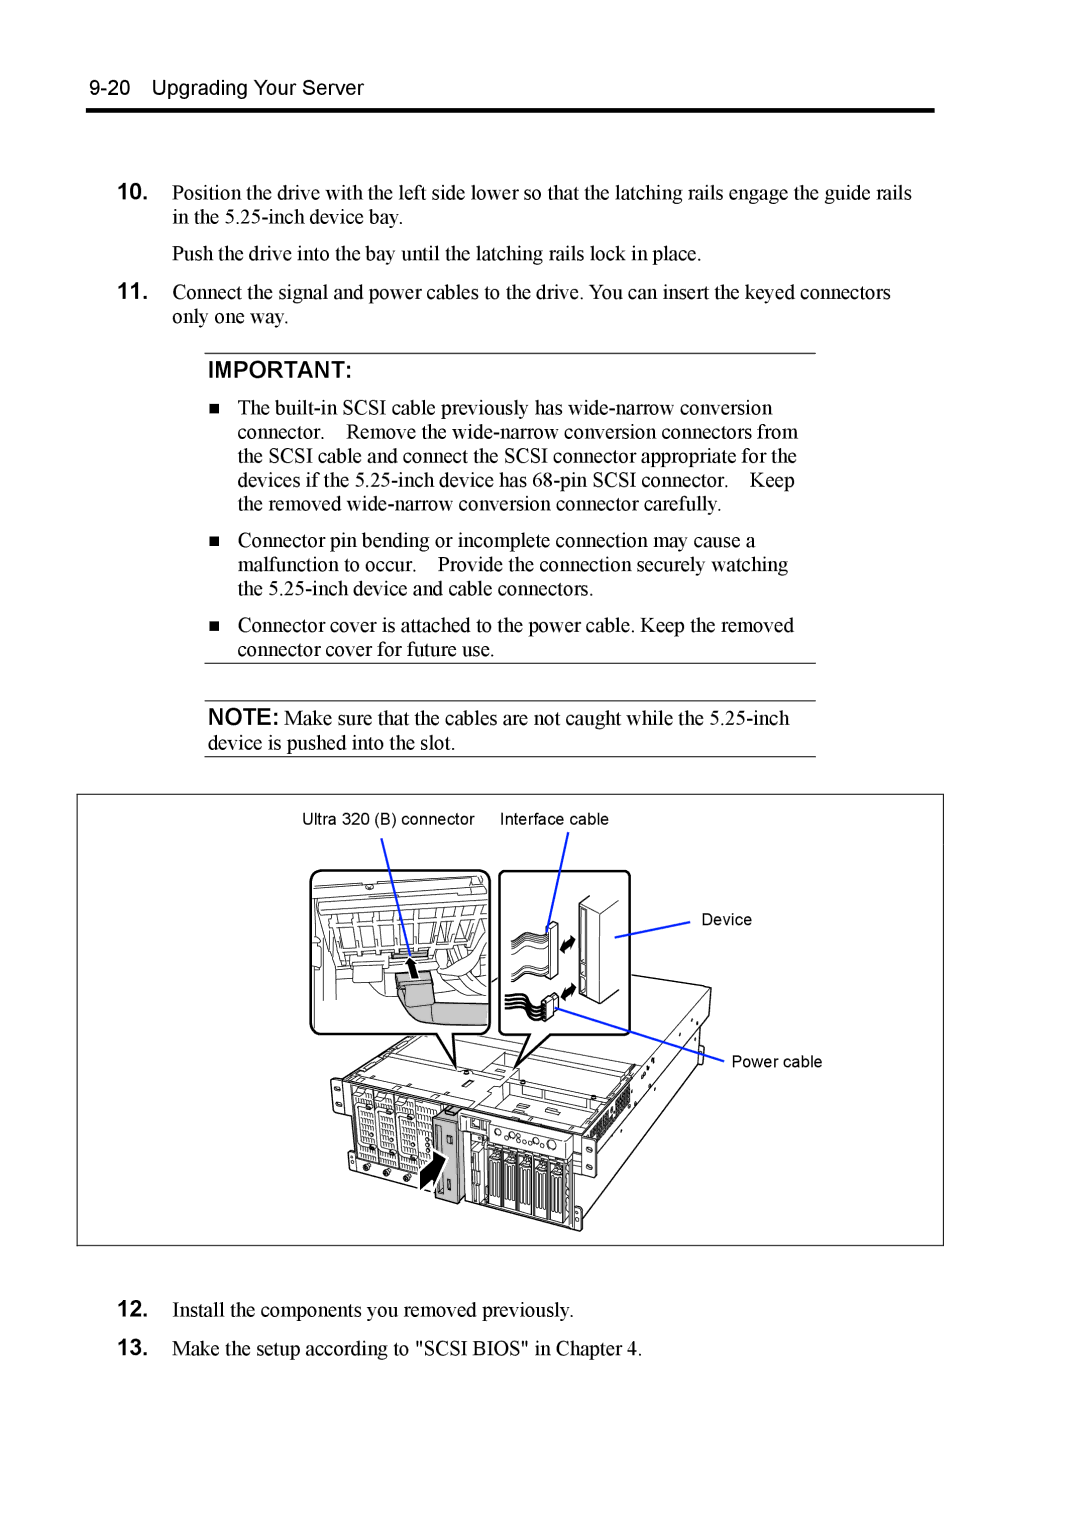
11.Connect the signal and power cables to the drive. You can insert the keyed connectors only one way.
IMPORTANT:
The
Connector pin bending or incomplete connection may cause a malfunction to occur. Provide the connection securely watching the
Connector cover is attached to the power cable. Keep the removed connector cover for future use.
NOTE: Make sure that the cables are not caught while the
Ultra 320 (B) connector | Interface cable |
| Device |
| Power cable |
12.Install the components you removed previously.
13.Make the setup according to "SCSI BIOS" in Chapter 4.