Upgrading Your Server 9-61
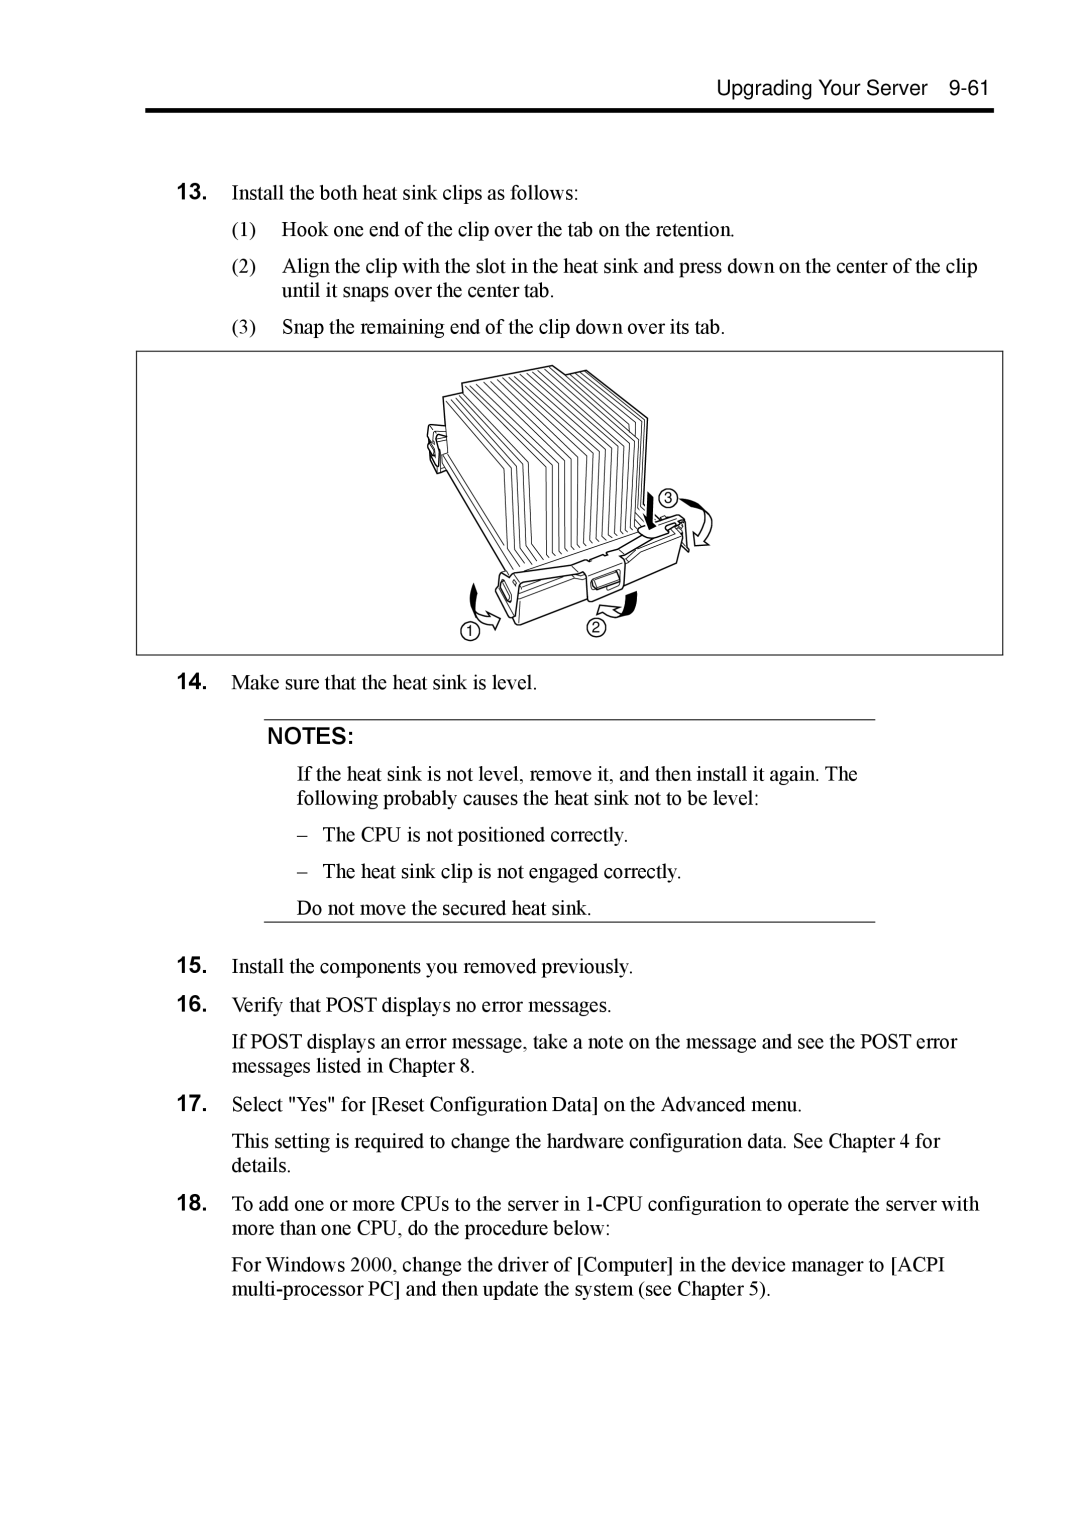
13.Install the both heat sink clips as follows:
(1)Hook one end of the clip over the tab on the retention.
(2)Align the clip with the slot in the heat sink and press down on the center of the clip until it snaps over the center tab.
(3)Snap the remaining end of the clip down over its tab.
![]() 3
3
12
14.Make sure that the heat sink is level.
NOTES:
If the heat sink is not level, remove it, and then install it again. The following probably causes the heat sink not to be level:
–The CPU is not positioned correctly.
–The heat sink clip is not engaged correctly.
Do not move the secured heat sink.
15.Install the components you removed previously.
16.Verify that POST displays no error messages.
If POST displays an error message, take a note on the message and see the POST error messages listed in Chapter 8.
17.Select "Yes" for [Reset Configuration Data] on the Advanced menu.
This setting is required to change the hardware configuration data. See Chapter 4 for details.
18.To add one or more CPUs to the server in
For Windows 2000, change the driver of [Computer] in the device manager to [ACPI