9-6 Upgrading Your Server
DEVICE INSTALLATION OR REMOVAL PROCEDURE
Install or remove a component from the server in the following procedure.
Hard Disk Drive
The server has five slots to install hard disks (Ultra 320 SCSI) in the
IMPORTANT:
Do not use any hard disks that are not authorized by NEC. Installing a
–
–
–
–
–
–
–
To make array configuration, refer to the manual that comes with the optional disk array controller board.
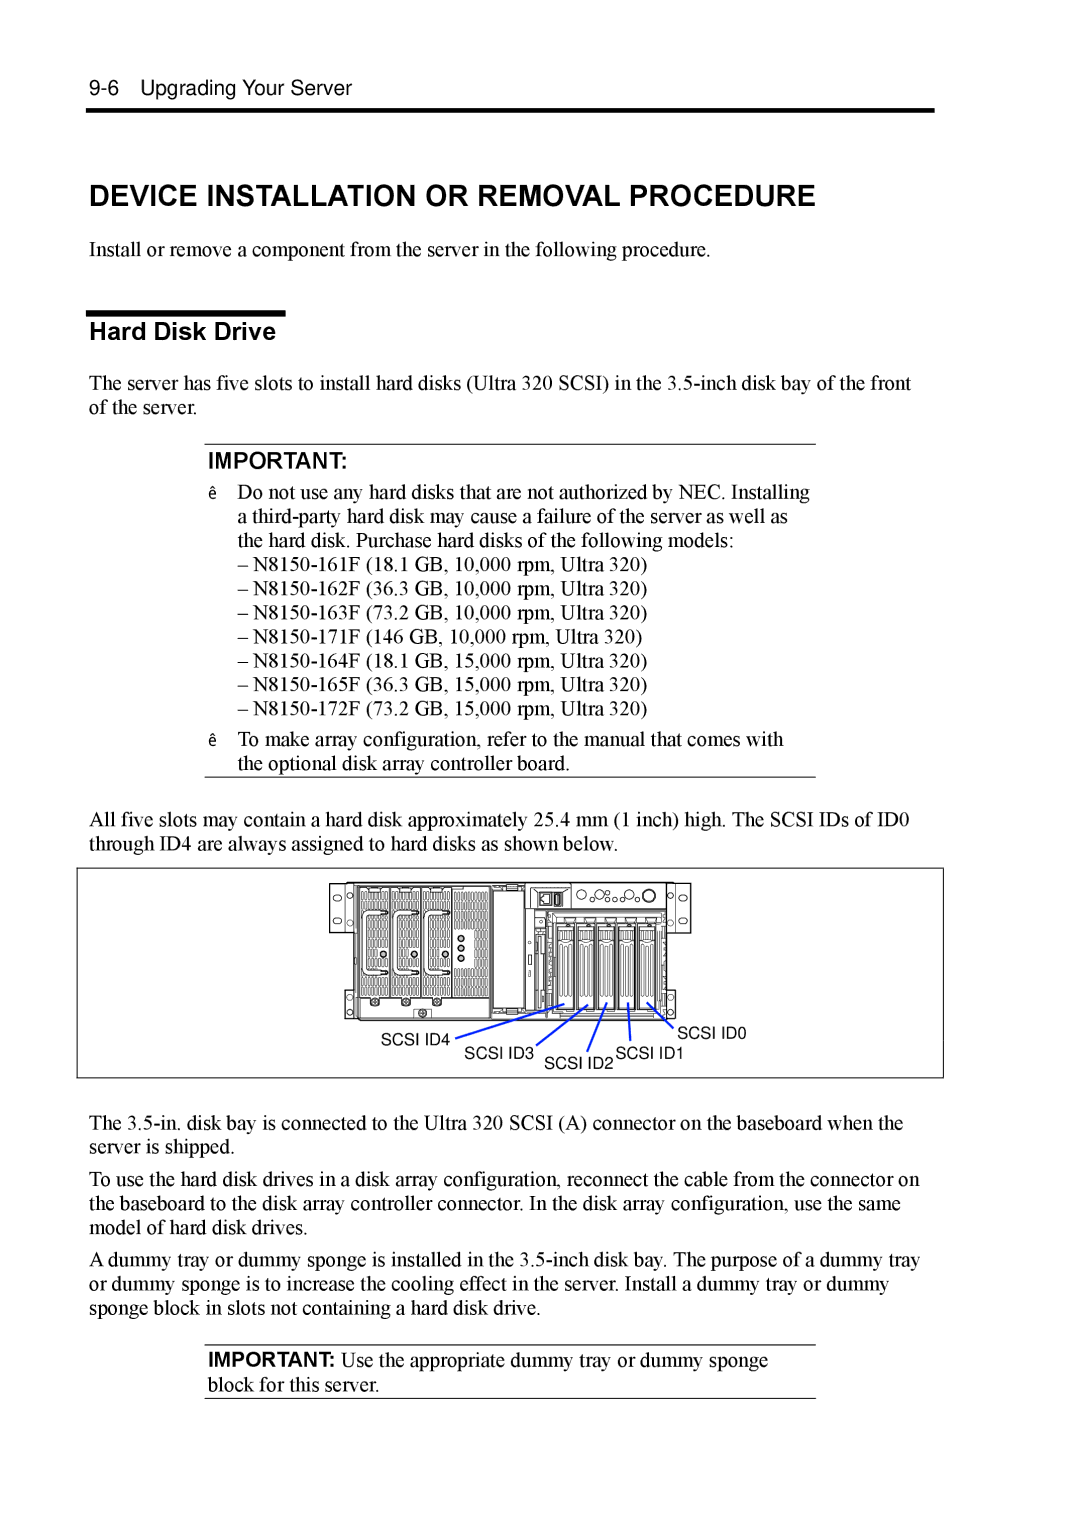
All five slots may contain a hard disk approximately 25.4 mm (1 inch) high. The SCSI IDs of ID0 through ID4 are always assigned to hard disks as shown below.
SCSI ID4 | SCSI ID0 |
SCSI ID3 SCSI ID2SCSI ID1 |
The
To use the hard disk drives in a disk array configuration, reconnect the cable from the connector on the baseboard to the disk array controller connector. In the disk array configuration, use the same model of hard disk drives.
A dummy tray or dummy sponge is installed in the
IMPORTANT: Use the appropriate dummy tray or dummy sponge block for this server.