Upgrading Your Server 9-65
Disk Array Controller
The disk array controller board
The installation of this board enables the hard disks in the
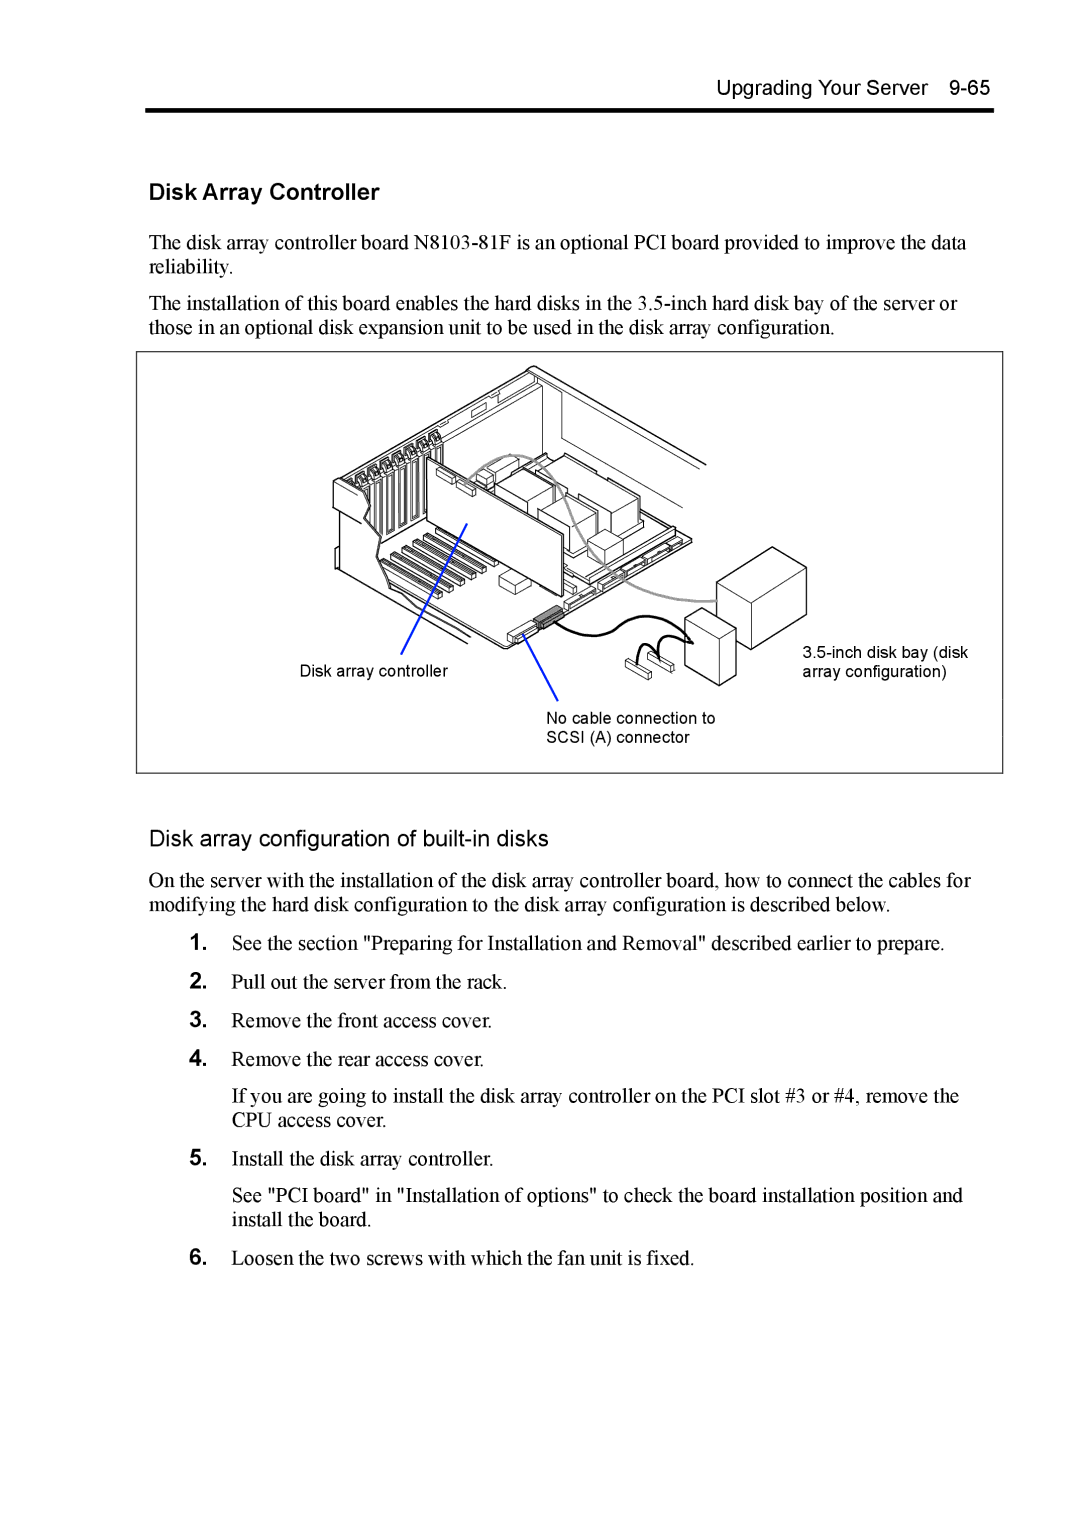
Disk array controller
No cable connection to
SCSI (A) connector
Disk array configuration of built-in disks
On the server with the installation of the disk array controller board, how to connect the cables for modifying the hard disk configuration to the disk array configuration is described below.
1.See the section "Preparing for Installation and Removal" described earlier to prepare.
2.Pull out the server from the rack.
3.Remove the front access cover.
4.Remove the rear access cover.
If you are going to install the disk array controller on the PCI slot #3 or #4, remove the CPU access cover.
5.Install the disk array controller.
See "PCI board" in "Installation of options" to check the board installation position and install the board.
6.Loosen the two screws with which the fan unit is fixed.