3-10 Setting Up Your Server
2. | Install the core nuts coming with the rack at the positions defined by the templates. |
Install four core nuts (two for each of left and right sides) on the front face of the rack from the inner side. The server is fixed to the rack with the core nuts, four screws C, and four washers A.
Install two core nuts from the inner side of the rear of the rack (at the left side when you faces the rear of the rack). When the core nuts are installed on a rack with the distance between the front and rear mount faces of 700 or 743 mm, fix the arm bracket (700) to the core nuts.
Hang the lower clip of a core nut on the proper rectangular hole and insert the upper clip into the hole using a
IMPORTANT: Install the core nuts so that the clips are located at the top and bottom. If any core nut is installed with the clips located at the left and right ends, the server may be dropped to cause it to be defected and also people to be injured severely.
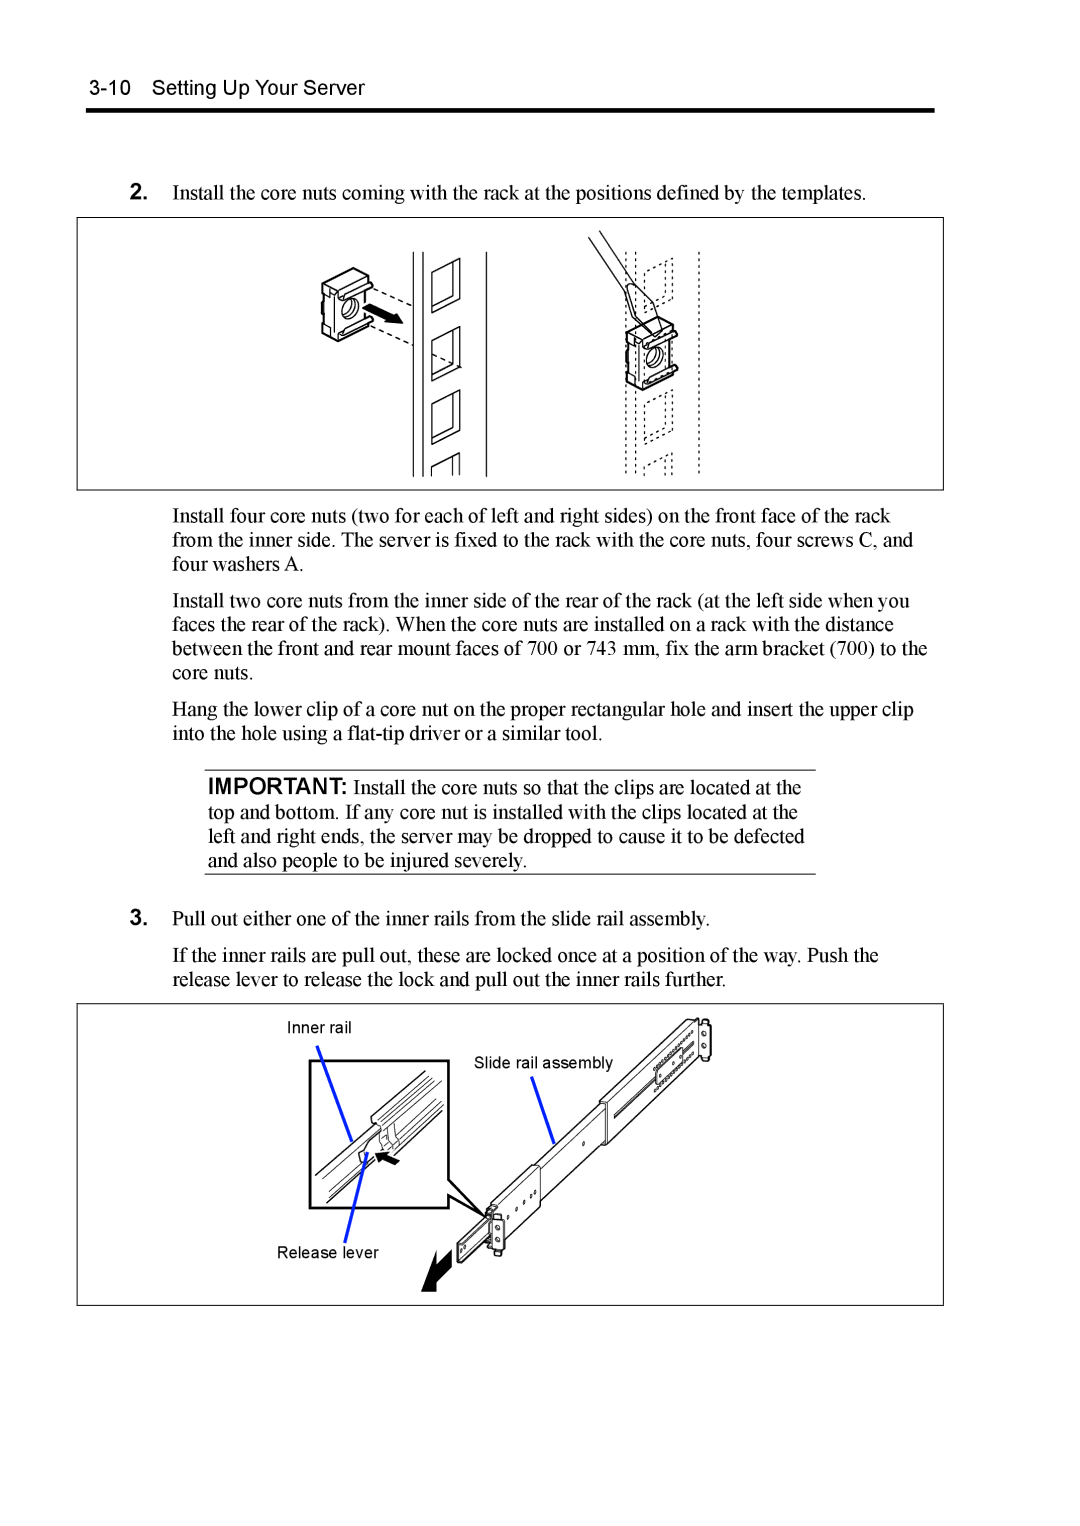
3.Pull out either one of the inner rails from the slide rail assembly.
If the inner rails are pull out, these are locked once at a position of the way. Push the release lever to release the lock and pull out the inner rails further.