Polycom CMA� System Operations Guide
Trademark Information
Contents
Add/Schedule a Conference Add/Schedule a New Conference
Polycom CMA System Conference Scheduling Overview
Conference Scheduling Operations
Endpoint Management Overview
Advanced Scheduling Operations
Conference and Participant Management Operations
Conference and Participant Details
Polycom CMA System Operations Guide
Endpoint Provisioning Operations
Provisioning of LifeSize Passwords Reporting
Endpoint and Peripheral Management Operations
Device Details
Endpoint Software Update Operations
Management Operations for Other Network Devices 239
Provisioning Details Software Update Details
Network Device Management Overview
MCU Bridge Management Operations 227
User Management Operations
MCU Bridge Device Details 245
Users and Groups Overview
Polycom CMA System Dashboard 307
System Administration Overview 307
System Reports 281
Room Overview and Operations 343
Conference Setup Overview 321
Conference Setup Operations 337
Conference Templates 321 Conference Settings 334
Multiple Address Books
Directory Setup Operations
View the Global Address Book Set or Change the GAB Password
Directory Operations
Server Setting Operations
Polycom CMA System Setup Overview
Database Operations
Polycom CMA System Snmp
Management & Security Operations 445
Polycom CMA System Redundancy
Gatekeeper Management 439
Dial Plan Setup Operations 463
Xviii
System Troubleshooting
Remote Alert Setup Operations
System Management and Maintenance 521
System Backup and Recovery Operations
System Security and Port Usage
Polycom CMA System Overview
Polycom CMA System Features and Capabilities
Minimum System Requirements
Polycom CMA System Models
Log Into the Polycom CMA System
Working in the Polycom CMA System
Filter and Search a List
Field Input Requirements
Sn Givenname Mail
Change a Password
Restart or Shut Down a Polycom CMA System
Enter a New Password
Confirm the new password and click OK
Log Out of the Polycom CMA System
Emergency Shutdown of a Polycom CMA System
Polycom CMA System Operations Guide
Add DNS SRV Record for Polycom CMA System Services
Polycom CMA System Configuration
Configure the Connection to an External Enterprise Directory
Configure the Connection to the External Database
Set Up Video Call Routing
Configure Redundancy
Set Up Conference Templates
Set Up Automatic Provisioning
Set Up Automatic Softupdate
Set Up a Certificate for the Polycom CMA System
Set Up Directory Services
Distribute Polycom CMA Desktop for Windows Systems
Distribute Polycom Applications
Distribute Polycom CMA Desktop for MAC OS Systems
Polycom CMA System Operations Guide
Operating in Maximum Security Environments
Maximum Security Mode Overview
Snmp
Conference Scheduling in Maximum Security Mode
Endpoint Management in Maximum Security Mode
Field
Network Device Management in Maximum Security Mode
Scheduler
User Management in Maximum Security Mode
Polycom RMX Systems in Secure Mode
Administrator
Action Use this action to
Operating in Maximum Security Environments
Operator, and Auditor
Group Management in Maximum Security Mode
Reporting in Maximum Security Mode
Download the System Log Files
Backup and Delete audit log files
Auditor
About Machine Accounts
Device Administration in Maximum Security Mode
Evergreenroommachine
System Administration in Maximum Security Mode
Conference Templates
Admin Menu
Provisioning Profiles
Software Updates
Server Settings
On the Enterprise Directory
Management and Security
Session Management
Account Inactivity
Field Description Password Management
Field Description Account Lockout
Dial Plan and Sites
Backup System Settings
Field Description Password Complexity
Network Intrusion Detection in Maximum Security Mode
There is no change in the Windows Event Logs function
Troubleshooting in Maximum Security Mode
Troubleshooting Utilities
There is no change in the Database Backup function
Mssqlserver
Service Manages the system’s Comment
There is no change in the CMA Licenses function
Report Administration
Polycom CMA System Operations Guide
Conference Menu Overview General Scheduling Information
Polycom CMA System Conference Scheduling Overview
Conference Menu and Views
Conference Menu Overview
Add
Conference views have these sections
Section Description
Refresh
Conference Views-Future and Ongoing
Conferences may be in the following states
Conference States
Available for future, past, and active conferences
Context-Sensitive Conference Actions
Action Description Available for future conferences only
Available for future and past conferences
Bridge Selection and Cascading
General Scheduling Information
Scheduling Participants and Endpoints
Bridge Scheduling and Reassignment
Polycom CMA System Conference Scheduling Overview
Polycom CMA System Operations Guide
These options are discussed in the following topics
Conference Scheduling Operations
Add/Schedule a Conference
Add/Schedule a New Conference
Participants and Rooms list
Click Add Guest
Configure these fields in the Add Guest dialog box
1001@11.12.13.14
Not available when Use Modified Dial Number
If the guest has a SIP IP endpoint, configure these settings
Participants and Rooms list
Copy an Existing Conference
Go to Conference Future
Edit a Conference
Edit a Participant’s Settings
If the guest has a SIP IP endpoint, configure these settings
View Scheduling Information for a Conference
Click Back to List to return to the conference list
Edit Conference Settings on
Advanced Scheduling Operations
Edit Conference Settings
Chairperson feature
Setting Description
Dial-In+Dial-Out
When Enable Chairperson is selected
Setting Description
People and Content VO. This Polycom proprietary
People +Content H.329. This enables the industry
Application Sharing. Allows two or more
Click Manual Cascade
Select a Bridge for a Conference
Create a Cascaded Conference Across Multiple Bridges
Add Link dialog box, select the Link Type
Go to Conference Ongoing
Conference and Participant Management Operations
Manage an Active Conference
Isdn
Use these conference actions as needed
Use these participant actions as needed
New Conference Participants list
Add Additional Participants to an Active Conference
Click Close
Add a Room to an Active Conference
Participants list
From the Conference Actions list, click Add Room
Click Join Conference
View the Video of a Participant in an Active Conference
Join an Active Conference
From the Conference Actions list, click Add Favorites
Add/Save a Participant to a Favorites List
Manage a Participant’s Endpoint During a Conference
View a Participant’s Details During a Conference
PVX , MGC , RMX , GW/MCU , Other , and Tandberg
GDS
Delete a Conference
Terminate an Active Conference
Polycom CMA System Operations Guide
Conference Details section has these fields
Conference and Participant Details
Conference Image
Conference Details
CIF Svga Qcif XGA 4CIF Ntsc 16CIF
VGA
Auto
Conference Features
Conference Features section has these fields
Mode is None
MCU
Bridge MCU Features
IVR
Participants List
Participants section has these fields
Participant Details section has these fields
Participant Details
Participant Settings dialog box has these fields
Participant Settings
SIP URI
Endpoint Menu, Views, and Lists
Endpoint Management Overview
Endpoint views is Refresh
Monitor View
Endpoint List in the Monitor View
Endpoint Types on
Endpoint list in this view has these fields
Action Use this action to Available for all endpoint types
Tandberg , iPower , and Other
Actions in the Monitor View
SIP
Peripherals List in the Peripherals View
Peripherals View
Peripherals list in this view has these fields
Actions in the Peripheral View
View list
Bundled Provisioning View
Endpoint List in the Bundled Provisioning View
RealPresence Group Series -Displays just
Automatic Provisioning View
Actions in the Bundled Provisioning View
Endpoint List in the Automatic Provisioning View
Use the Scheduled Provisioning View to
Scheduled Provisioning View
Actions in the Automatic Provisioning View
Endpoint List in the Scheduled Provisioning View
Viewstation
Actions in the Scheduled Provisioning View
Tandberg C-Series
VSX Series
Endpoint List in the Automatic Software Update View
Automatic Software Update View
Actions in the Automatic Software Update View
Endpoint List in the Scheduled Software Update View
Scheduled Software Update View
Scheduled Software Update View Actions
PVX
Endpoint Types
Vtel
Tandberg 150 MXP
Vcon
Endpoint Configuration/Provisioning
For more information, see
Provisioning Best Practices
Bundled Provisioning
How Bundled Provisioning Works
Automatic Provisioning
How Automatic Provisioning Works
Csv file
Automatic Provisioning Profiles
Field For the endpoint systems being provisioned
Home Screen Settings
Settings
Calendaring Settings
Call Settings
Audio Settings
CMA Desktop Settings
URL
VVX Settings
How Scheduled Provisioning Works
Scheduled Provisioning
Profile Order and Priority
FX/EX
Scheduled Provisioning Profiles
ViewStation QDX Series
General Settings Home Screen Settings Home Screen Settings
ViewStation QDX Series General Settings Security
GMT
General Settings Date and Time
AM/PM
Video Network IP Network Gatekeeper
Video Network IP Network Call Preferences
Video Network IP Network Gateway Number
Video Network IP Network Quality of Service Settings
NAT
Video Network IP Network Firewall Settings
Video Network Isdn BRI Protocol
NAT Public WAN Address
FX/EX
Applies to
Monitor 3 Options
Cameras Video Quality
Cameras Camera Settings
DVD
Cameras Cameras
ViewStation QDX Series Video/Camera Cameras
Enter IP Address Manually Select if the IP
LAN Properties LAN Properties
Obtain IP Address Automatically Select if
Global Services Directory Servers
LAN/H.323 Global Directory GDS Preferred Alias
Global Services Dialing Rules
To Auto on the Place a Call screen
Video Network IP Network Gateway Setup
Global Services Account Validation
Global Services My Information
Endpoint Gatekeeper Registration Policies
Automatic Software Update Profiles
Endpoint Software Updates
Automatic Software Updates
How Automatic Software Update Works
Automatic Software Update Versions
Peripheral Software Updates
Scheduled Software Updates
Considerations for Third-Party Endpoints
Endpoint Passwords
Enabling Management of LifeSize Endpoints
Enable Tandberg Endpoints Global Address Book Access
Scheduled Provisioning of Selected Tandberg Endpoints
Monitoring
Field Name Models Series 990/880/770 T150
Provisioned for supported Tandberg
Models?
140
Polycom, Inc 141
142
Polycom, Inc 143
144
Polycom, Inc 145
Spid
Isdn HLC Isdn MSN
148
Polycom, Inc 149
150
Polycom, Inc 151
152
RTP MTU
154
Polycom, Inc 155
OSD
Field Name Team Calls
Scheduled Provisioning of LifeSize Endpoints
Provisioned for
Selected LifeSize
Telepresence
Video Settings Video Control
Video Settings Video Quality
Field Name Team
Network NAT
Security Passwords
Security General
Network General
Communications General
Field Name Team Network Reserved Ports
Network Network Qos
Network LifeSize Transit
Communications SIP
Communications H.323
Directory Ldap
Field Name Team System General
System Identification
Directory Auto Discovery
Appearance Display
Diagnostics Cameras
Diagnostics DVD-I Input
Appearance Layout
Reporting
Provisioning of LifeSize Passwords
Endpoint Management Operations
Endpoint and Peripheral Management Operations
Field Description Identification
View Device Details
Go to Endpoint Monitor View
URL, Transport Address, and Unknown
Http URL
Addresses
Call Info Sites
Capabilities
Call Info Call Details
System Alerts
Add an Endpoint or Find an Endpoint on the Network
Go to Endpoint Monitor View and click Add
Call Info Video Feed
Click Find Device
Enter the IP Address of the endpoint
Site based upon IP address
URL , Transport Address , and Unknown
Edit an Endpoint
Delete an Endpoint
Tandberg
View an Endpoint’s Video Feed
Clear an Endpoint Help Request
Associate a User with an Endpoint
Reboot an Endpoint
Send a Message to an Endpoint
Click View Peripherals
Search for Endpoints in a Range of IP Addresses
View Peripherals
Go to Endpoint Monitor View and click Search Devices
Display Applications
Peripheral View Operations
Delete Peripheral
Polycom CMA System Operations Guide 180
Go to Endpoint Bundled Provisioning
Endpoint Provisioning Operations
Bundled Provisioning Operations
View the Provisioning Bundle List
Go to Endpoint Bundled Provisioning Click Download
Download a Provisioning Bundle
Delete a Provisioning Bundle
Go to Endpoint Automatic Provisioning
Automatic Provisioning Operations
View the Automatic Provisioning List and Details
Add an Automatic Provisioning Profile
Provisioning Profiles list
Click Update Profile Order
Edit an Automatic Provisioning Profile
Automatic Provisioning Profiles page, click Add
Profiles list
Clone an Automatic Provisioning Profile
Delete an Automatic Provisioning Profile
Go to Endpoint Scheduled Provisioning
Scheduled Provisioning Operations
View the Scheduled Provisioning List and Details
Add a Scheduled Provisioning Profile
Clone a Scheduled Provisioning Profile
Edit a Scheduled Provisioning Profile
Click Schedule Scheduled Provisioning View reappears
Delete a Scheduled Provisioning Profile
Schedule an Endpoint for Provisioning
Click Provision
Click Clear Status
Cancel a Scheduled Provisioning
Check the Status of a Scheduled Provisioning
Clear the Status of Scheduled Provisioning
Click Cancel Provision
For automatic software update, it includes these topics
Endpoint Software Update Operations
Automatic Software Update Operations
View Automatic Software Update Information
Go to Admin Software Updates Automatic Software Updates
View Automatic Software Update Packages
Implement Automatic Software Updates for Endpoints
Set Maintenance Window for Automatic Software Updates
Automatic Software Updates list reappears
List the Serial Numbers for the Endpoints to be Updated
Download the Required Software Package
Request Update Activation Keys
Select the tab for the endpoint type of interest
Upload the Software Package and Create a Software Update
Click Upload Software Update
Select Product Activation
Set an Automatic Software Update Policy
Create a Local Trial Group
Trial a Software Update Package
Set up testing. Complete these tasks
Promote the Trial Software Update Package to Production
Delete the Trial Software Update Package
View and Implement Software Updates for Peripherals
Both the Production URL and the Trial
View Software Updates for Peripherals
From the Production URL
Field Description Configure Platform
Upload Peripheral Software Updates to the CMA Web Server
Configure Peripheral Updates for Production
Click Configure Production
Both the Production URL and the Trial URL
Click Configure Application
Configure Application
Click Configure Trial
Configure Peripheral Updates for Trial
For scheduled software update, it includes these topics
Scheduled Software Update Operations
Implement Scheduled Software Updates for Endpoints
View Scheduled Software Update Information
View List of Software Update Packages
Return to the endpoint serial number list and click Close
Scheduled Software Updates list reappears
» Close the Product Activation screens
For Polycom products
Schedule the Software Update for Endpoints
Fields Description
Cancel Software Updates
Click Schedule
Polycom, Inc 211
Polycom CMA System Operations Guide 212
Device Summary Information
Device Details
Standard. This device is monitored
Device Status Information
Isdnbri
RMX , GW/MCU , Other , and Tandberg
Isdnquadbri
ISDNPRIT1
Call Information
Status will be either Success or Failed
Device Alerts Information
Provisioning Details
Software Update Details
With the device
Network Device Menu, Views, and Lists
Network Device Management Overview
Network Device Types
Network Device views is Refresh
Network Device List in the Monitor View
Network Device Types on
Network Device list has these fields
Available for only selected network device types
VBP View
Action Use this action to Available for all device types
DMA View
MCU View
Polycom CMA System Operations Guide 226
Go to Network Device MCUs
MCU Bridge Management Operations
View Device Details
Device Details dialog box for the selected MCU appears
Field Description Addresses
RMX MCU
Field Description MCU Network Services
MCU Resources
Card Alerts MGC MCUs only
Field Description Alerts RMX MCUs only
Go to Network Device MCUs and click Add
This topic describes how to add an MCU to a CMA system
Add an MCU Manually
System Name field
Edit an MCU Bridge
227. At a minimum, assign the MCU a System Name
As needed, use the Filter to customize the MCU list
Enable Cascading Conferences on Polycom MCUs
For a Polycom MGC MCU
Delete an MCU Bridge
View Bridge Hardware
View Bridge Ports
View Bridge Services
View Bridge Conferences
View Bridge Gateway Conferences
View Bridge Meeting Rooms
View Bridge Entry Queues
238
Polycom VBP Management Operations
Management Operations for Other Network Devices
Click Restart Apache
Add a Polycom VBP Device
Copy the CMA System Certificate to a Polycom VBP Device
Go to Network Device VBPs and click Add
Delete a Polycom VBP Device
Identify Endpoints Using the Polycom VBP Device
Edit a Polycom VBP Device
Go to Network Device DMAs and click Add
Polycom DMA Management Operations
Add a Polycom DMA System
Edit a Polycom DMA System
Go to Network Device DMAs Click View DMA Nodes
Delete a Polycom DMA System
View Registered DMA Nodes
Polycom CMA System Operations Guide 244
MCU Bridge Device Details
MCU H.320 Services
Field Description MCU H.32O Service
MCU H.323 Services
MCU Resources-Polycom MGC Platform
MCU Gateway Services
MCU Resources-Polycom RMX Platform
Refer to the RMX 2000/4000 Administrator’s Guide
Local Users
Users and Groups Overview
Overview of Groups, Users, and User Roles
Users
Enterprise Users
Groups
Enterprise Groups
Local Groups
Roles and Permissions
Role Permissions Comment
Default CMA System Roles and Permissions
User Name Remote Server Software Version Font Size
Role Responsibilities
CMA system offers three different default Scheduler roles
Scheduler Roles, Responsibilities, and Menus
Operator Role, Responsibilities, and Menus
Device Administrator Role, Responsibilities, and Menus
Auditor Role, Responsibilities, and Menus
Customized Roles and Responsibilities
Administrator Role, Responsibilities, and Menus
Device Associations and Presence
Polycom CMA System Operations Guide 260
Search for a User
User Management Operations
Manage Users
Select the user you want
View User Information
You can view information about a user, local or enterprise
Go to User Users
Groups
Add a Local User
Associated Permissions
Associated Roles
Be a minimum of eight characters in length
Edit a User
Delete a User
View Permissions for a User
Unlock a User Account
Go to User Groups Groups page, click Add Local Group
CMA system, only users assigned the Administrator role can
Manage Groups
Add a Local Group
Column Description Group Members Local Users Only
Import Enterprise Groups
Go to User Groups
Manage User Roles
Edit a Group
Delete a Group
View the Groups and Users Associated with a User Role
Go to User User Roles
Assign Users Roles and Endpoints
View the List of User Roles
Click Save New user role appears in the CMA system
Add a User Role
Edit Permissions for a User Role
Go to User User Roles
View Associated Groups and Users dialog box appears
Delete a User Role
View the Groups and Users Associated with a User Role
User Menu and Guest Book
Manage System Guest Book
Actions Description
Context-Sensitive Guest Book Actions
Add a Guest to the System Guest Book
Go to User Guest Book and click Add Guest
Alias@IP , for example
Click Edit Guest
Not available when Use Modified Dial Number is
Edit a Guest in the System Guest Book
Go to User Guest Book and select the guest of interest
Click Delete Guest
Manage Favorites
Delete a Guest from the System Guest Book
Add a Favorites List
Delete a Favorites List
Edit a Favorites List
Site Statistics Report
System Reports
Go to Reports Site Statistics
Go to Reports Site Link Statistics
Site Link Statistics Report
Go to Reports H.323 Call Detail Records
Call Detail Records Report
Schedule Weekly Archives of the CDR Report
Call Detail Record Report Administration
Modify the CDR Retention Period
SSL/TLS
Configure these settings
Endpoint Usage Report
Go to Reports Endpoint Usage Report
Time in Call divided by the Total Calls
Seconds
Q.850 cause code showing how the call ended
Calculated from sample tests done once per minute
Conference Type Report
Chart that compares the number of scheduled minutes
Go to Reports Gatekeeper Message Log
Gatekeeper Message Log
View and Export the Gatekeeper Message Log
Use the Gatekeeper Message Log page to
Field Description Registration
Define Log Settings
Gatekeeper Message Log is cleared
Clear Events from the Log
Pause and Restart Logging
Click Yes to confirm the action
Log Files Related to Global Address Book Functionality
Log File Related to Dial Plan Functionality
Log File Related to External Database Functionality
Log Files Related to Scheduling Functionality
Log Files Related to Gatekeeper Functionality
Log Name Description
Log Files Related to Device Management Functionality
Log Files Related to Presence Functionality
Log Files Related to Web Services Functionality
Go to Reports System Logs
Click Change Settings
View and Export System Log Files
Change the System Log Level
Go to Reports Audit Log Files
Download Windows Event Log Files
View and Download Audit Log Files
You can view and download audit log files
Click Backup and Delete
Backup and Delete Audit Log Files
You can backup and delete audit log files
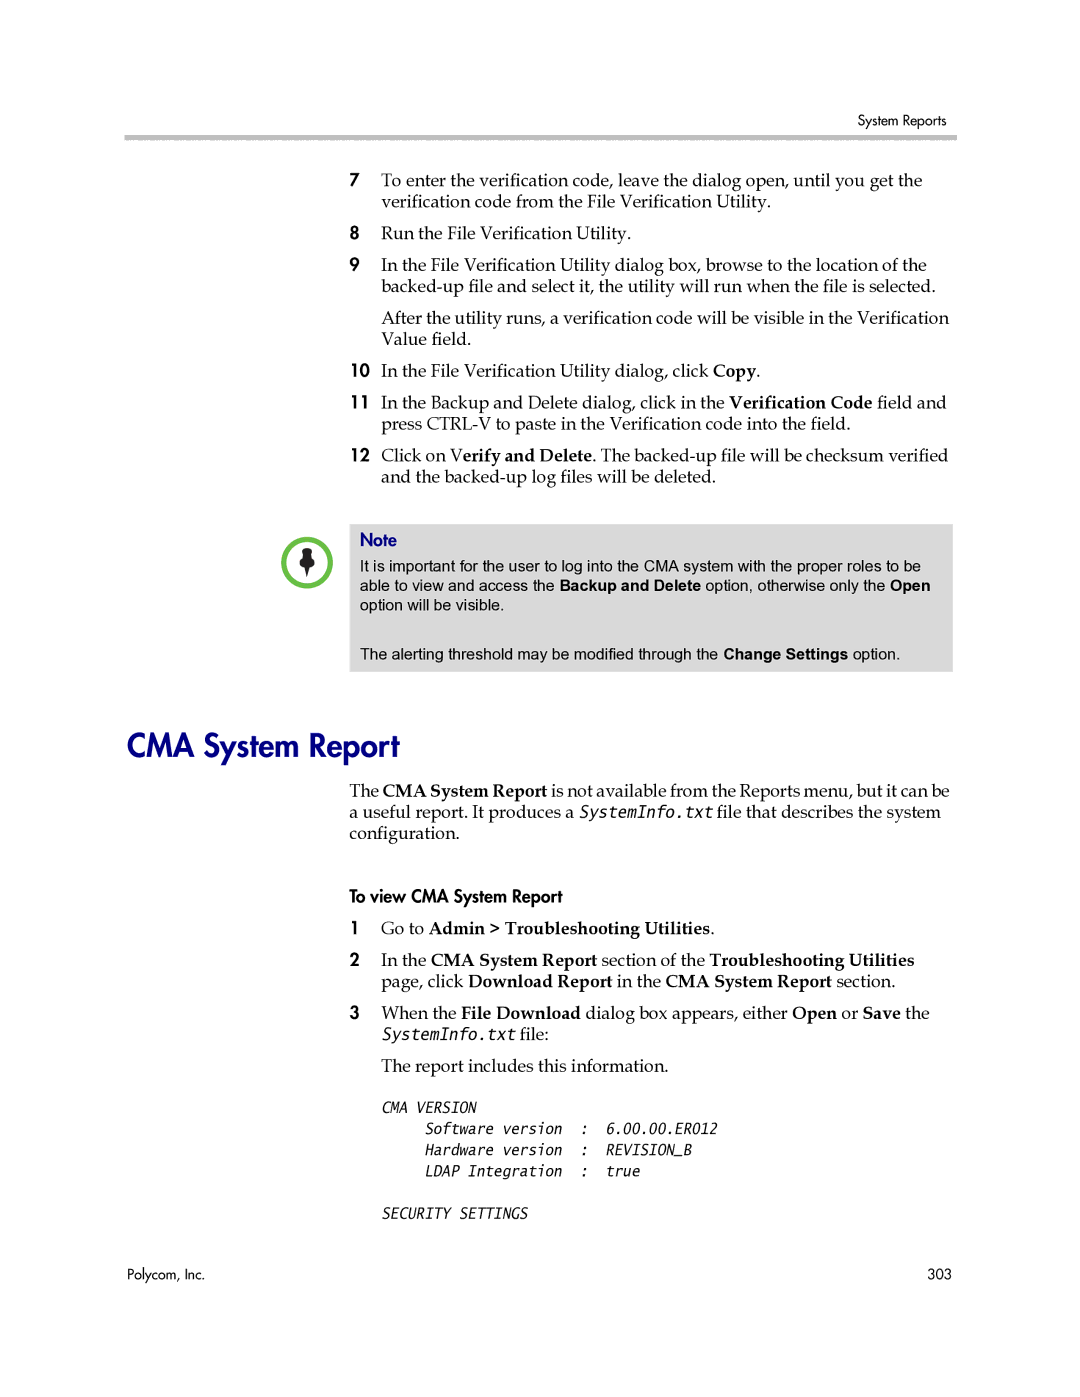
Report includes this information
CMA System Report
License Info
CRL
Polycom CMA System Operations Guide 306
Polycom CMA System Dashboard
System Administration Overview
Dashboard Panes
Endpoints multiple, configurable panes
MCU Status multiple, configurable panes
Dashboard Buttons
Cmad
CPU
Need Virtual IP or Secondary Is Down
Polycom, Inc 311
Gatekeepers
Pre-call Status
Today’s Adhoc Conferences
Conference Status
Failed AD Login Attempts pane displays
Selection Use this selection to
System Administration Menu
Including the enterprise directory, address books, or Global
Administration Periods, etc
Polycom CMA System Operations Guide 320
Conference Templates
Conference Setup Overview
RMX
Field Description General Settings
Common Settings
MGC
Telepresence mode is On RMX Video Settings
Video Switching Mode
Auto layout option RMX Video Settings
Video switching option RMX General Settings
Time Warning feature
Presentation Mode , or Lecture View Switching
MGC Settings
H264
People+Content H.239
Polycom Visual Concert PC . To show live PC content
Auto
RMX General Settings RMX Profile Settings
Conference on Port is enabled, the Video Mode must be
264 SD 30v7 with MPM+ or MPMx
Field Description RMX General Settings Conference Settings
Supported MCU General Settings
RMX General Settings Advanced Settings
RMX Video Quality People Video Definition
At the end When last participant remains Only
LPR
At the end After last participant quits All
Motion option for Video quality
Video switching VSW option RMX General
To On RMX Video Settings
RMX Video Quality Content Video Definition
Same layout option
Field Description RMX Video Settings
MGC as a Supported MCU General Settings
Lecture View Switching option Common Settings
Continuous Presence Room continuous presence
RMX Audio Settings
Possible values include
Manual
RMX Conference IVR
Field Description RMX Skins
Field Description RMX Recording
Alert Tone feature
Conference Settings
By default, Conference Time Warning is enabled
Polycom, Inc 335
Polycom CMA System Operations Guide 336
View the Conference Templates List
Conference Setup Operations
Edit a Conference Template
Go to Admin Conference Templates
Add a Conference Template
Go to Admin Conference Settings
Set Conference Settings
Disable Conference Auto-Launch
Disable Conference Time Warning
Add Customized Text to E-mail Notifications
Go to Admin Server Settings E-mail
Overbooking Dial-in Participants
Delete Customized Text in E-mail Notifications
Edit Customized Text in E-mail Notifications
Polycom CMA System Operations Guide 342
Local and Enterprise Meeting Rooms
Room Overview and Operations
Add a Local Room
Go to Admin Rooms
Go to Admin Rooms
View the Rooms List
Associated Endpoints
Add an Enterprise Room
Field Description Site Site in which the room is located
Delete a Room
Edit a Room
How Areas Work
Area Overview and Operations
Areas Overview
Area Best Practices
Members
View Areas
Field Description Areas list
Summary
Click Save Configuration
Create Area Administrator Role
Enable, Configure, and Customize Areas
Go to Endpoint Monitor View or Network Device Monitor View
Add Areas
Assign Devices to Areas
Click Assign Areas
Go to Admin Areas and click Manage Members
Associate Users with Areas
Click Associate Area
Click Unassign Areas
Change Area Association for Users
Delete an Area
Select the user of interest and click the right arrow
Polycom CMA System Operations Guide 354
Directory Management Overview
Directory Operations
Viable options
Directory Management Supported Configurations
Multiple Forests
Multiple Domains
Directory Operations
How Global Catalog Searches Work
CMA System Computer Account
CMA System Service Account
Accounts Required for the CMA System
Understanding Base DN
Character Character Name
Understanding Exclusion Filters
Polycom CMA System and Windows Authentication
Integrate with Enterprise Directory Server Option
Directory Management Operations
Create the Polycom CMA System Service Account
For example net user polycomcma$ p@ssw0rd
Create the Polycom CMA System Computer Account
Create the Polycom CMA System Service Account
Enable Integration with the Enterprise Directory Server
It then negotiates security once the socket is
Go to Admin Directories Directory Setup
Support LifeSize Endpoints in Directories
Remove or Include Guest Book Entries in the Directory
On the Directory Ldap Mark the Provision This Page check box
Ldap field, select Enabled from the drop-down list
View the Global Address Book
Directory Setup Operations
Go to Admin Directories Global Address Book
User information found in the Global Address Book includes
Set or Change the GAB Password
Multiple Address Books Overview
Multiple Address Books
How Multiple Address Books Work
Add an Address Book
Go to Admin Directories Address Books
View the Address Book List and Details
Address Book Tiers
Complete the fields in the Add an Address Book dialog box
Field Description Address Book Information
Edit an Address Book
Field Description Address Book Tiers
Assign Address Books to Groups
Select the address book you want to delete
Viewing the Address Book a User is Assigned To
Delete an Address Book
Click Delete Confirmation message appears Click Yes
Set the Default Address Book
Click Update Priority
Change Address Book Priority
Copy an Address Book
Go to Admin Directories Address Books Click Set Default
Selection Description
Polycom CMA System Setup Overview
Server Settings
Polycom CMA System Licensing
Polycom CMA System Setup Overview
Polycom CMA System Site Topology and Dial Plan Set Up
Sites List
Add/Edit Site Dialog Box
Assignment Method = did Direct Inward Dial
Did Direct Inward Dial . Select this option when
Gateway Extension Dialing . Select this option
Isdn Number Assignment
Routing/Bandwidth
Subnets
Add/Edit Site Link Dialog Box
Site Links
Site-to-Site Exclusions
Associated Sites
Territories
Add/Edit Territory Dialog Box
Field Description Territory Info
Field Description Cloud Info
Polycom CMA System Gatekeeper Functionality
Network Clouds
Add/Edit Network Cloud Dialog Box
Redundant Gatekeeper
Default, Redundant, Alternate, and Neighboring Gatekeepers
Default Gatekeeper
Neighboring Gatekeeper
Device Registration
Alternate Gatekeeper
Allow Registration of Predefined Endpoints Only
CMA system has two routing modes
Routing Mode
Direct Mode
Routed Mode
Standard Polycom CMA System and Reserved Conferencing
Polycom CMA System Integration with Microsoft Outlook
400
Endpoint Directory and Directory Settings
402
Go to Admin Server Settings Network
Server Setting Operations
Edit the Polycom CMA System Network Settings
Go to Admin Server Settings System Time
Edit the Polycom CMA System Time Settings
Configure these settings on the Network page, as necessary
Associate Sites with Microsoft Exchange Servers
Assign Calendaring Settings to Provisioning Profiles
Go to Admin Server Settings Calendaring Management
408
Go to Admin Dial Plan and Sites Sites
View Current Polycom CMA System Licensing
Go to Admin Server Settings Licenses
Enter the Polycom CMA System Activation Key
Go to Admin Server Settings Licenses
Add Polycom CMA System Licenses
Request a Software Activation Key Code
Add or Remove a Polycom CMA System Custom Logo
Go to Admin Server Settings Custom Logos
Reclaim Polycom CMA Desktop Licenses
Add or Remove a Polycom CMA Desktop Custom Logo
Default Polycom CMA Desktop Branded Polycom CMA Desktop
Edit the Polycom CMA System E-mail Account
Snmp Overview
Polycom CMA System Snmp
416
Go to Admin Snmp Settings
Enable Snmp Messaging
Edit the Snmp Settings for a Polycom CMA System
To enable Snmp messaging you must perform the two tasks
ContextEngineID for SNMPv3
UDP
Click Save Snmp Settings
Add an Snmp Notification Receiver
TCP
SHA
MD5
Threshold Description
Configure Alert Thresholds
Go to Admin Alert Settings CMA Alert Threshold Settings
Configure these thresholds
Identified in the Average CPU usage alert
Download Polycom CMA System MIB Package
Name Description
Go to Admin Snmp Settings Click Download CMA MIBs
CMA MIBs dialog box, select the MIB of interest
Change the Snmp Communication Port
Database Description
Database Operations
Overview of the Polycom CMA System Database
External Databases
Simple Recovery Model should be enabled for SQL backup mode
Internal Databases
From
Database Operations
Database Restoration
Revert a Polycom CMA System to its Internal Database
Copy the CMA System Database Backup Files
Error and Usage Report Settings are optional
Integrate a Polycom CMA System to an External Database
On the Database page, select Reformat existing database
Reformat the Existing Database
Polycom CMA System Operations Guide 430
How Redundancy Works
Polycom CMA System Redundancy
Polycom CMA 5000 System Redundancy Overview
432
Redundant Configuration System Administration
Implement a Redundant Polycom CMA 5000 System
Go to Admin Server Settings Redundant Configuration
Go to Admin Server Settings Database
Configure the External Database for Redundancy
Set the Virtual IP Address for the Redundant System
Log into the server and go to Admin Server Settings Database
Failover to a Redundant Polycom CMA 5000 System Server
License a Redundant Polycom CMA System
Primary system restarts
Primary Gatekeeper Management Operations
Edit the Primary Gatekeeper Settings
Go to Admin Gatekeeper Settings Primary Gatekeeper
Gatekeeper Management
Gatekeeper Message Log
Endpoint Monitor View
Logs, select System Management Reports
Configure Prefixed Based Registration
Add an Alternate Gatekeeper
Go to Admin Gatekeeper Settings Alternate Gatekeeper
Alternate Gatekeeper Settings include these fields
Alternate Gatekeeper Management Operations
View Neighboring Gatekeepers
Edit the Alternate Gatekeeper Settings
Neighboring Gatekeeper Management Operations
Remove the Alternate Gatekeeper
Delete a Neighboring Gatekeeper
Go to Admin Gatekeeper Settings Neighboring Gatekeeper
Add a Neighboring Gatekeeper
Edit a Neighboring Gatekeeper
Management & Security Operations
Update the Polycom CMA System Software
Certificates Accepted by the Polycom CMA System
Manage Certificates
DER
PEM Pkcs #7
View Certificates and Certificate Details
Go to Admin Management and Security Certificate Management
Certificate Operations
Polycom, Inc 449
Click Create Certificate Signing Request
Create a Certificate Signing Request
Install a Certificate
Upload a Certificate Revocation List
Delete a Certificate
Admin Management and Security Certificate Management
View the Expiration Dates for Certificates and CRLs
Control Remote Desktop Connections to the CMA System
Give Enterprise Users Default Scheduler Role
Change the Message for Enterprise Users without a Role
Automatic Registration Synchronization
Disable Common Password for Endpoints
Set Common Passwords for Endpoints
Set Local Password Requirements
Set Local Account Lockout and Timeout
Is 1 to
Add Machine Accounts
Change Internal Database Passwords
Click Apply Password Changes
Select the database user whose password you want to change
Click Change Password
Site operations include
Dial Plan Setup Operations
Site Operations
View the Sites List
Go to Admin Dial Plan and Sites Site Topology
Go to Admin Dial Plan and Sites Sites
View the Graphical Site Topology
Add a Site
Field For the endpoint systems at the site being provisioned
Firewall Settings
Manual. Then specify a NAT Public WAN Address
H323 Settings
SIP Settings
Quality of Service Settings
Provisioning Settings
Security Settings
Meeting password cannot include spaces
Whitelist
Ldap Settings
Assign Locations to a Site
View Site Information
474
Edit Site Provisioning Settings
Edit Site Settings
Delete a Site
Set Up SIP
Edit SIP URI Data
Site-link operations include
Site Link Operations
Edit a Site Link
Go to Admin Dial Plan and Sites Site-Links
View the Site Links List
Add a Site Link
Site-Linkslist, select the link of interest and click Edit
Site-to-Site Exclusions
Delete a Site Link
View the Site-to-Site Exclusion List
Go to Dial Plan and Sites Site-to-Site Exclusions
Add a Site-to-Site Exclusion
Edit a Site-to-Site Exclusion
Delete a Site-to-Site Exclusion
Add a Territory
Go to Admin Dial Plan and Sites Territories
Territories
View the Territory List
View the List of Network Clouds
Go to Admin Dial Plan and Sites Network Clouds
Network Clouds
Delete a Territory
Click Linked Sites
Edit a Network Cloud
Delete a Network Cloud
Results column
Conference on Demand
Dial Plan Service Operations
These services can be edited and disabled, but not deleted
Field Description Conference on Demand-MCU Properties
Default Conference Properties
Simplified Dialing
Gateway Service
Field Description For use in simplified dialing
Field Name Description
Services operations include
Go to Admin Dial Plan Services
View the Services List
Add a Service
Go to Admin Dial Plan Services. The Services list appears
You can make changes to a service
Edit a Service
Delete a Service
Click OK New service is added to the system
Routing Action Dial String Manipulation
Local Directory Services
Local Directory Services or Prefix Range
Dial Rule Operations
Name or IP Address
Directory Services , Prefix , and Prefix Range
Gateway Services
When the action is Route to a gateway service , this
Pattern Types
Default Dial Rules
Search the List of Devices and List of Services
Parts of a Dial Rule
LCR
Examples of Custom Dial Rules
Routing Actions
Routing Pattern Description Action Type
View the Dial Rules List
Click OK New dial rule is added to the system
Enable or Disable Dialing Rules
You can enable or disable dial rules
Add a Dial Rule
Edit a Dial Rule
Go to Admin Dial Plan Dial Rules
Least-Cost Routing Operations
LCR Tables for Three Sites
Country Code Area Code Prefix Weighted Cost
How Least-Cost Routing Works
Example of Least-Cost Routing
Area Code Prefix Weighted Cost
Call Scenario Two
Call Scenario One
Determining Country Codes
Determining the Weighted Cost
Determining Area Codes
Edit a Least Cost Routing Table
Go to Admin Dial Plan LCR Tables
View the Least Cost Routing Tables List
Add a Least Cost Routing Table
Alias Assignment
Numbering Scheme
Delete a Least Cost Routing Table
Implementation in the CMA System
A No Suffix
Numbering Scheme Default Settings
Numbering Scheme Explained
Based on Device Type Specify Number Range No Suffix
506
Phone Number
No Prefix
Number specify
Based on Devicey Type, available only if shown
Highlight a specific user
Setting-up an E.164 Alias in a User Dial String Reservation
Go to Admin Dial Plan and Sites E.164 Numbering Scheme
Generating E.164 Aliases
Click on Add. The Add User dialog will display
Setting-up an E.164 Alias in a Room Dial String Reservation
Click on Edit. The Edit User dialog will display
Click on Dial String Reservations
510
Set Up Remote Alerts
Remote Alert Setup Operations
Enable CMA System Remote Alerts
Set Up CMA System-generated E-mail Account
Alert Type Alert indicates
Set CMA System Remote Alert Level Settings
Go to Admin Alert Settings CMA Alert Level Settings
Subnet bandwidth threshold, which is set at 90%
Go to Admin Alert Settings Endpoint Alert Level Settings
Set Endpoint Alert Level Settings
Add a Remote Alert Profile
To add a remote alert profile
Edit User dialog box, click Associated Alert Profile
Associate a Remote Alert Profile With a User
Edit a Remote Alert Profile
Disable a Remote Alert Profile
Go to Admin Alert Settings Remote Alert Profiles
Clear Enable Profile
Disable CMA System Remote Alerts
Administrator Responsibilities
System Management Maintenance
Management and Maintenance Overview
Auditor Responsibilities
Administrative Best Practices
Auditor Best Practices
Recommended Regular Maintenance
Polycom CMA System Operations Guide 524
Backup Internal Databases and System Configuration
System Backup and Recovery Operations
Backup the CMA System Settings
Backup the CMA System Internal Databases
Restore to Factory Default Image
Restore Database and System Configuration
Click Restore from Backup Archive
Restore from a Backup Archive
Go to Admin Backup System Settings
Troubleshooting Utilities Dashboard
System Troubleshooting
530
Gatekeeper Settings Primary
Troubleshooting Specific Types of Issues
Registration Problems and Solutions
Problem Description Solutions
Assignment pane
Admin Gatekeeper Settings Primary Gatekeeper
CMA
Plan and Sites Sites and make sure
Point-to-Point Calling Problems and Solutions
Services
MCU and Gateway Dialing Problems and Solutions
Sites Services page. Verify that
Admin Dial Plan and Sites
Cause Code Description
Conference On Demand Problems and Solutions
Plan and Sites Services
Gatekeeper Cause Codes
536
TCP/UDP
System Security and Port Usage
Open Inbound Ports on the Polycom CMA System
Port Description
Outbound Ports Used by the Polycom CMA System
System Security and Port Usage
Polycom CMA System Operations Guide 540