Section 4 | |
|
|
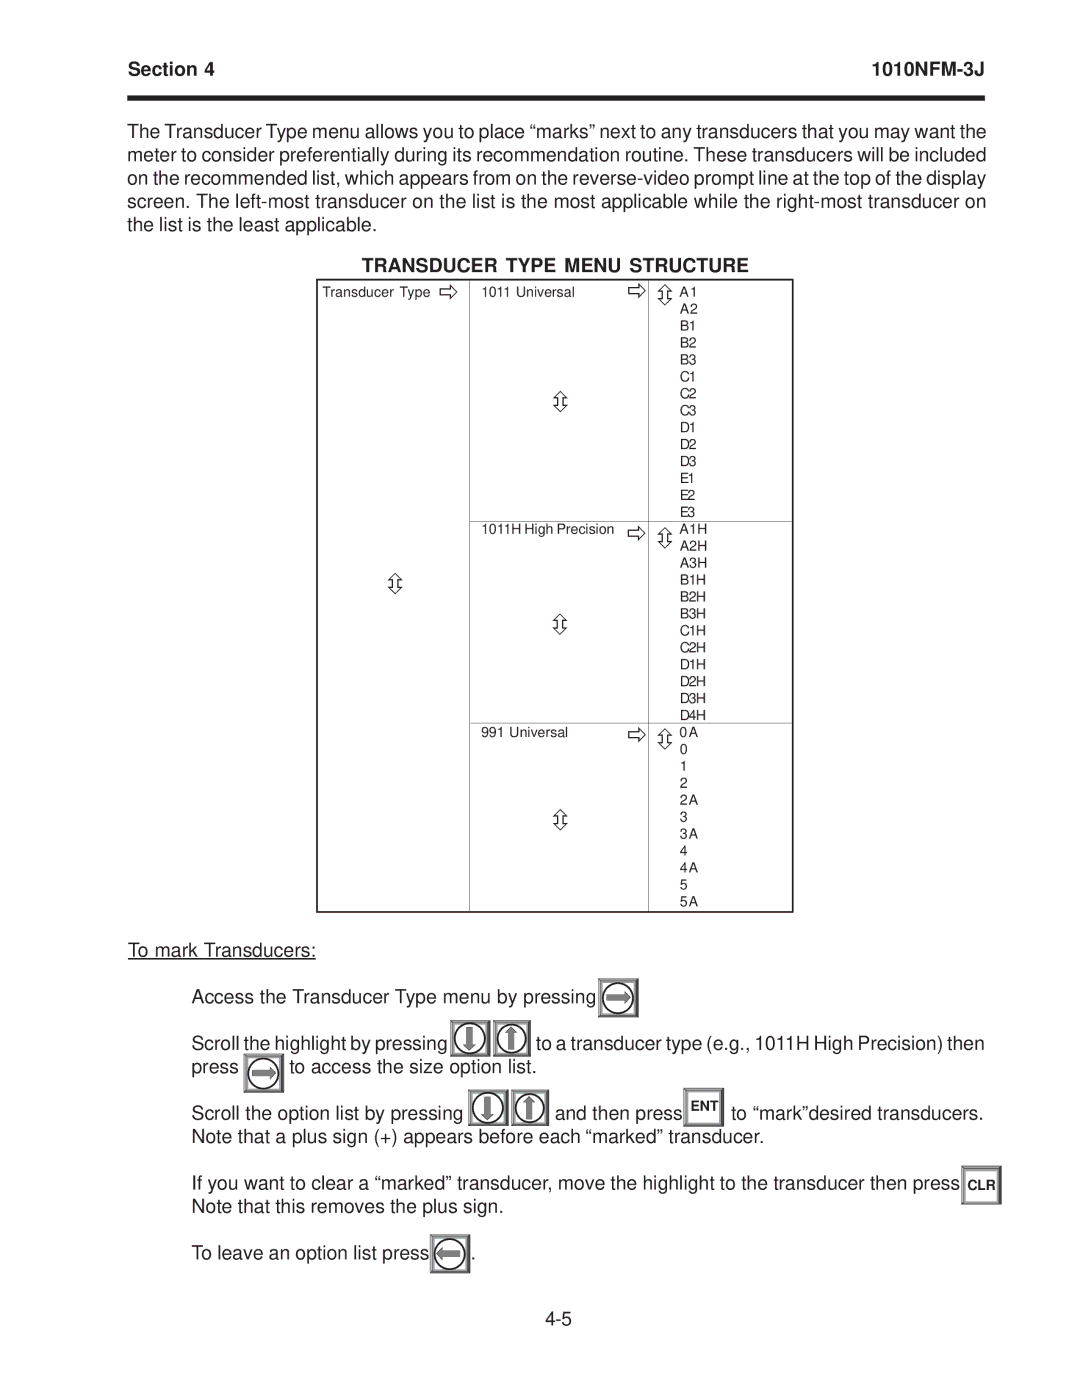
The Transducer Type menu allows you to place “marks” next to any transducers that you may want the meter to consider preferentially during its recommendation routine. These transducers will be included on the recommended list, which appears from on the
TRANSDUCER TYPE MENU STRUCTURE
Transducer Type Ö
Ú
1011 Universal | Ö Ú A1A2 | |
| B1 | |
| B2 | |
| B3 | |
| C1 | |
Ú | C2 | |
C3 | ||
| ||
| D1 | |
| D2 | |
| D3 | |
| E1 | |
| E2 | |
| E3 |
1011H High Precision Ö Ú A1HA2H A3H B1H B2H
Ú | B3H |
C1H | |
| C2H |
| D1H |
| D2H |
| D3H |
| D4H |
991 Universal | Ö Ú 0A0 |
| 1 |
| 2 |
Ú | 2A |
3 | |
| 3A |
| 4 |
| 4A |
| 5 |
| 5A |
To mark Transducers:
Access the Transducer Type menu by pressing![]()
![]()
![]()
Scroll the highlight by pressing ![]()
![]() to a transducer type (e.g., 1011H High Precision) then
to a transducer type (e.g., 1011H High Precision) then
press ![]() to access the size option list.
to access the size option list.
Scroll the option list by pressing | and then press ENT to “mark”desired transducers. |
Note that a plus sign (+) appears before each “marked” transducer.
If you want to clear a “marked” transducer, move the highlight to the transducer then press Note that this removes the plus sign.
CLR |
To leave an option list press![]()
![]()
![]() .
.