Troubleshooting/Service
7.9 Software Upgrades
Introduction
This procedure enables software features that were not ordered from the factory. See Table
ATTENTION:
This procedure cannot be undone, it is a
Each instrument has a unique code number sequence, so the following procedure must be performed on each instrument to be upgraded.
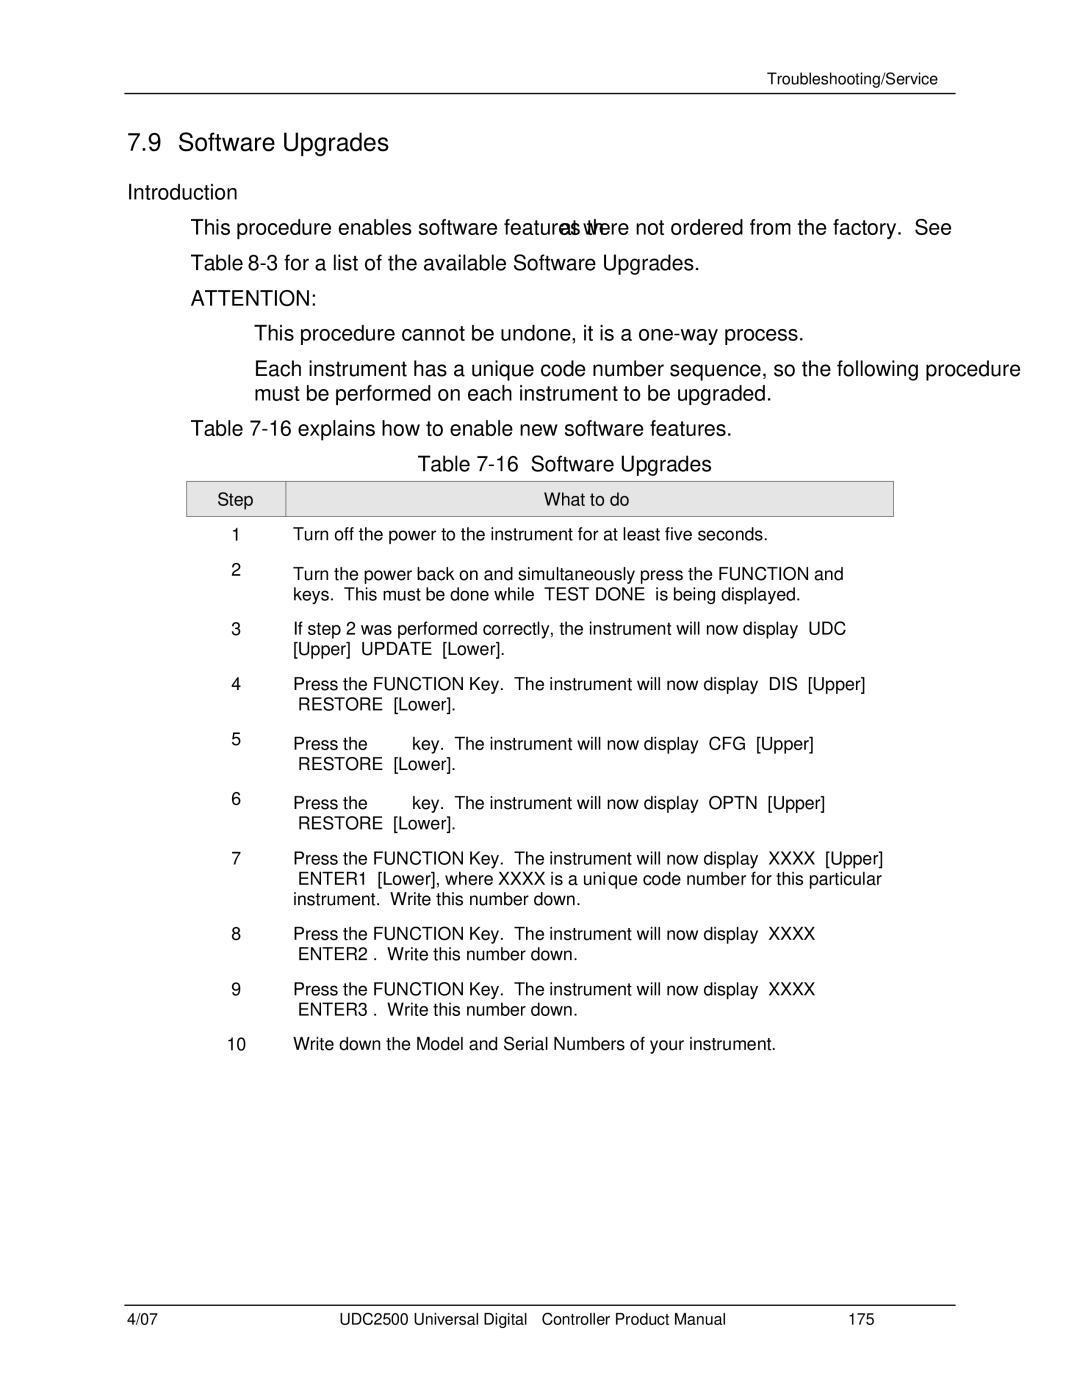
Table
Table 7-16 Software Upgrades
Step | What to do |
|
|
1Turn off the power to the instrument for at least five seconds.
2Turn the power back on and simultaneously press the FUNCTION and ![]() keys. This must be done while “TEST DONE” is being displayed.
keys. This must be done while “TEST DONE” is being displayed.
3If step 2 was performed correctly, the instrument will now display “UDC” [Upper] “UPDATE” [Lower].
4
5
6
Press the FUNCTION Key. The instrument will now display “DIS” [Upper] “RESTORE” [Lower].
Press the ![]() key. The instrument will now display “CFG” [Upper] “RESTORE” [Lower].
key. The instrument will now display “CFG” [Upper] “RESTORE” [Lower].
Press the ![]() key. The instrument will now display “OPTN” [Upper] “RESTORE” [Lower].
key. The instrument will now display “OPTN” [Upper] “RESTORE” [Lower].
7Press the FUNCTION Key. The instrument will now display “XXXX” [Upper] “ENTER1” [Lower], where XXXX is a unique code number for this particular instrument. Write this number down.
8Press the FUNCTION Key. The instrument will now display “XXXX” “ENTER2”. Write this number down.
9Press the FUNCTION Key. The instrument will now display “XXXX” “ENTER3”. Write this number down.
10Write down the Model and Serial Numbers of your instrument.
4/07 | UDC2500 Universal Digital Controller Product Manual | 175 |
