Page 232 of 456 Cabling Common Equipment in a Multi Group system
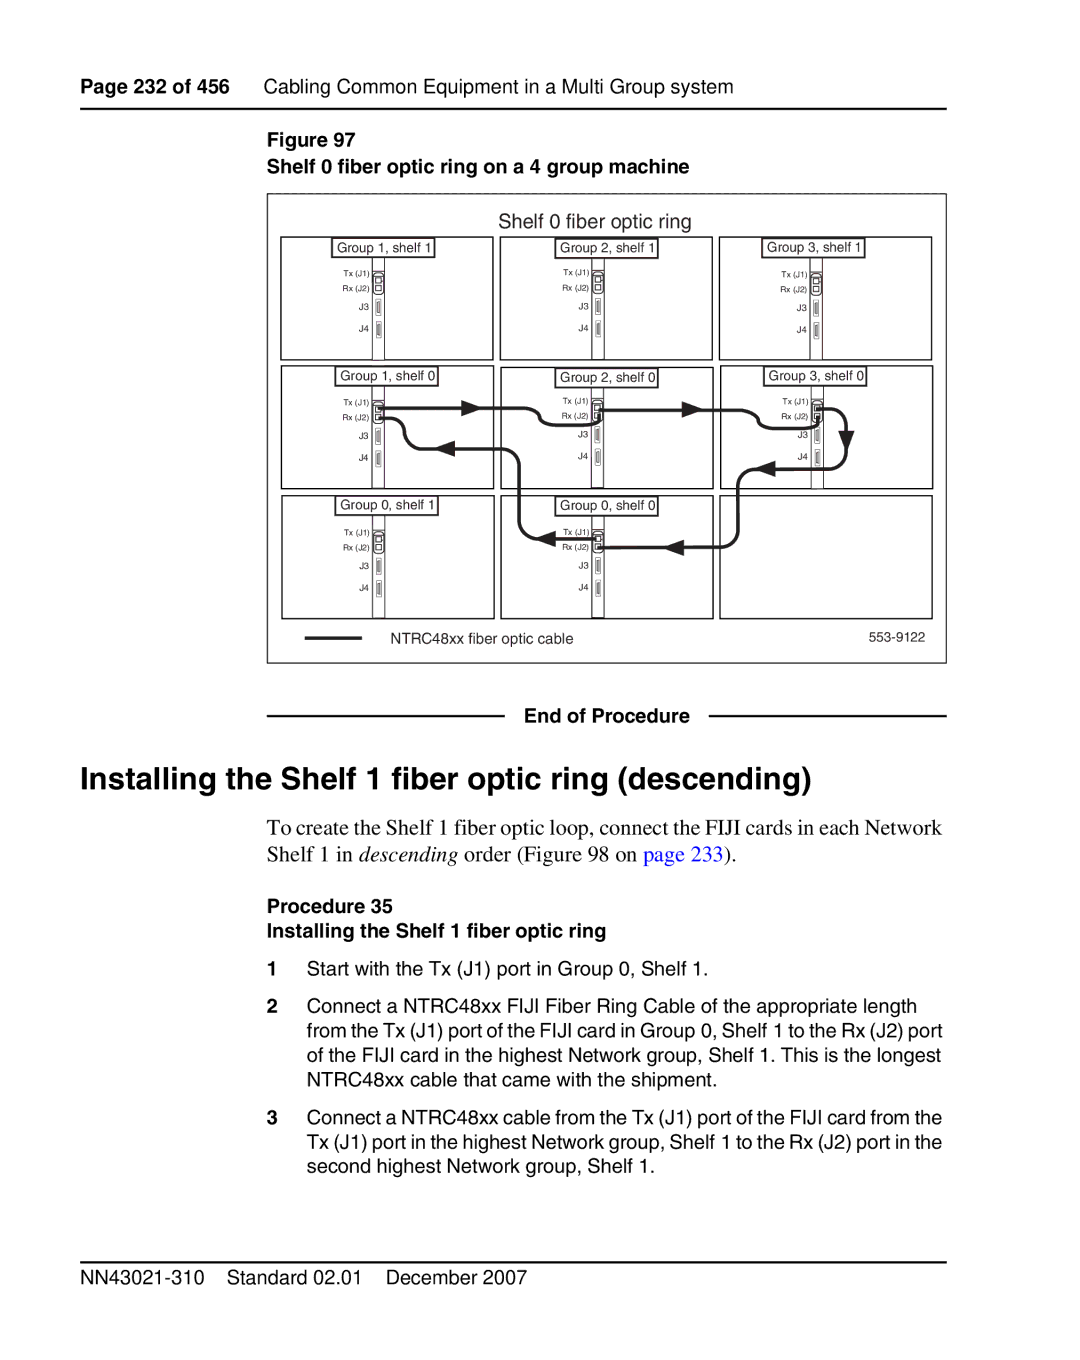
Figure 97
Shelf 0 fiber optic ring on a 4 group machine
| Shelf 0 fiber optic ring |
|
Group 1, shelf 1 | Group 2, shelf 1 | Group 3, shelf 1 |
Tx (J1) | Tx (J1) | Tx (J1) |
Rx (J2) | Rx (J2) | Rx (J2) |
J3 | J3 | J3 |
J4 | J4 | J4 |
Group 1, shelf 0 | Group 2, shelf 0 | Group 3, shelf 0 |
Tx (J1) | Tx (J1) | Tx (J1) |
Rx (J2) | Rx (J2) | Rx (J2) |
J3 | J3 | J3 |
J4 | J4 | J4 |
Group 0, shelf 1 | Group 0, shelf 0 |
|
Tx (J1) | Tx (J1) |
|
Rx (J2) | Rx (J2) |
|
J3 | J3 |
|
J4 | J4 |
|
NTRC48xx fiber optic cable | ||
End of Procedure
Installing the Shelf 1 fiber optic ring (descending)
To create the Shelf 1 fiber optic loop, connect the FIJI cards in each Network Shelf 1 in descending order (Figure 98 on page 233).
Procedure 35
Installing the Shelf 1 fiber optic ring
1Start with the Tx (J1) port in Group 0, Shelf 1.
2Connect a NTRC48xx FIJI Fiber Ring Cable of the appropriate length from the Tx (J1) port of the FIJI card in Group 0, Shelf 1 to the Rx (J2) port of the FIJI card in the highest Network group, Shelf 1. This is the longest NTRC48xx cable that came with the shipment.
3Connect a NTRC48xx cable from the Tx (J1) port of the FIJI card from the Tx (J1) port in the highest Network group, Shelf 1 to the Rx (J2) port in the second highest Network group, Shelf 1.